
Explore the timeless appeal of vintage hutches as we delve into a practical yet stylish storage solution. In this blog post, we take a straightforward approach to revamping a glazed bookcase cabinet. With its sturdy structure and appealing shape, we’re giving it a sleek black milk paint makeover, demonstrating how simplicity can enhance the classic charm of this piece to fit seamlessly into your modern interiors.
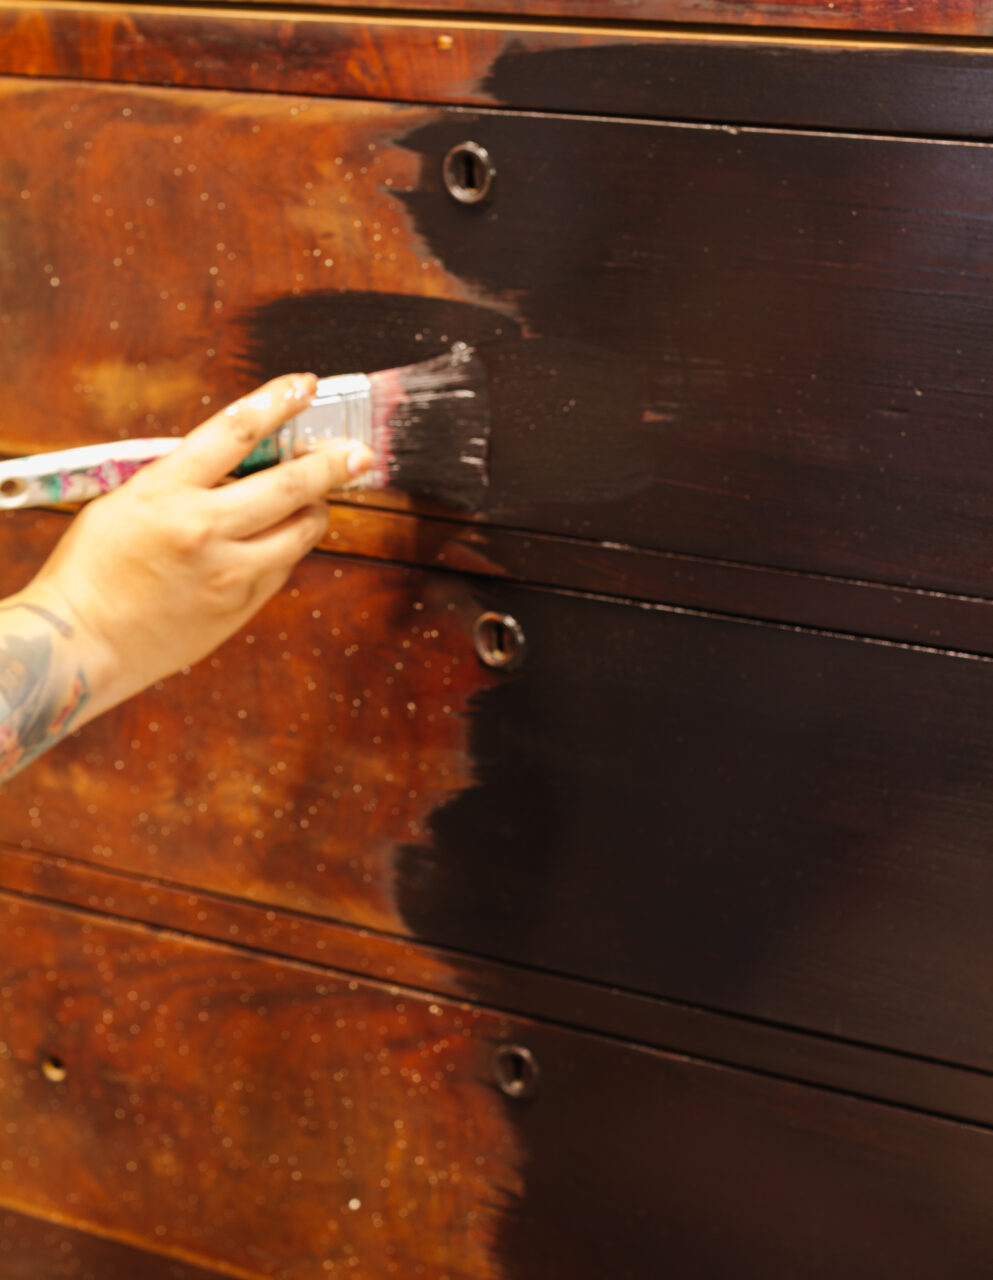
Here is a before look at the piece:
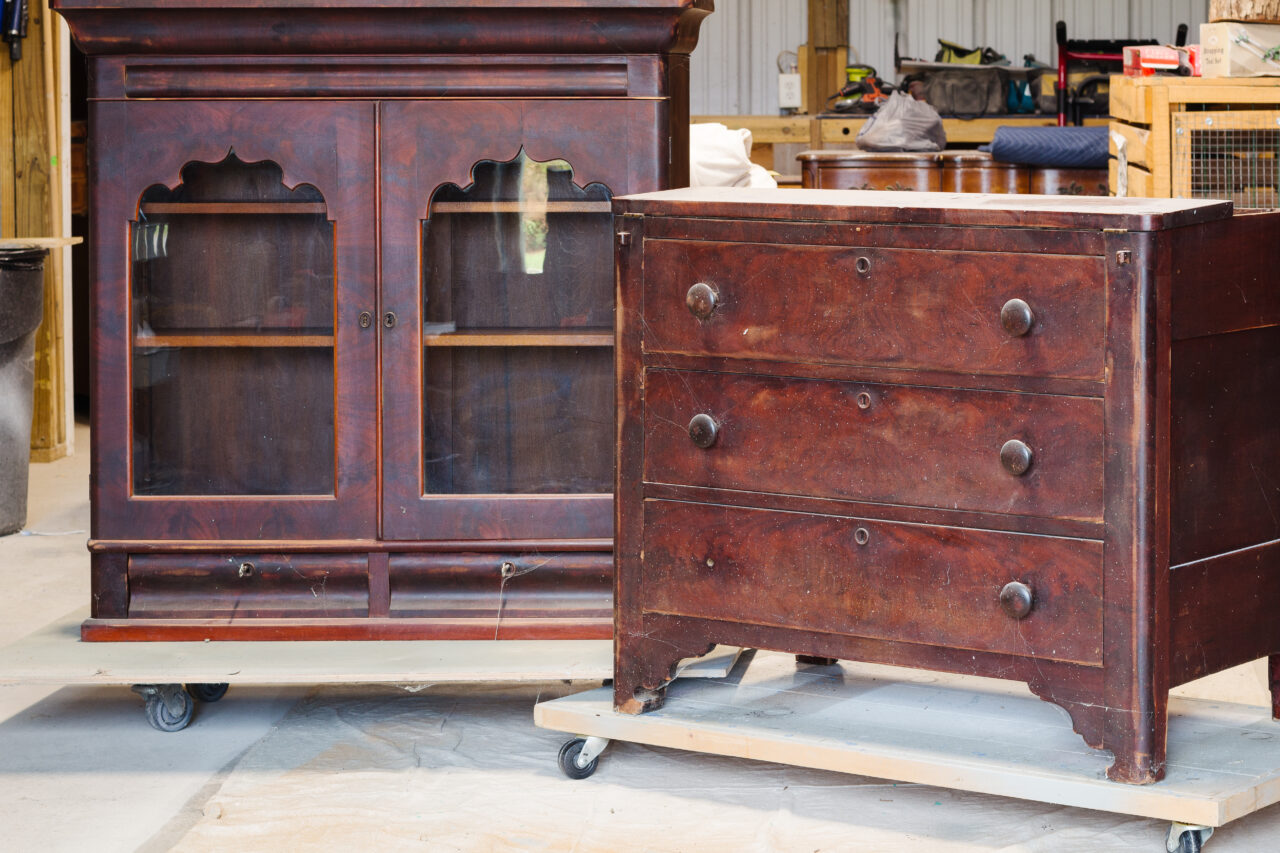
We love to add more warm and moody colours into our home, but a timeless classic will always be one of the staples in the Homestead House Milk Paint line, Coal Black. For this Moody Vintage Hutch Makeover, we took an antique hutch that needed a lot of work. It had rich mahogany tones that just needed some muting.
Below is a list of supplies you’ll need to complete a similar project.
- Fusion TSP Alternative + Wiping Cloths
- Homestead House Milk Paint Coal Black
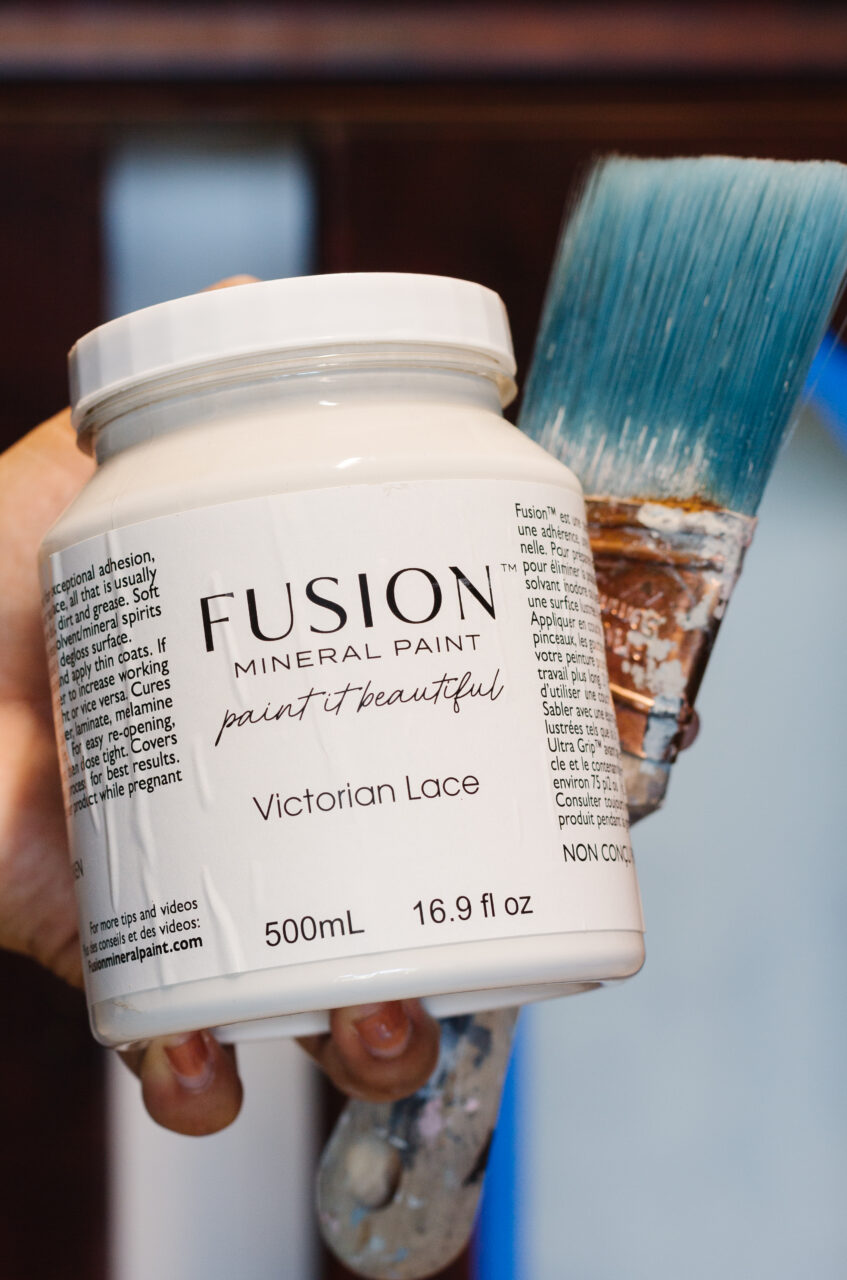
- Fusion Mineral Paint Victorian Lace
- Homestead House Hemp Oil
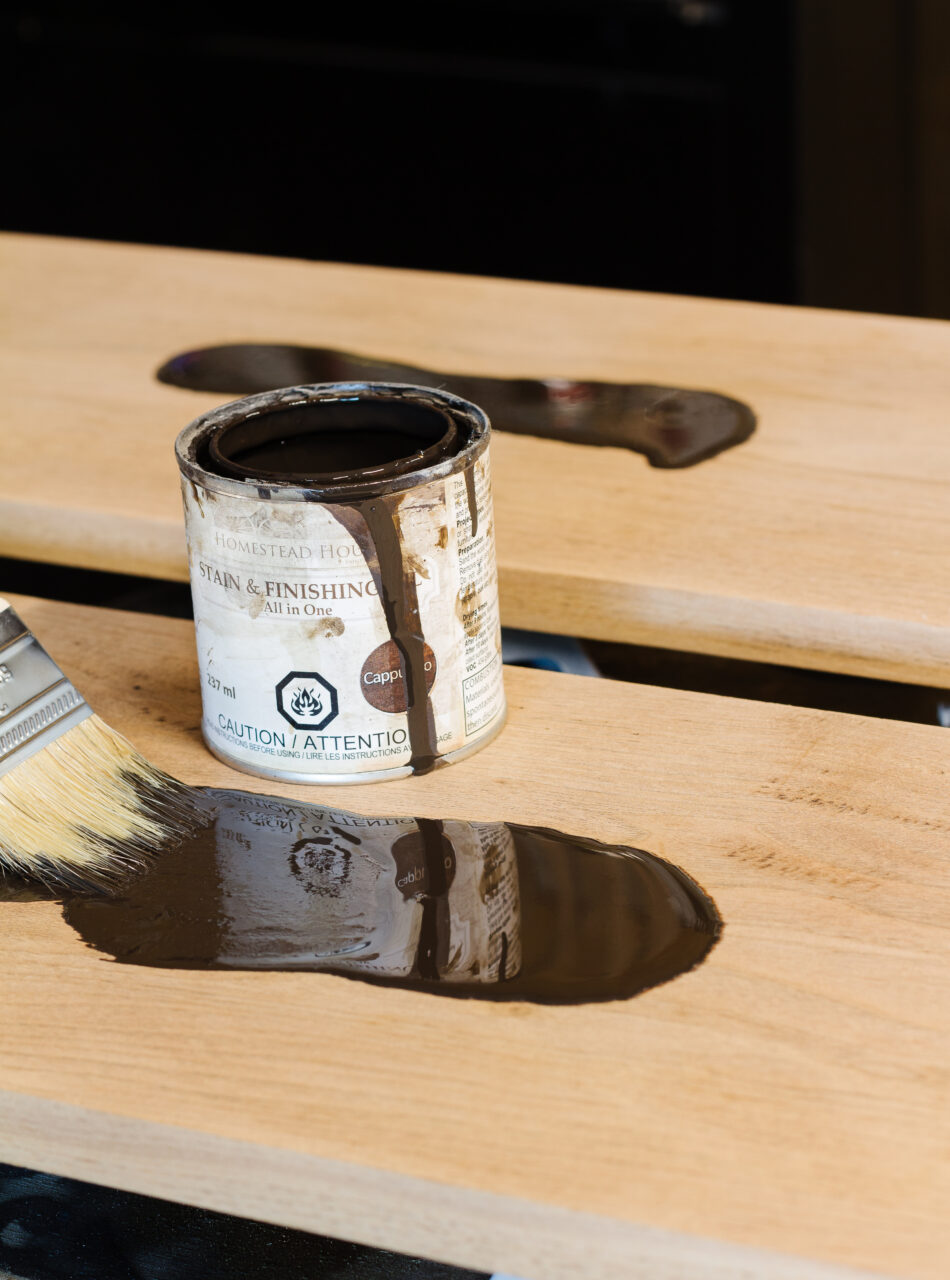
- Homestead House SFO Cappuccino
- Electric Sander and Sanding Pads/Paper
- Stir stick + Container
- Staalmeester Flat 2 inch Synthetic Brush
- Painter’s Tape
- Zinnser BIN Primer
Prepping Vintage Furniture For Milk Paint
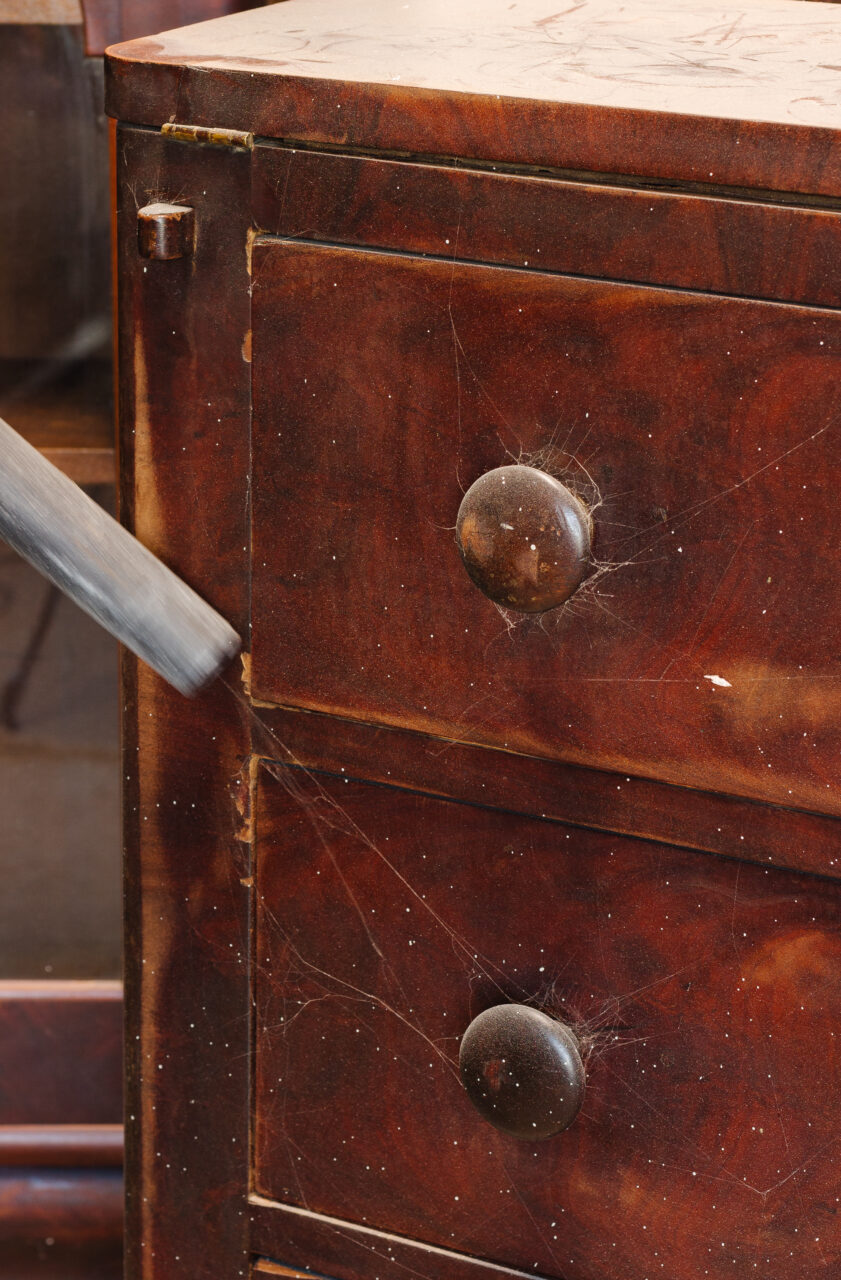
Prep is relatively simple for a piece that is in good condition. Our prep always starts with a good cleaning. This piece had sat in storage for a long time so it had a good layer of dust and webs. Using a vacuum to remove the dust and webs is a great way to remove loose debris.
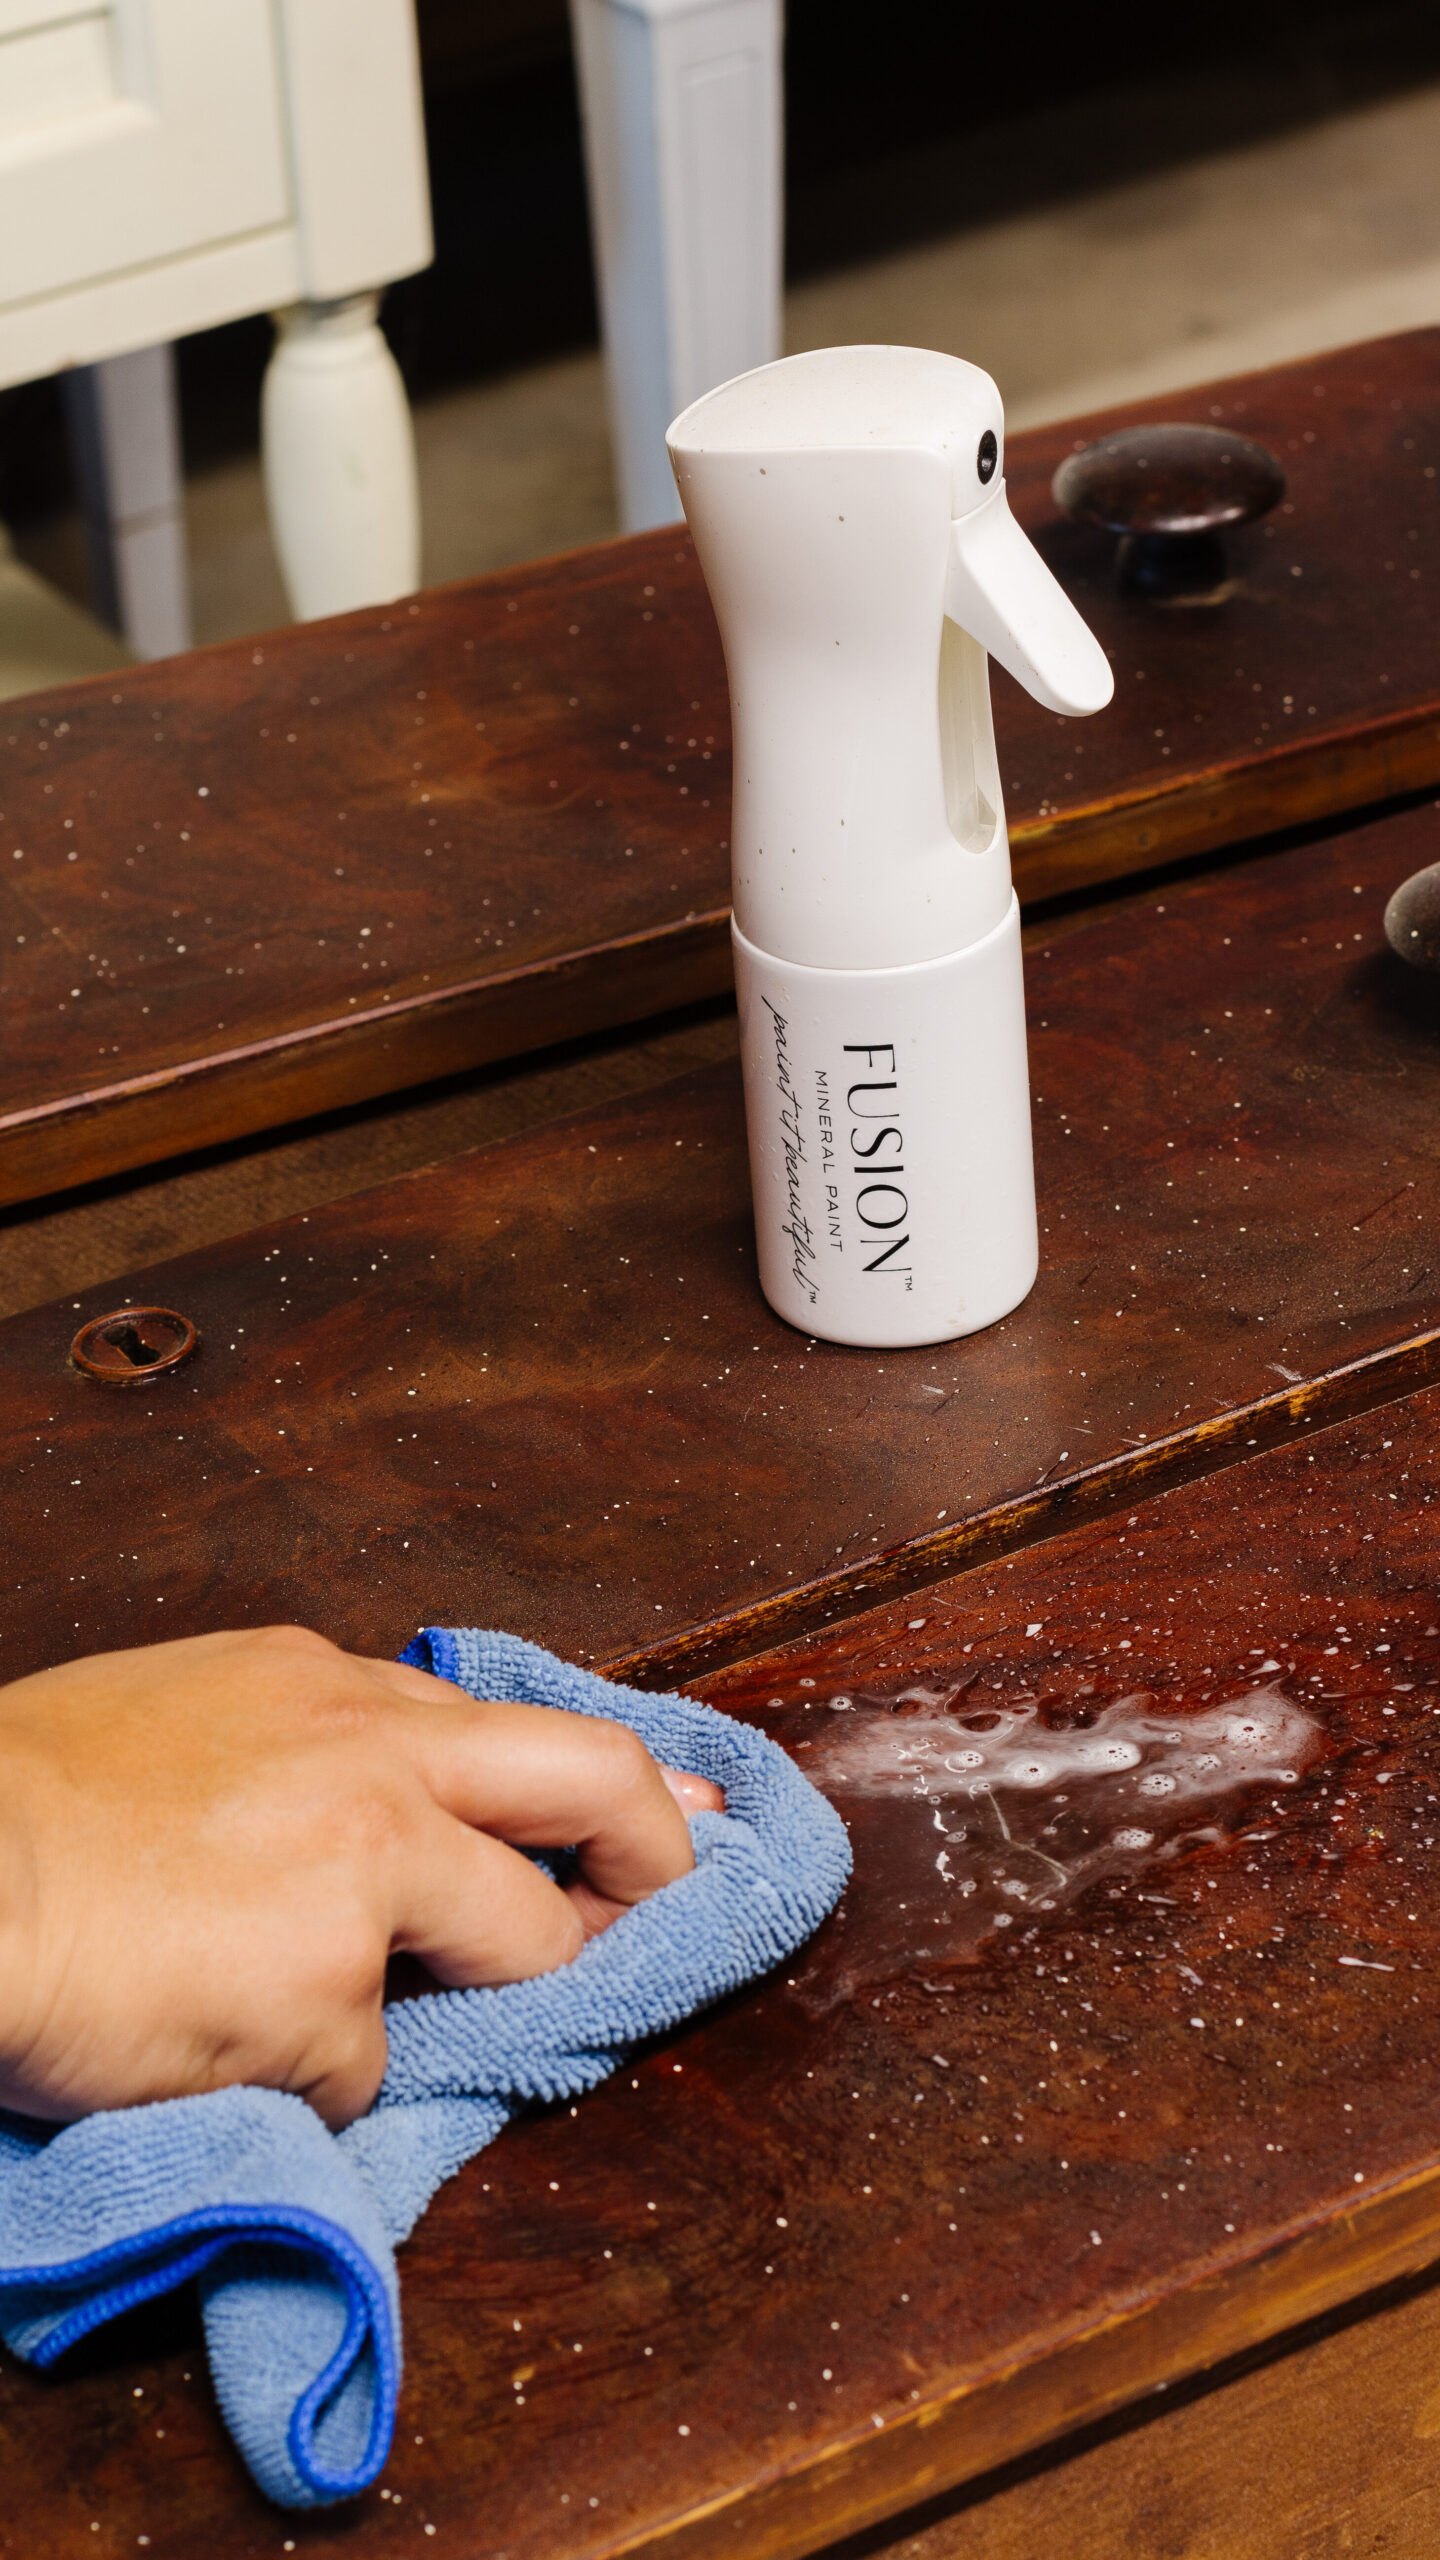
For removing any stuck-on residue, our Fusion TSP Alternative is a great non-toxic solution that does a great job of giving you a squeaky-clean finish. We mix Fusion TSP Alternative in our Fusion continuous spray bottle with water so it’s easy to have the solution ready for your next project.
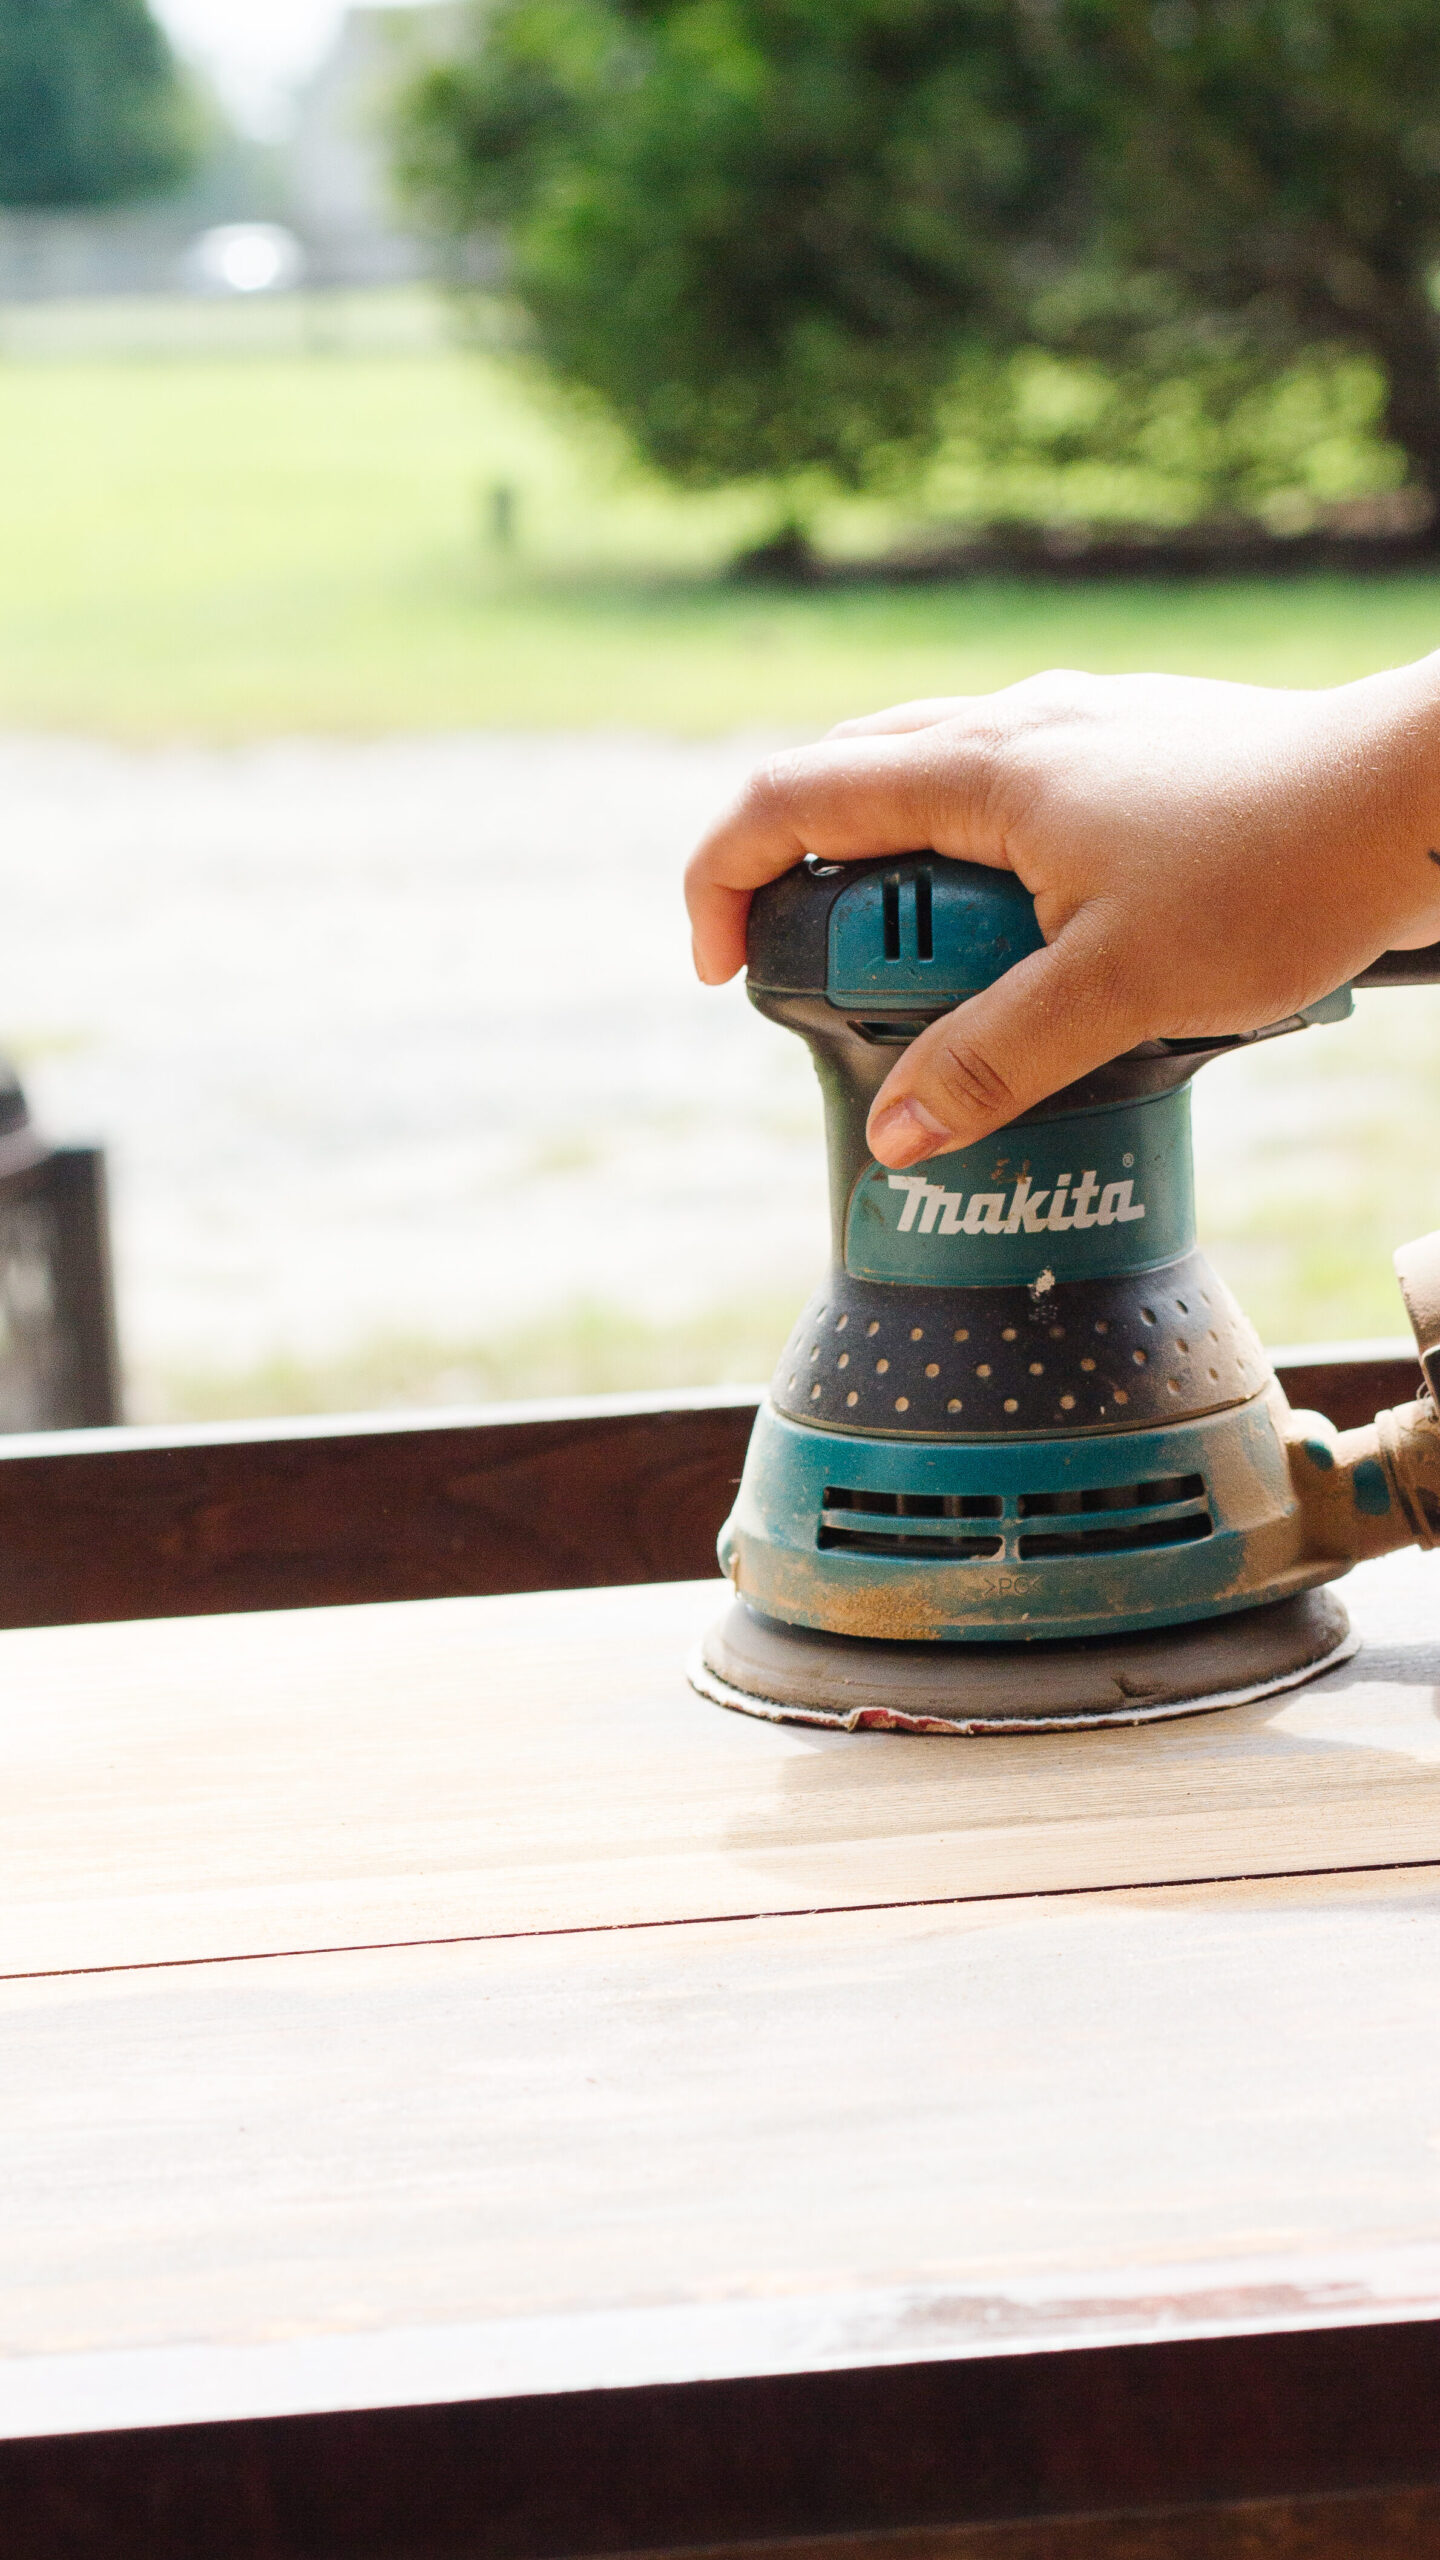
Next, we took our orbital sander to scuff sand our piece. This ensures there is a bit of tooth on the surface for our milk paint to adhere to. If there is any resistance on the surface, milk paint will likely crack and chip which is a beautiful primitive look, but for this piece, we wanted a full coverage smooth finish. We also sanded down the interior shelves to bare wood to prep them for stain.
Prime, Paint & Finish
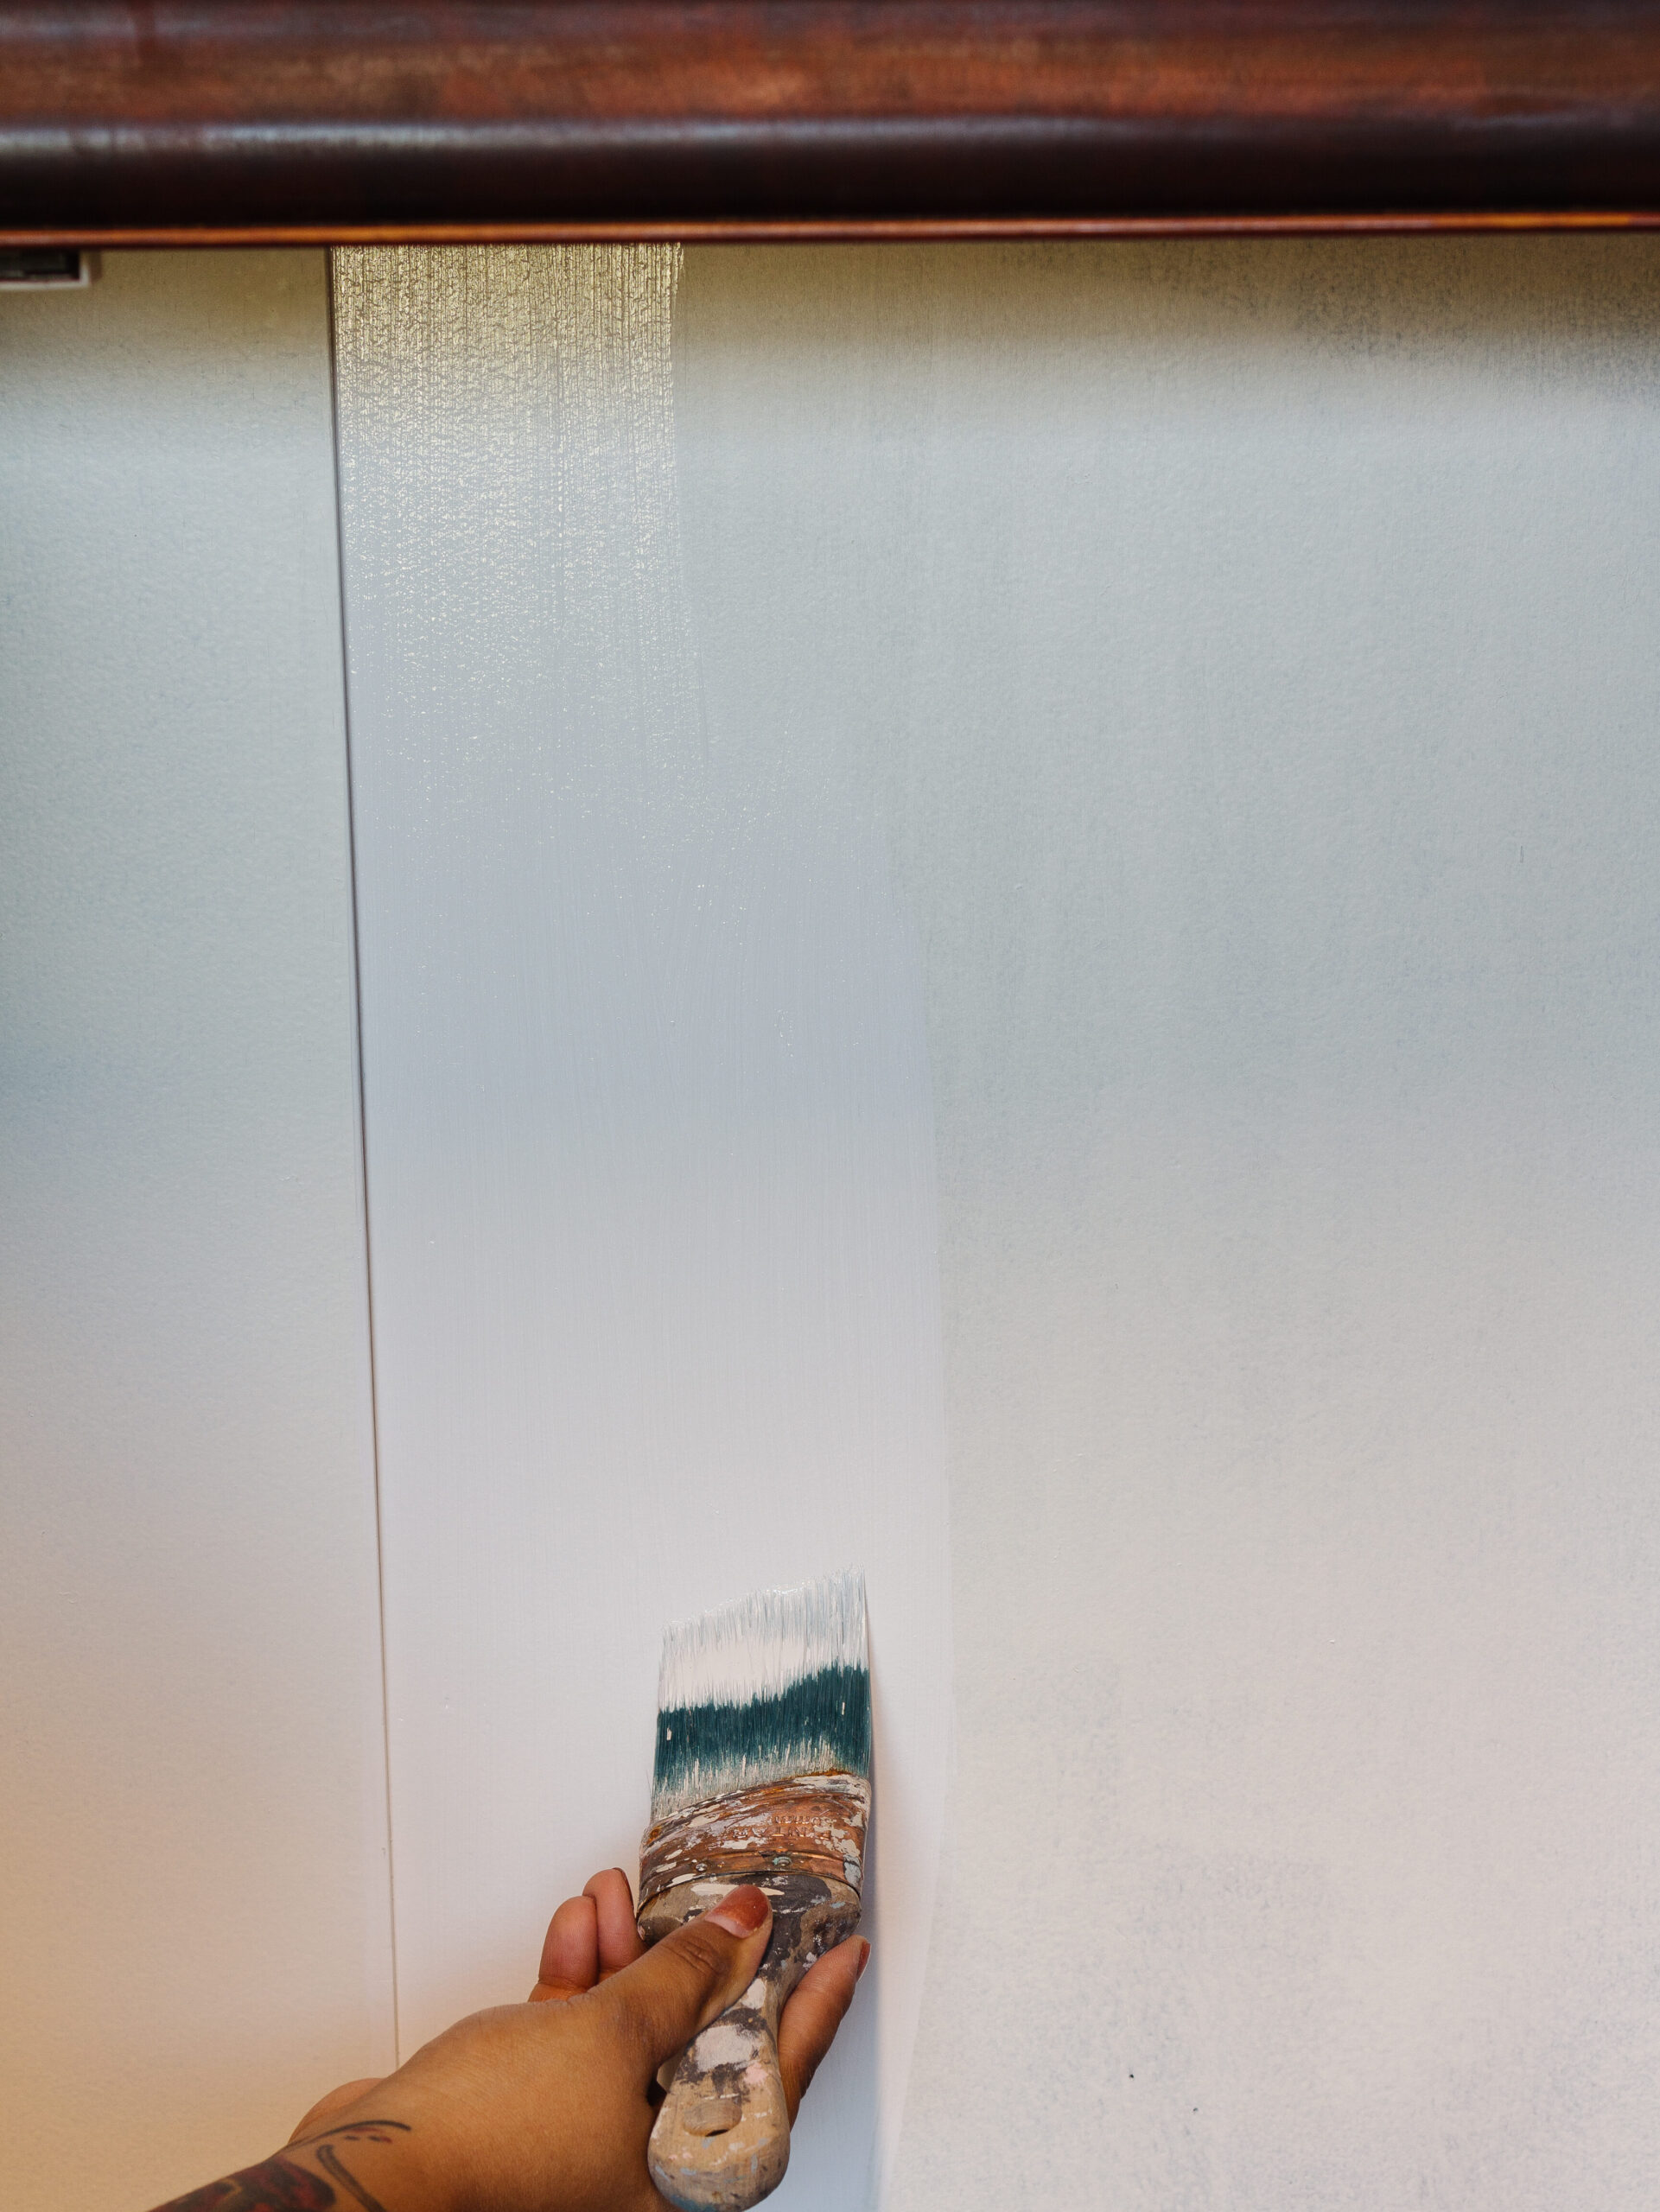
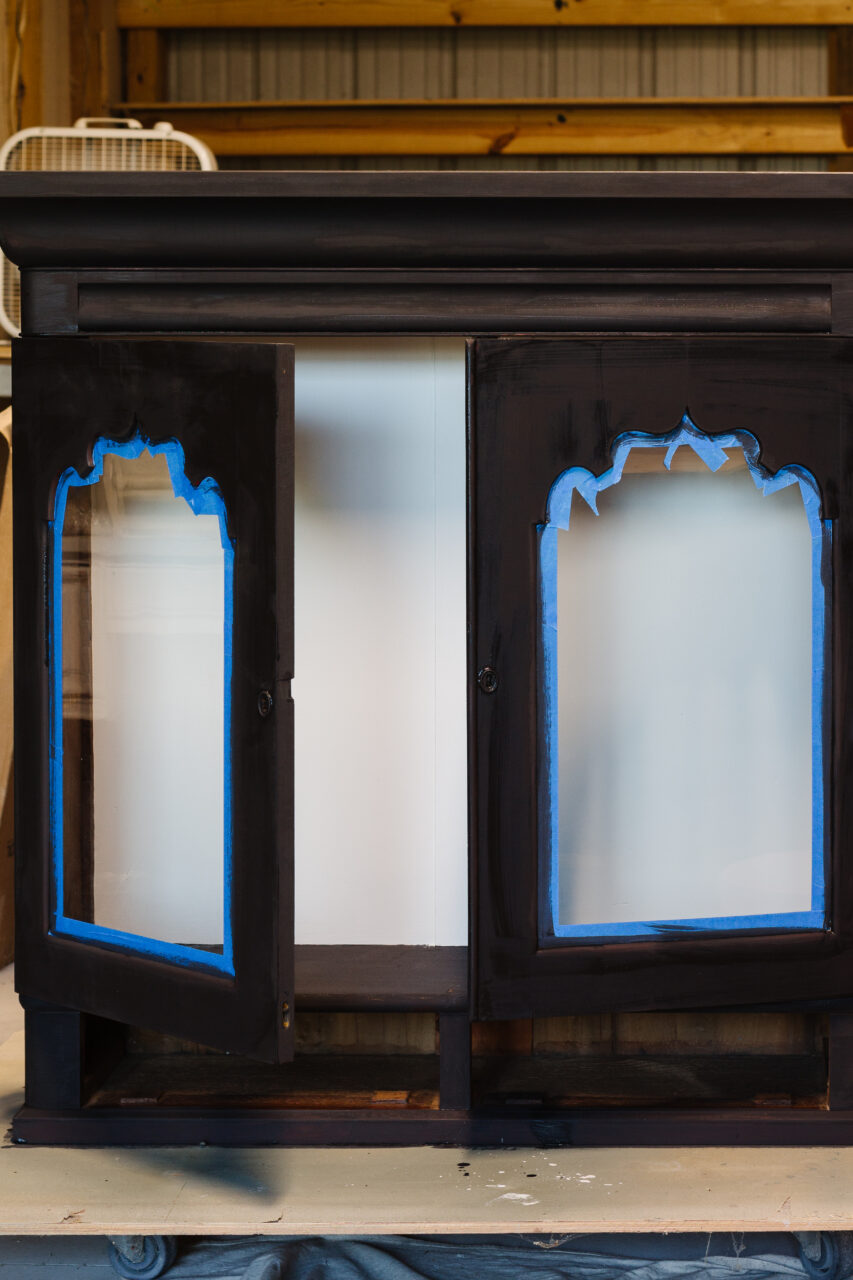
Now that our prep is done, we can work on getting our piece painted! We wanted to brighten up the interior, so we used Zinnser BIN Primer as our first coat. This serves two purposes; the first is to block any tannins and bleed through from showing through the paint. The other reason is to serve as a transition from a dark colour to a light one.
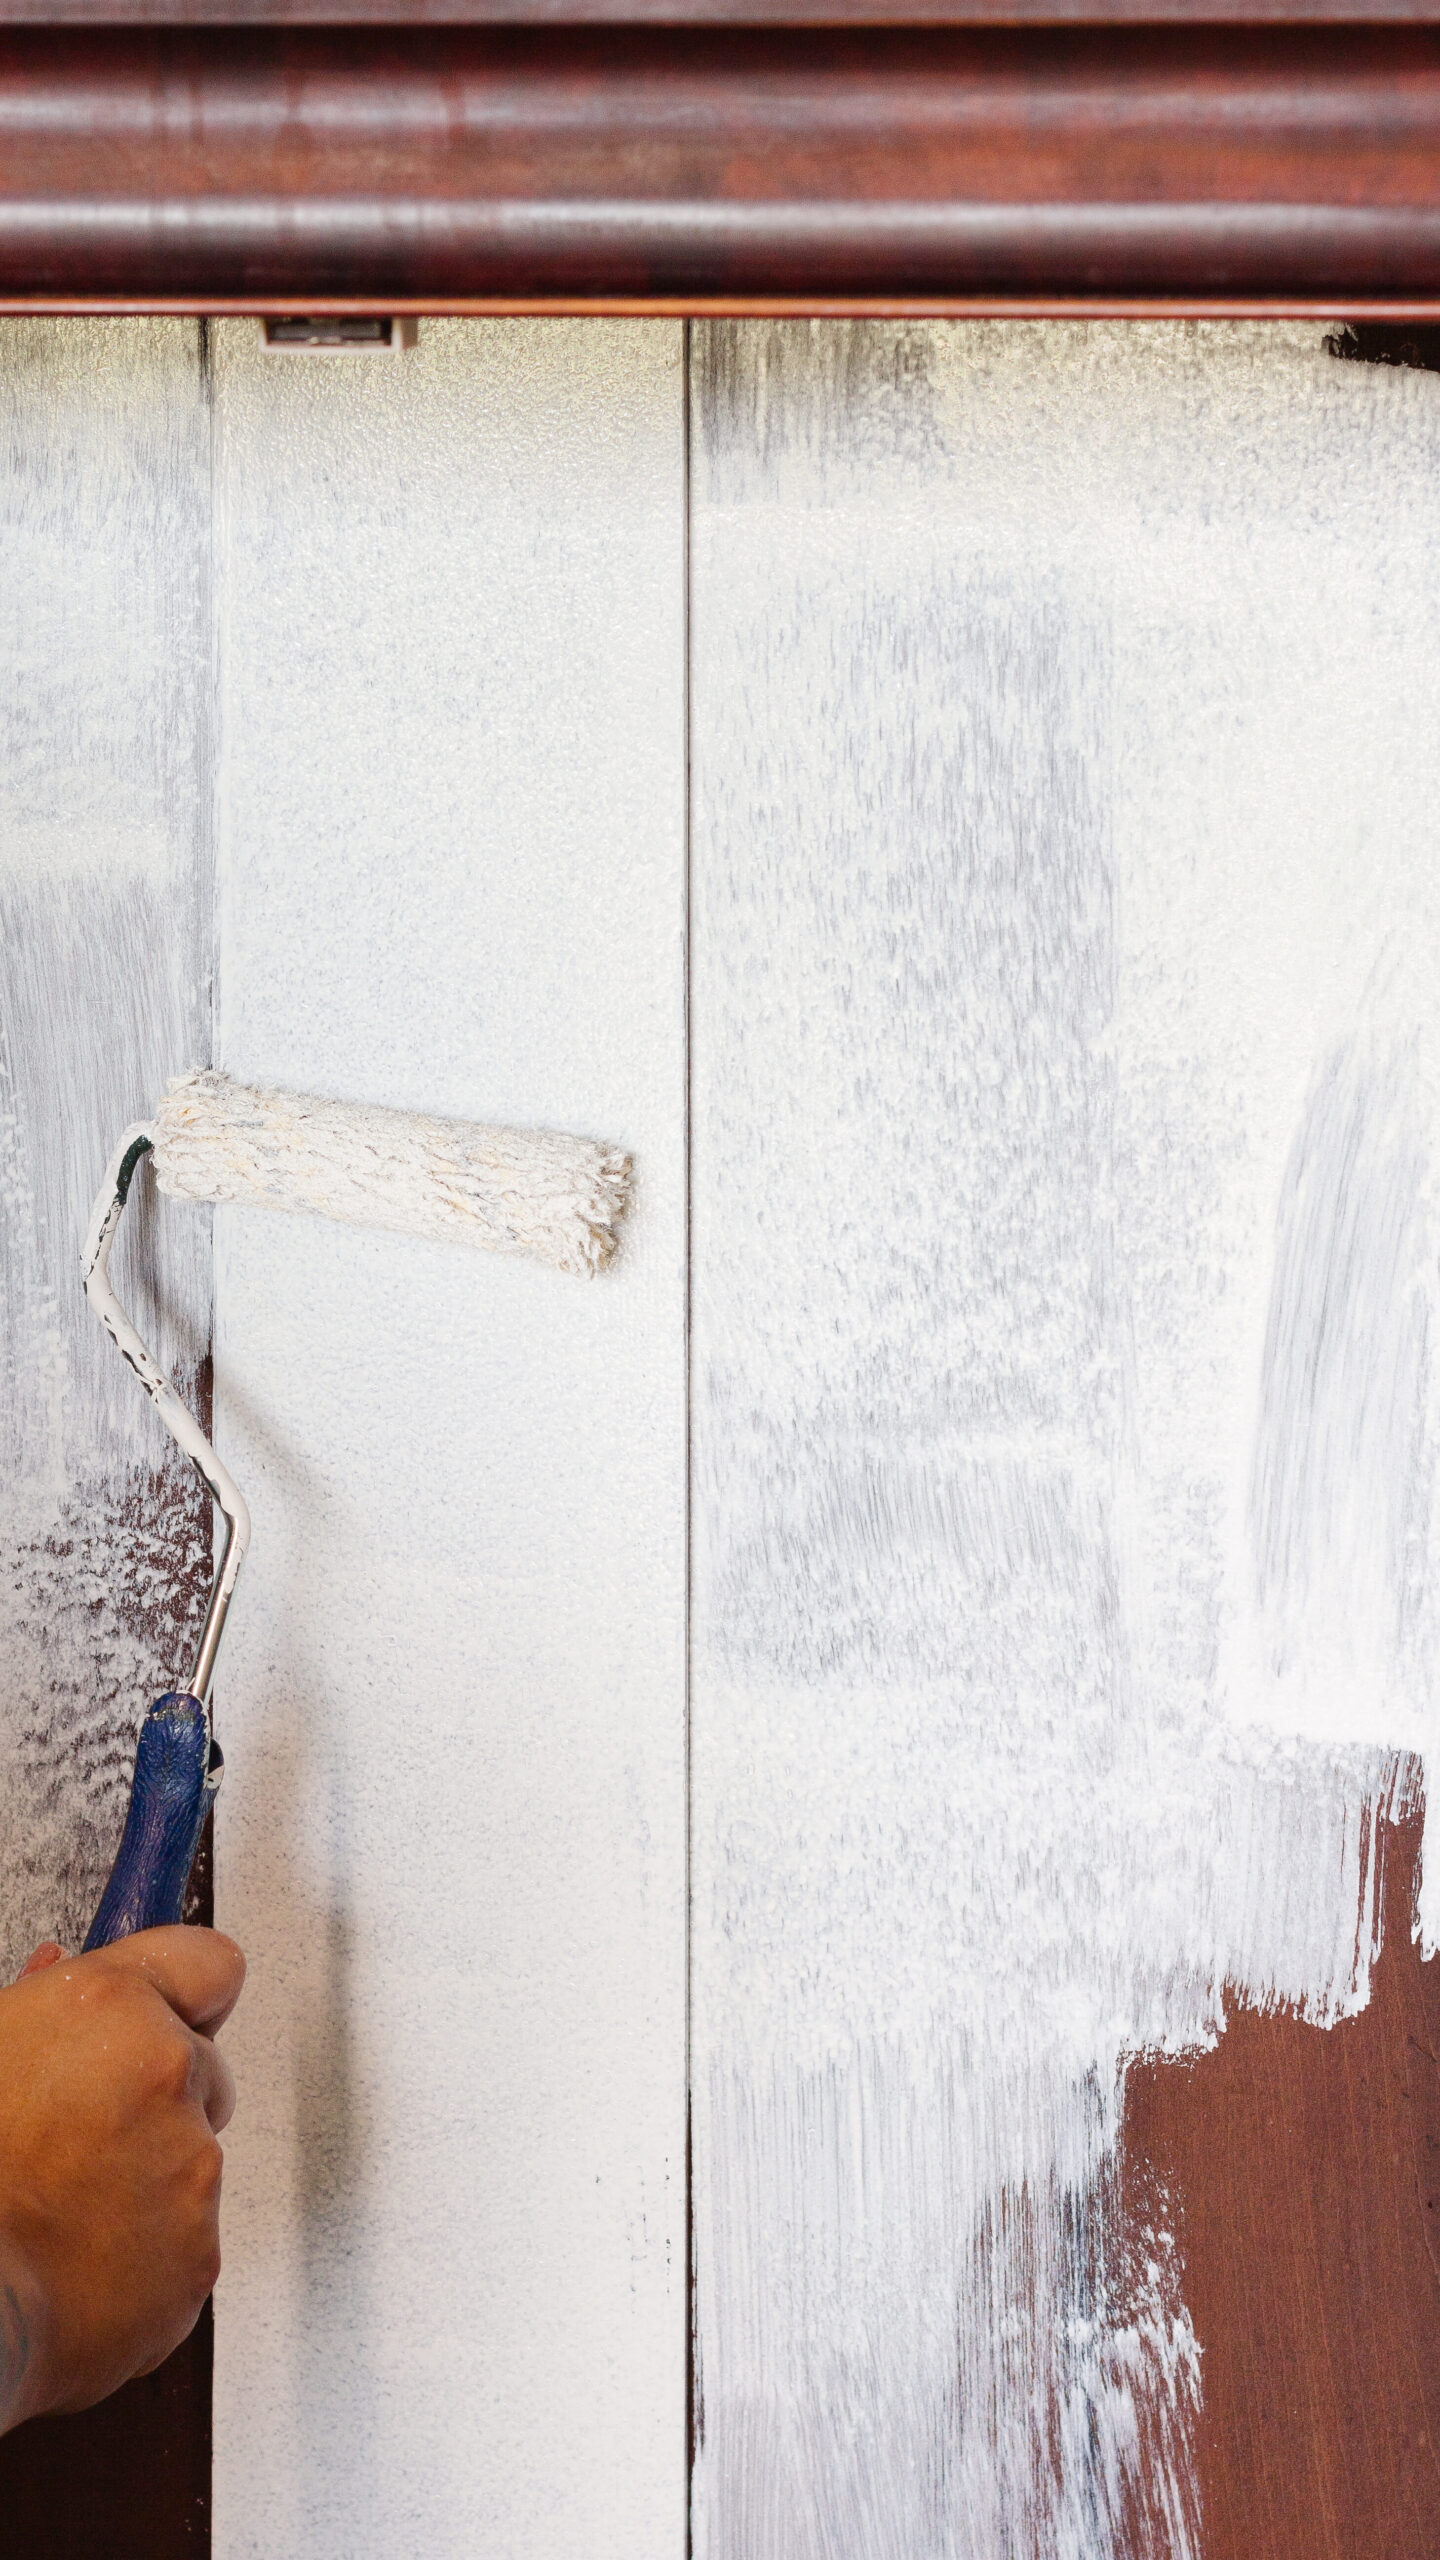
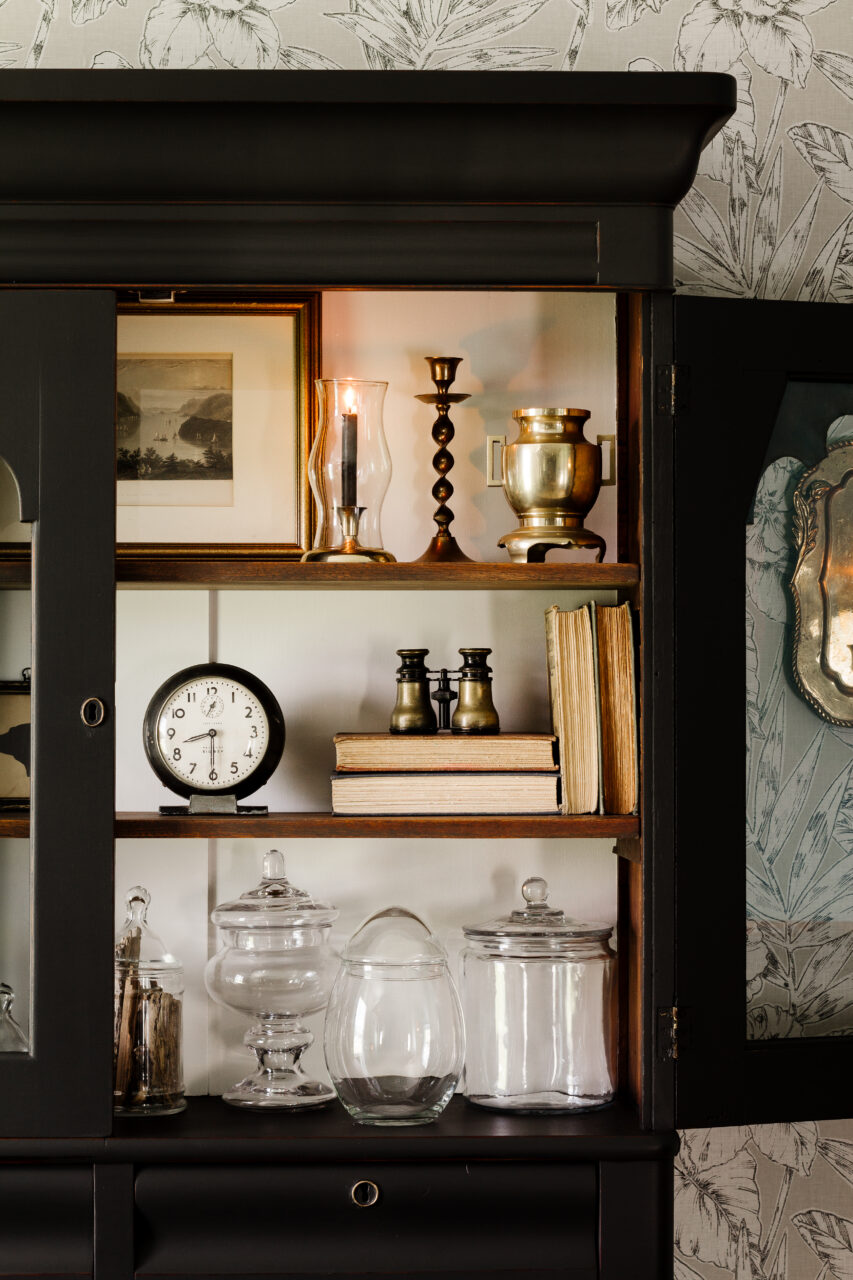
We painted 2 coats of Fusion Mineral Paint’s Victorian Lace on the interior. It gave us a crisp, but warm finish on the inside. It was a much-needed brightening up on such a dark interior.
While the paint dried on the interior, we used Stain and Finishing Oil in the colour Cappuccino as the finish for the interior shelves. Since we were painting with a dark colour, and had a bright interior, we wanted a contrast in texture and tone by adding a rich warm wood colour.
The next step in our process was to mix up our milk paint. We mixed a 1:1 ratio of Coal Black Milk Paint and water in a large bowl. A project this size would need multiple coats so we mixed up a large batch at a time.
We painted our first coat of milk paint on our project. The coverage was excellent but we knew we would need at least two coats for full opaque coverage.
Unique Properties of Milk Paint
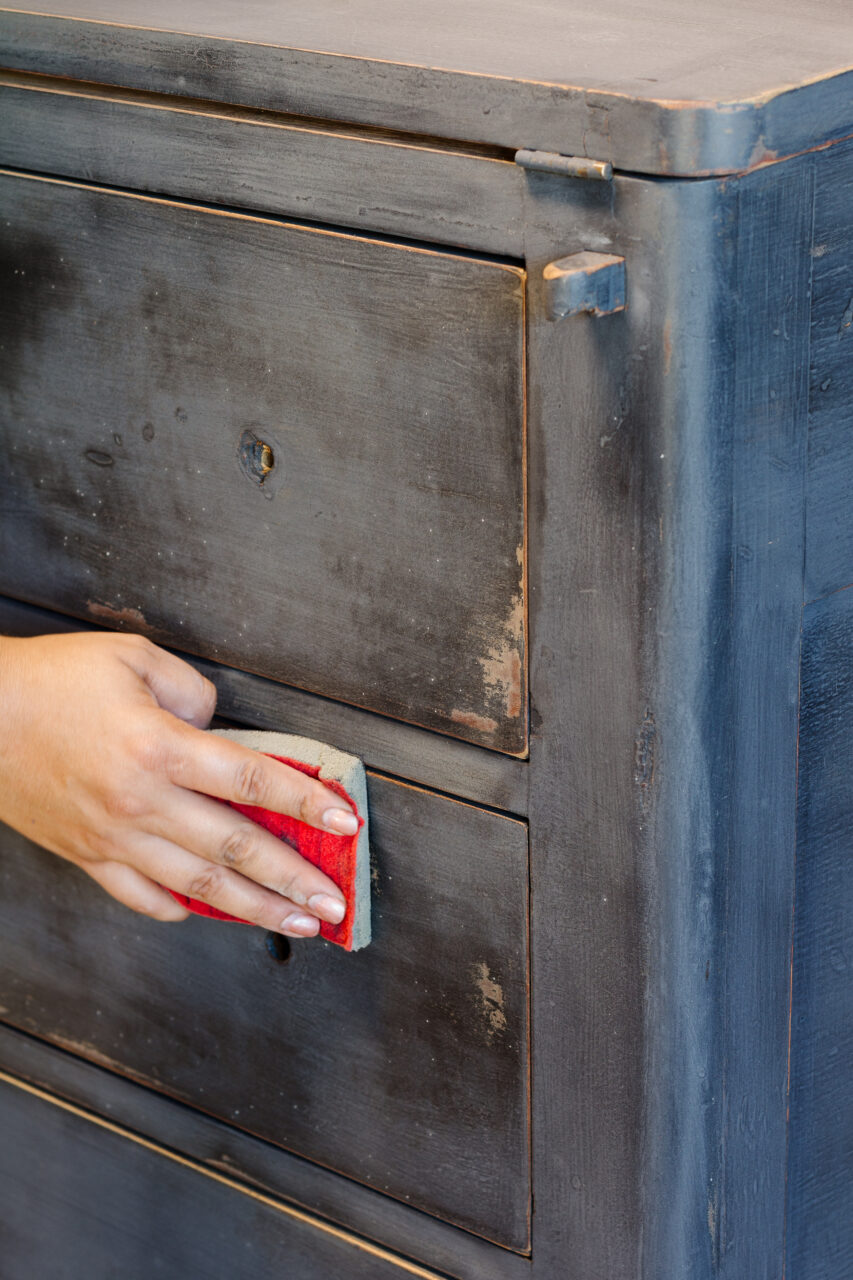
As the paint dried, we noticed some cracking and chipping. We were going for a smooth, lightly distressed finish, so we took our sanding pad to create more of a rough surface for our paint to stick to. After we cleaned up the sanding dust, we put on another coat of paint for a smooth, solid finish. If you have never used Milk Paint before you will notice that as it dries it looks flat and chalky, this is normal. Once you apply your topcoat the colour comes back to life!
Finally, we sealed our project with our Hemp Oil, which we call our liquid gold. A deep saturation and good buffing create the most velvety, buttery finish that we love paired with milk paint. Another unique property of milk paint is that it binds with the wood fibres, almost like a stain (on prepped wood). Adding Hemp Oil to milk paint creates another kind of bond giving you a unique finish.

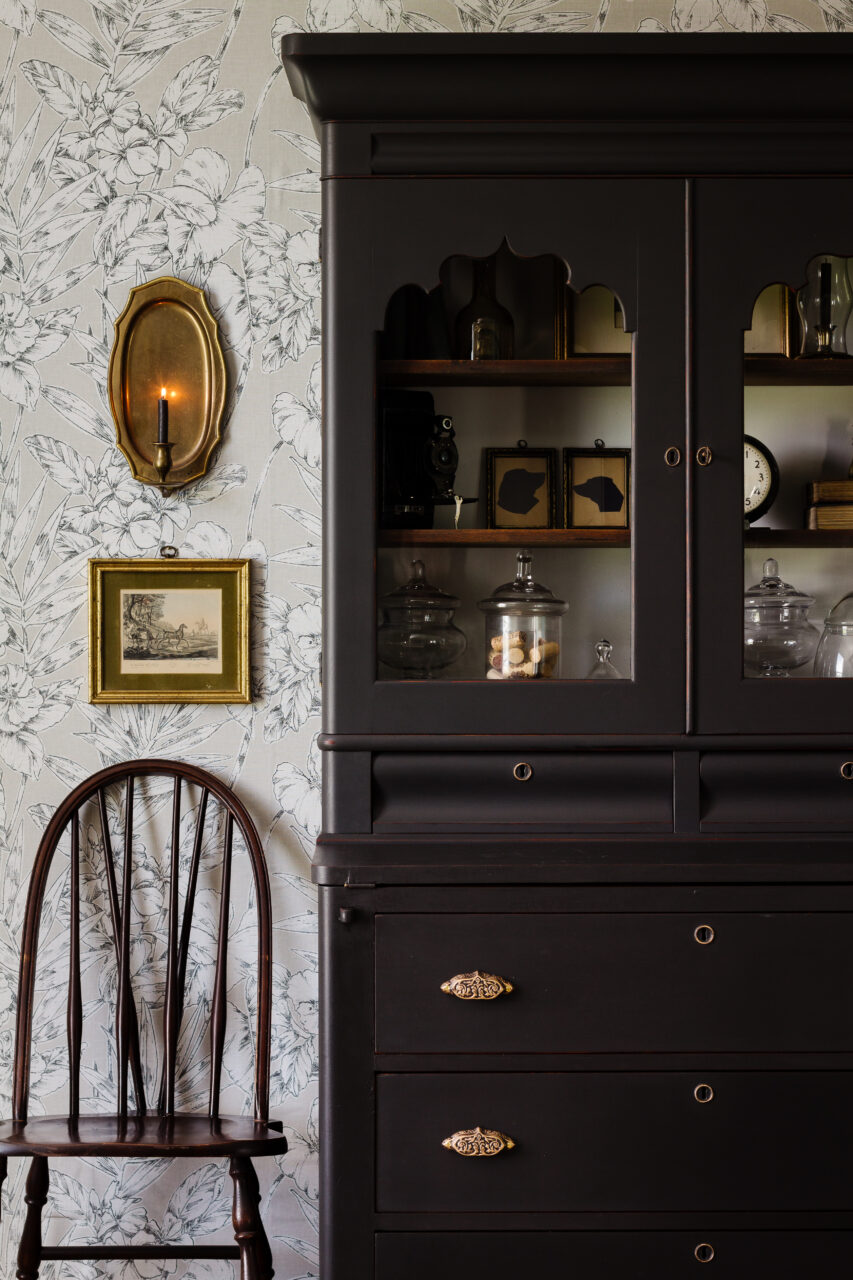
Black Milk Paint Hutch Makeover
We created a lot of drama with this makeover. Our once dark and red hutch is now still dark, but very much an elegant and statement piece that will look great in any season.
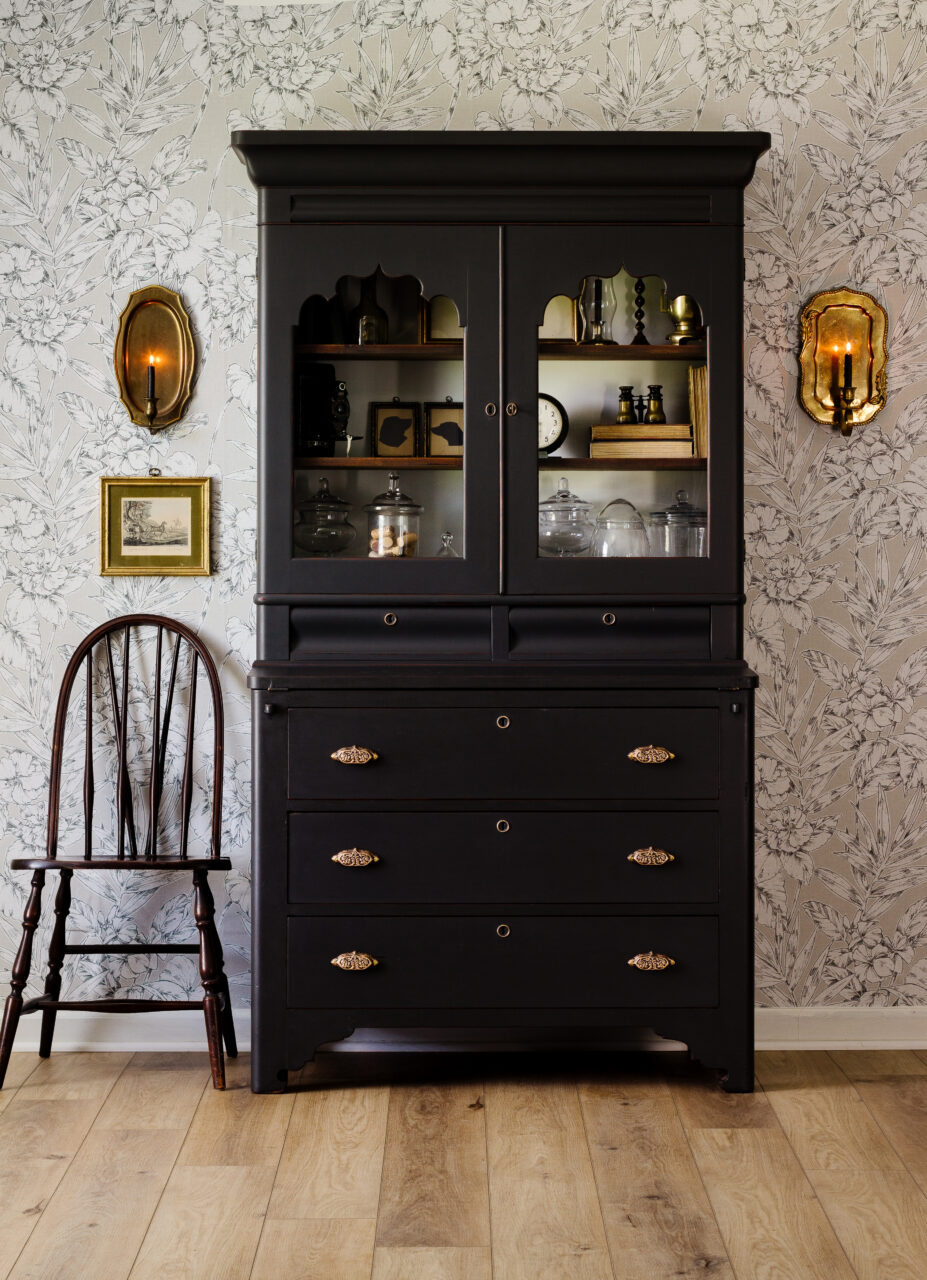

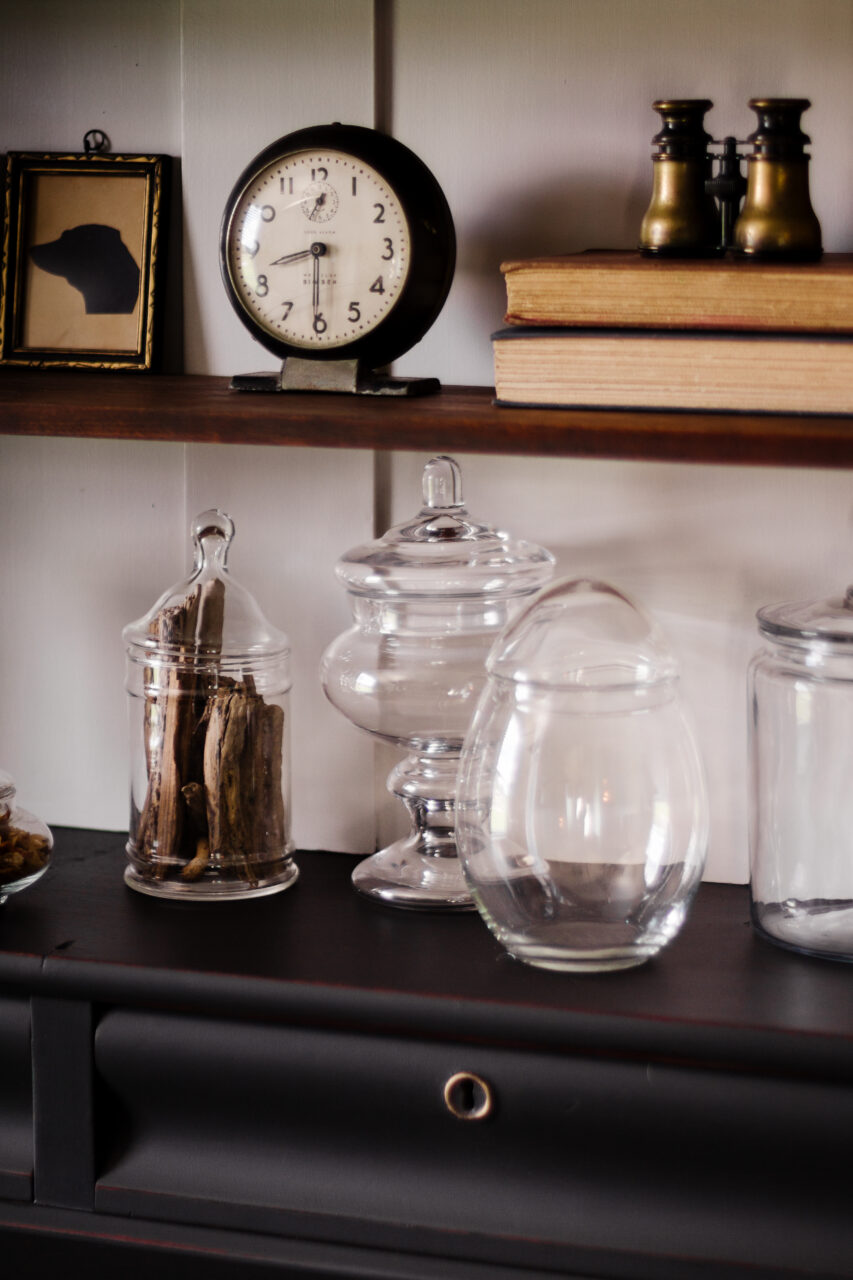
Brightening up the interior was the right move with this hutch. There were so many beautiful details to this piece that were lost in the dark original finish, and the white background brings those beautiful details out.
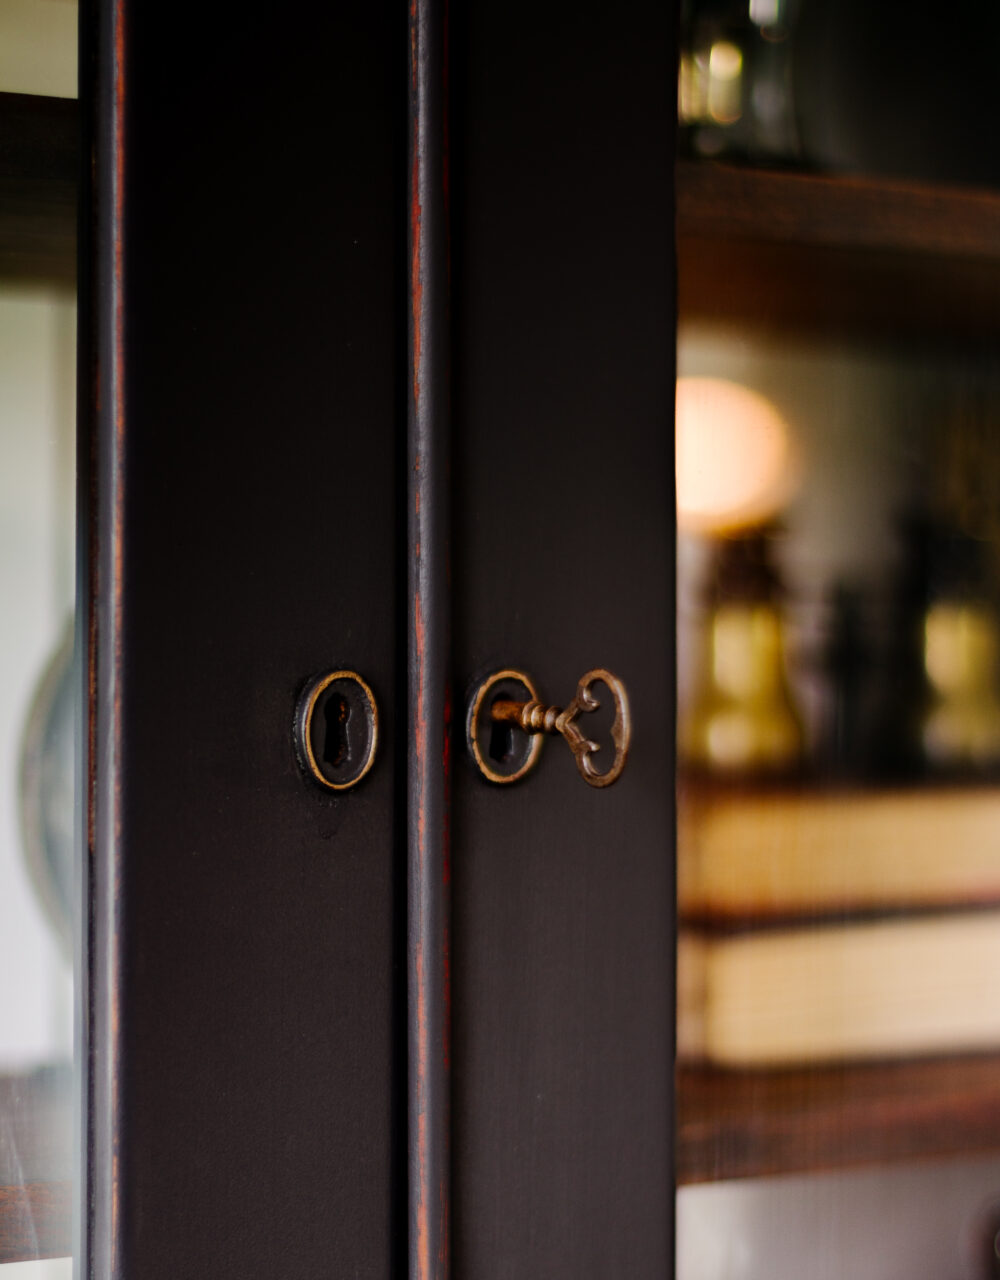
Updating the hardware added a sophisticated touch to this moody cabinet. The gold pops against the deep richness of our black cabinet, but it also draws out the warm tones in the light distressing we added to our edges and ornate details.
The wood shelves play the middleman literally and figuratively in our project. They bring that wood element that we toned down from the original finish back out. While we love that light wood tones are trending, nothing says classic like rich, whiskey tones in antique wood. Cappuccino SFO highlighted and kept an original element to this piece that told the story of its age.
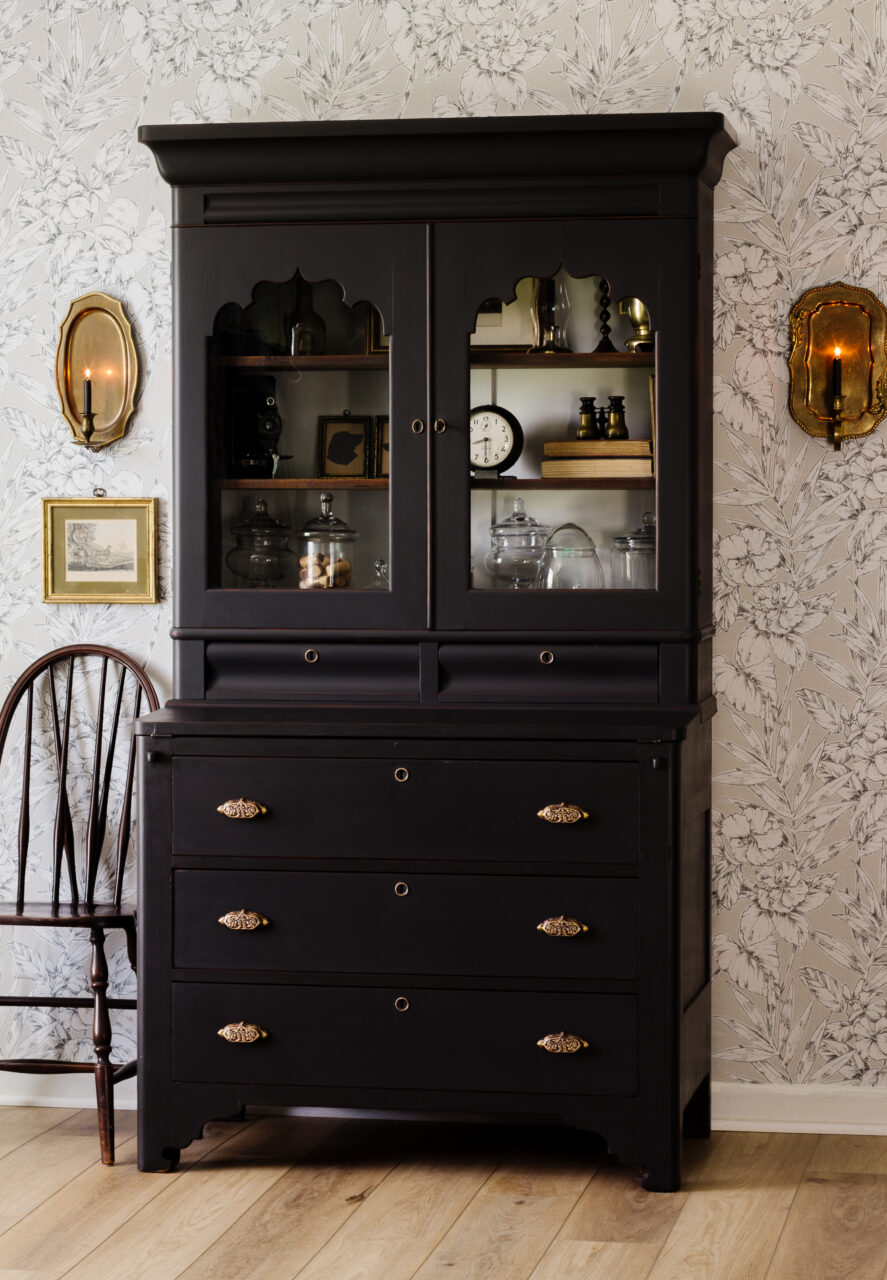

Our antique cabinet looks beautiful with a modern and moody finish in a timeless colour. Although black is thought to be a dark and deep colour, black can also be cozy, warm, and enchanting. We hope you enjoyed our Black Milk Paint Hutch Makeover and hope to see more of these rich, dark colours in your projects this year!