
Want a fun, affordable and easy way to decorate for Christmas? Learn how to create a dreamy snow effect on wood, to create the most adorable snow-filled wood Christmas trees! Included are different ways to display and decorate them! See how below.
This delightfully easy and charming DIY Christmas decor project became a thing thanks to a request from a reader.
She spotted THIS larger chippy white wood Christmas tree of my own, but since she didn’t have any chippy wood on hand, asked if I knew of a way to create the effect from scratch.
Actually, I do! Milk paint is long famous for creating a multitude of unique effects, including chippy paint in any colour!
So today, this post will share two things! How to achieve chippy white paint easily and effortlessly on nearly any wood piece, plus how to create your own chippy white wooden trees with endless Christmas or winter display possibilities.
Ready to decorate the holiday season with quaint and rustic small wooden Christmas trees? Here are the instructions for this easy project!
Create a Snow Effect on Chippy Wood
Supplies you’ll need:
- Homestead House Milk Paint in Sturbridge White
- Small whisk
- Bowl to mix milk paint
- Small chip brush
- Salad Bowl Finish by Homestead House
- Lumber of choice
- A rag
- Sanding sponge
- Mitre saw
- Orbital sander
- Wood closet rod
- Glue gun or wood glue
- String or twine
- Holiday decor to suit

Select Your Desired Boards
First up, let’s create a fabulous chippy white effect on some reclaimed wood boards so your simple wooden Christmas tree shapes look like they’ve been hit with fresh fallen snow.
1. Select a wood board size to work with the size of the wood tree you desire.
I wanted a little more height and stability to the trees, so I used a fairly thick board that had a good depth to it.
Board dimensions: 7.5″ wide x 64″ long x 1″ thick.
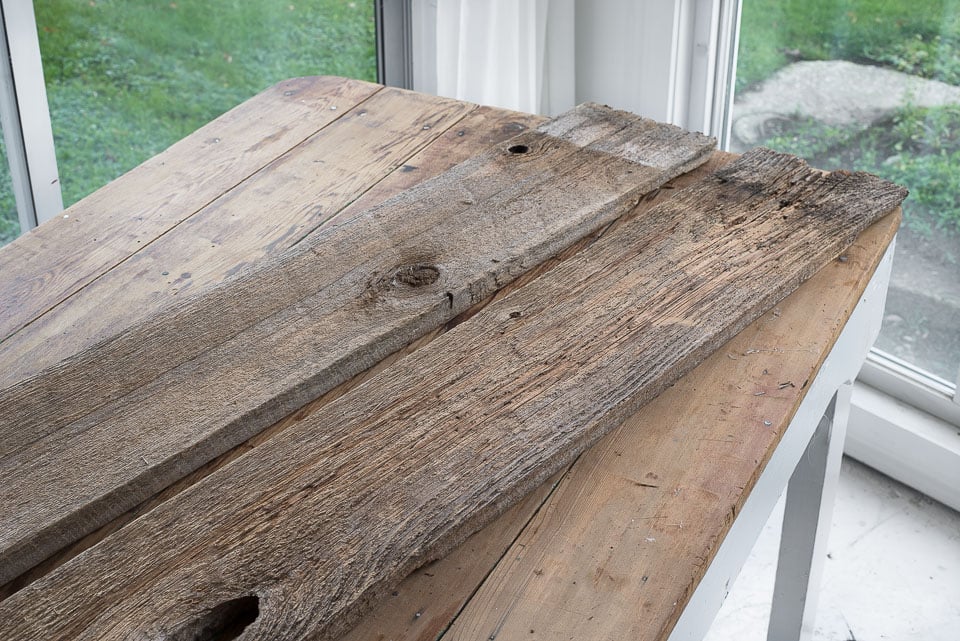
Although these boards happen to have a lot of texture, I vote to experiment on a few different textured boards to see which ones give you results you love.
Apply a Paint-Resist
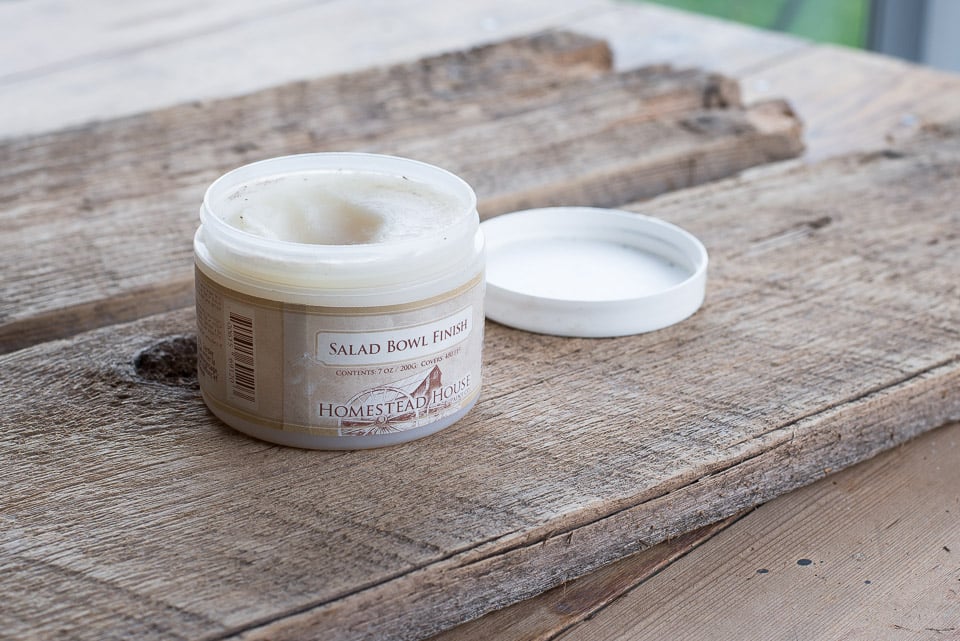
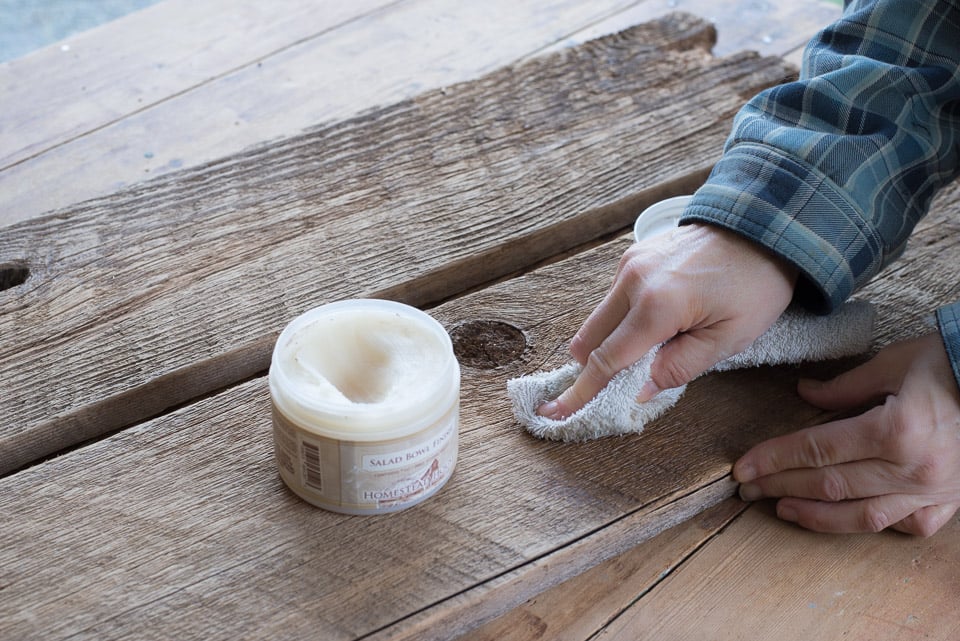
2. Apply something on the natural wood that will resist paint.
The key to making milk paint chip, crackle or distress easily is to coat the boards with something that inhibits the paint from getting a firm grasp on the wood surface.
I chose to use Homestead House Salad Bowl Finish, however you can use these other paint-resists too:
Using a rag or brush, apply your chosen paint-resist onto the wood, embedding it into any wood grooves if the wood is textured.
Lightly wipe off any excess.
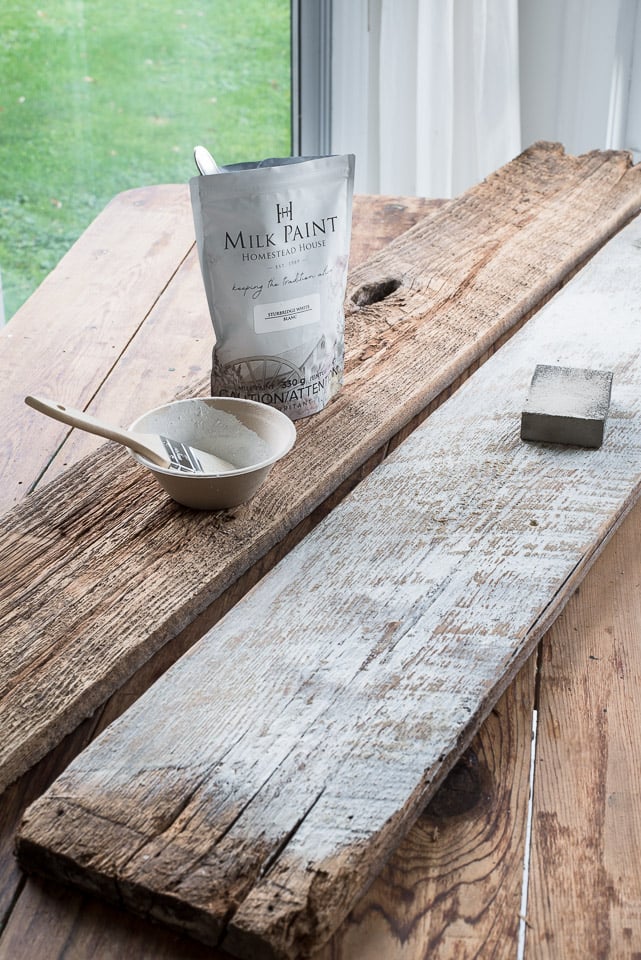
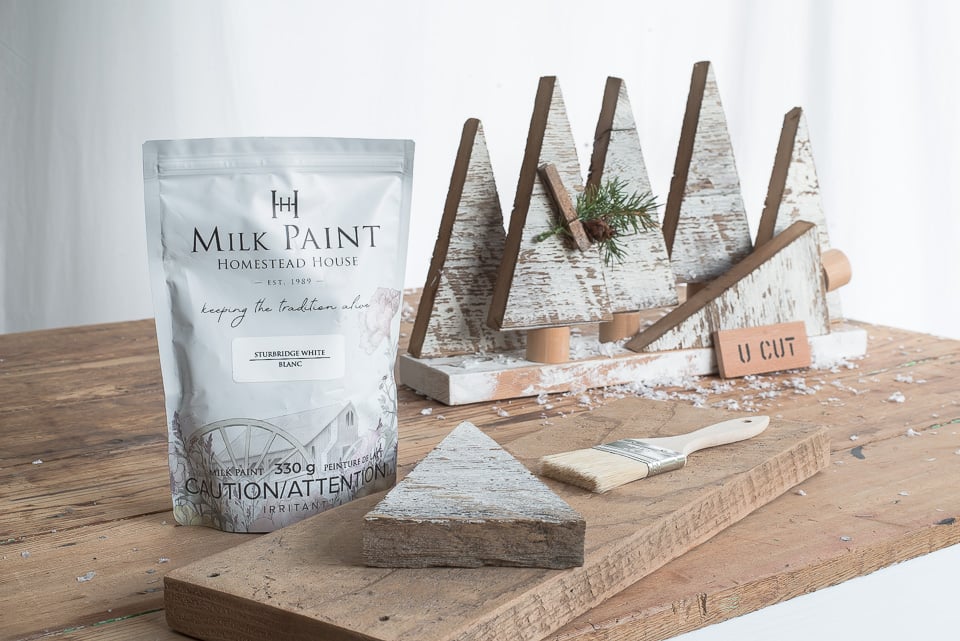
Mix up a batch of white milk paint
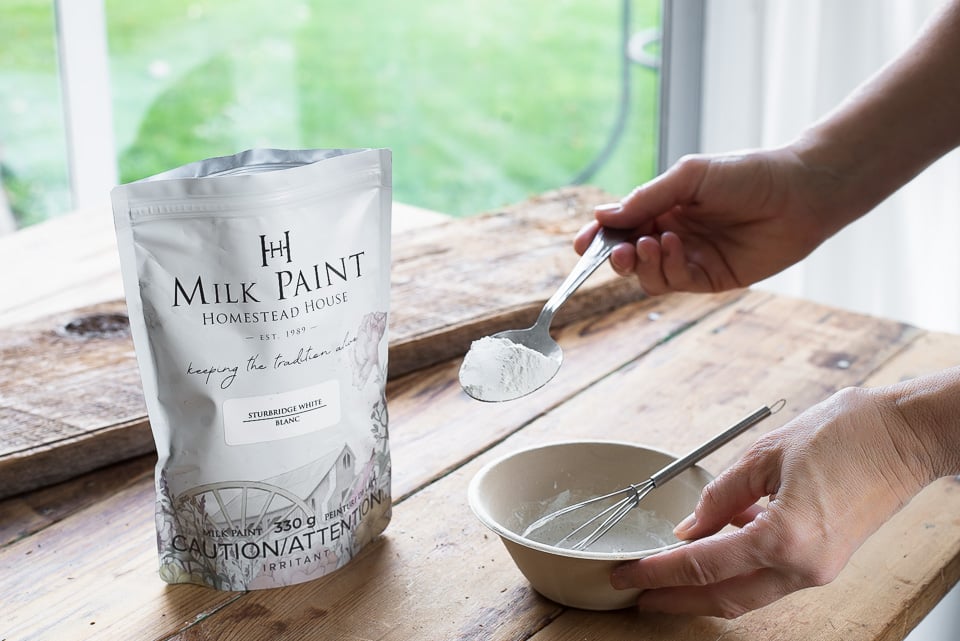
3. Next, mix up some Sturbridge White Milk Paint.
Sturbridge White was chosen since it’s one of the whitest whites in this milk paint collection.
A few perks of milk paint:
- milk paint stores forever
- there’s nothing to dry out since it’s in powder form
- mix just what you need, then store the rest for next time
- brush strokes are nonexistent since there’s no resin in the paint
- many different effects can be achieved, including chippy, distressed, matte, satin and more
How to mix milk paint to achieve a chippy snow effect
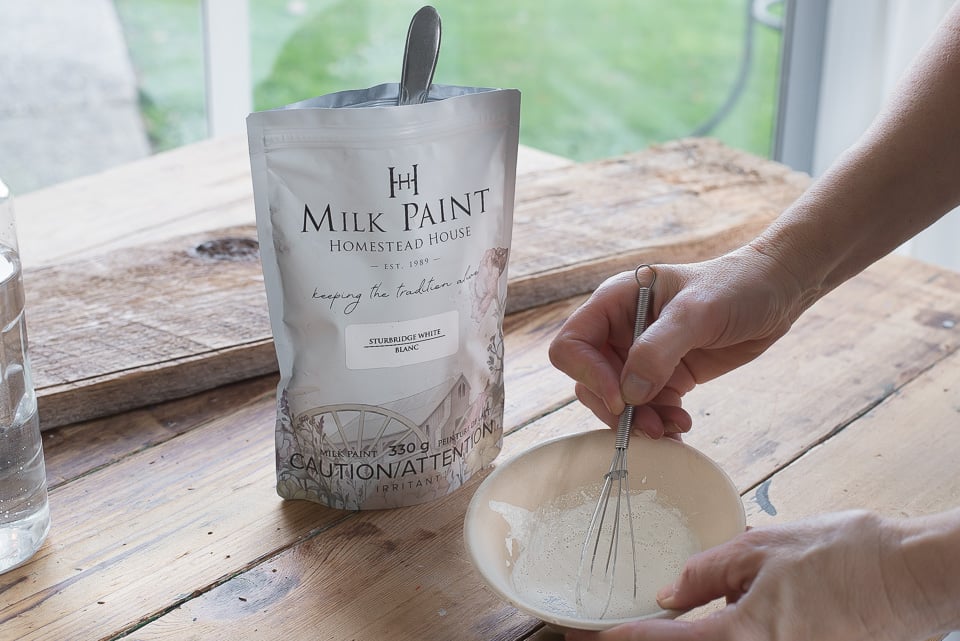
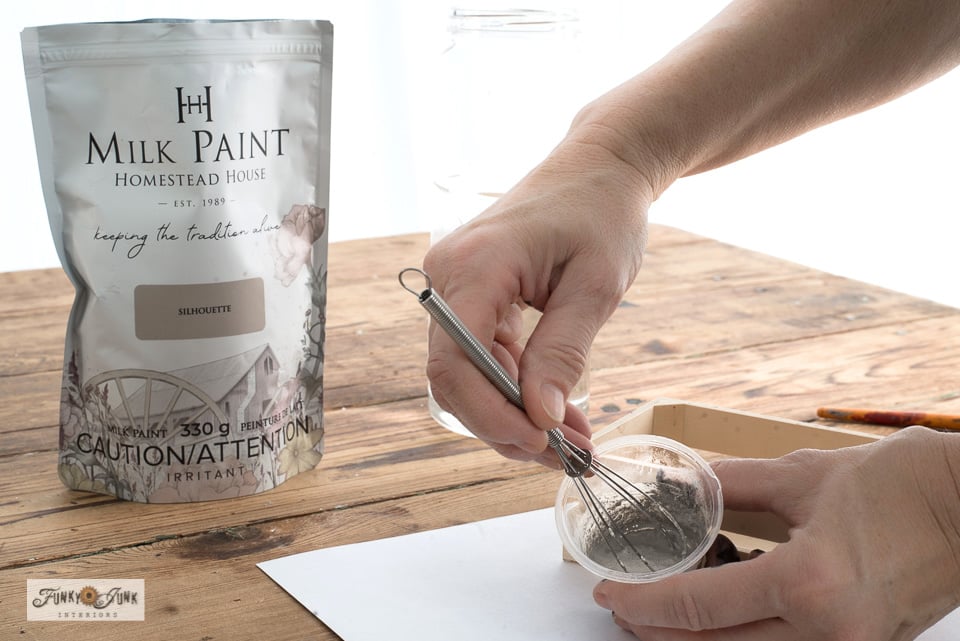
Mixing up a batch of milk paint is easy! The powder is formulated to dissolve quickly when mixed with water, making whipping up just what you need effortless.
Normally, the ratio of milk paint powder to water is 50/50. However since we are going for a crackle finish, the key this round is to mix the milk paint with a thicker consistency.
- Add milk paint powder into a bowl.
- Pour in a little water.
- Mix with a small whisk.
- Alternate powder and water, creating a thick cooked oatmeal texture.
- Allow to sit for a few moments.
- Give it one more stir, then paint.
Paint the boards with the milk paint mixture
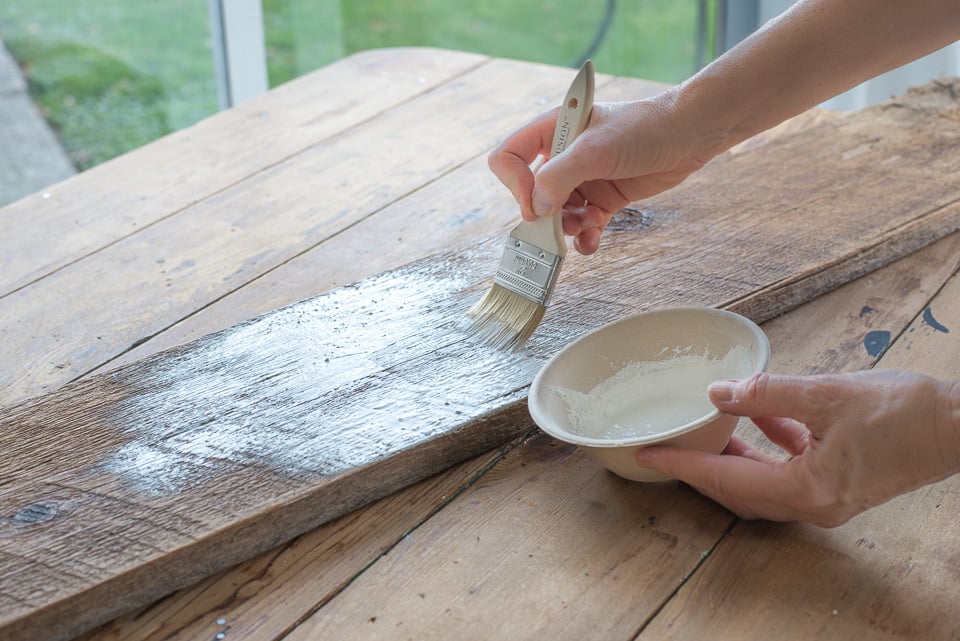
4. Brush the milk paint onto the wood plank.
To create a greater variety of looks, try applying the paint thicker in some areas, and thinner in others. This will create added interest to the finish of your scrap wood Christmas trees.
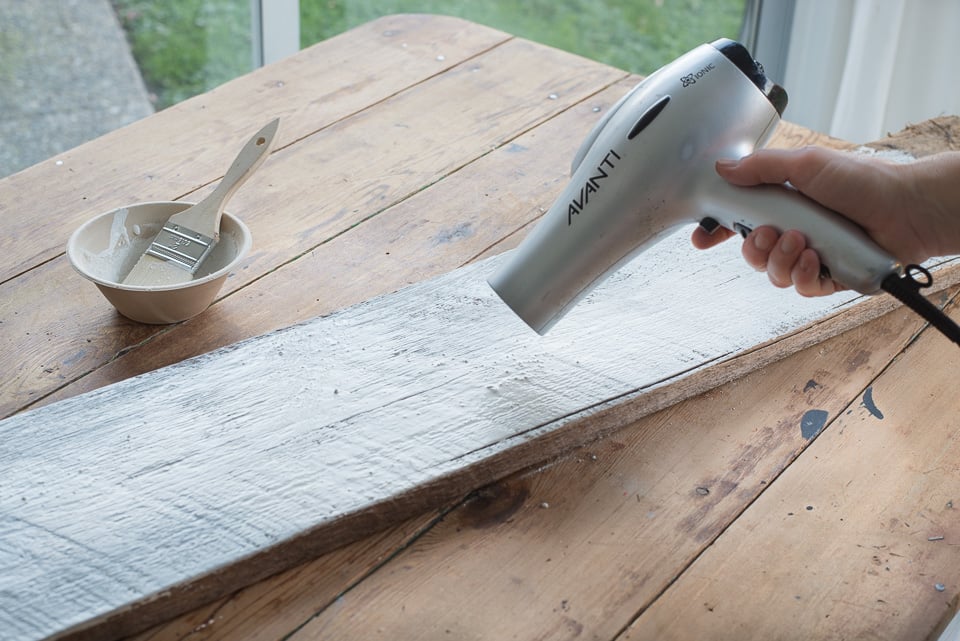
Heat up the paint
5. Dry the wet paint with a heat gun or hair dryer.
Heating the milk paint ‘rushes’ the drying process, with the potential of creating awesome deep crackles in the paint finish when the paint pulls away from your paint resist!
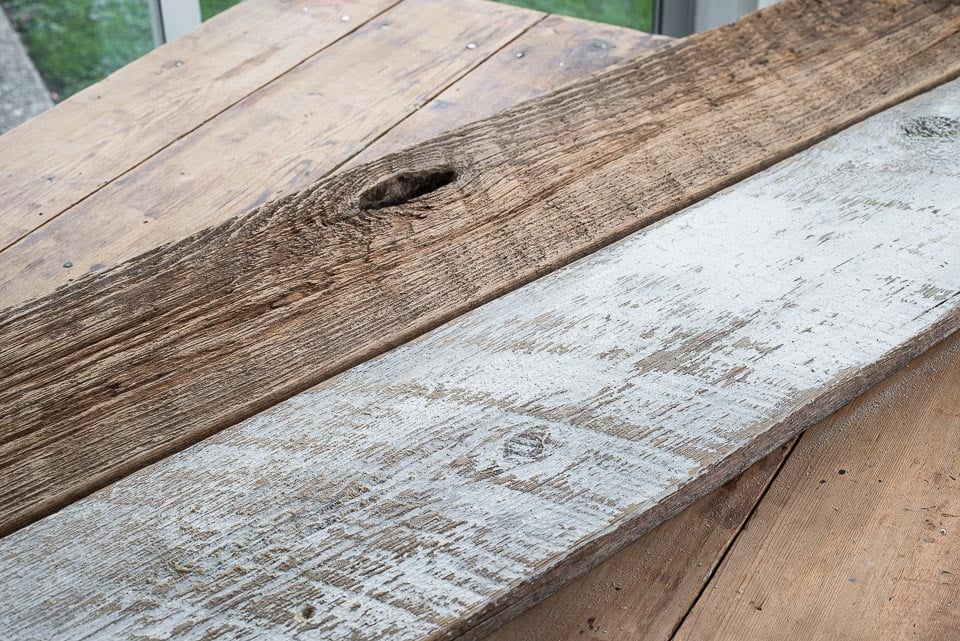
The areas with the heaviest paint crackled the most.
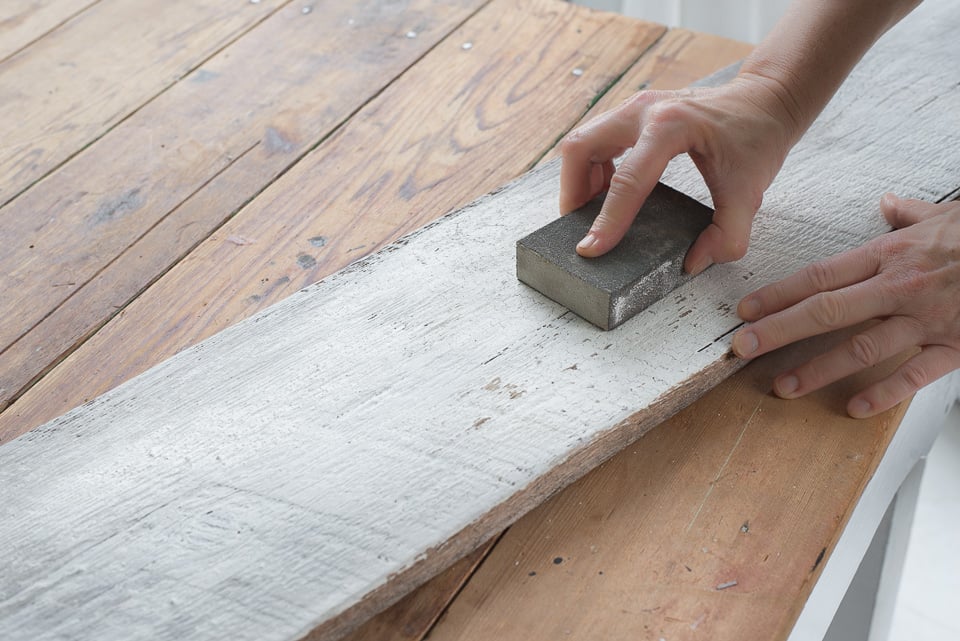
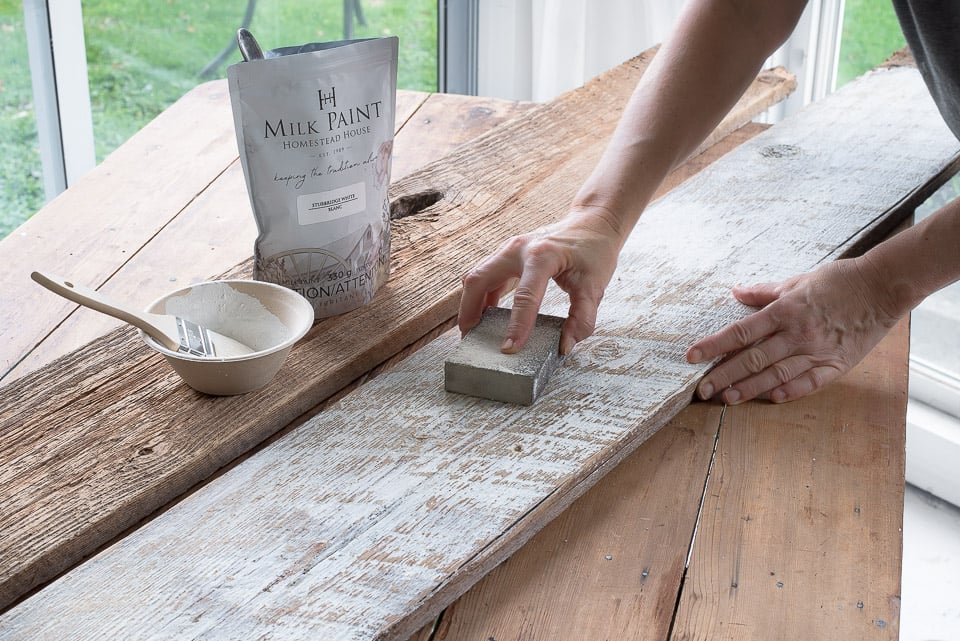
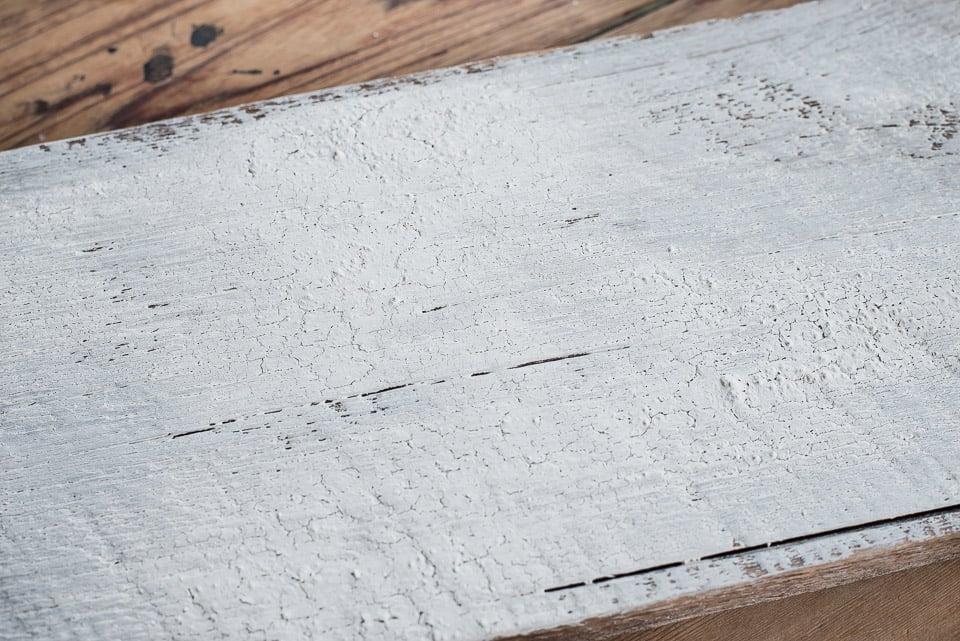
Distress with a sanding sponge
6. Distress the paint with a sanding sponge.
Sometimes the paint will chip on its own. However, what Milk Paint decides to do can be a little bit of a gamble. So I helped the process along by sanding.
The result was a combination of paint chips, crackles and a distressed look. The paint chipped off easily in the higher places, while staying in the low grooves, creating a natural delightfully chippy effect instantly!
To achieve larger paint chips, drag a metal spoon across the surface in random places.
Quite the decadent outcome, isn’t it? Now let’s create some snowy Christmas trees that are super simple to make!
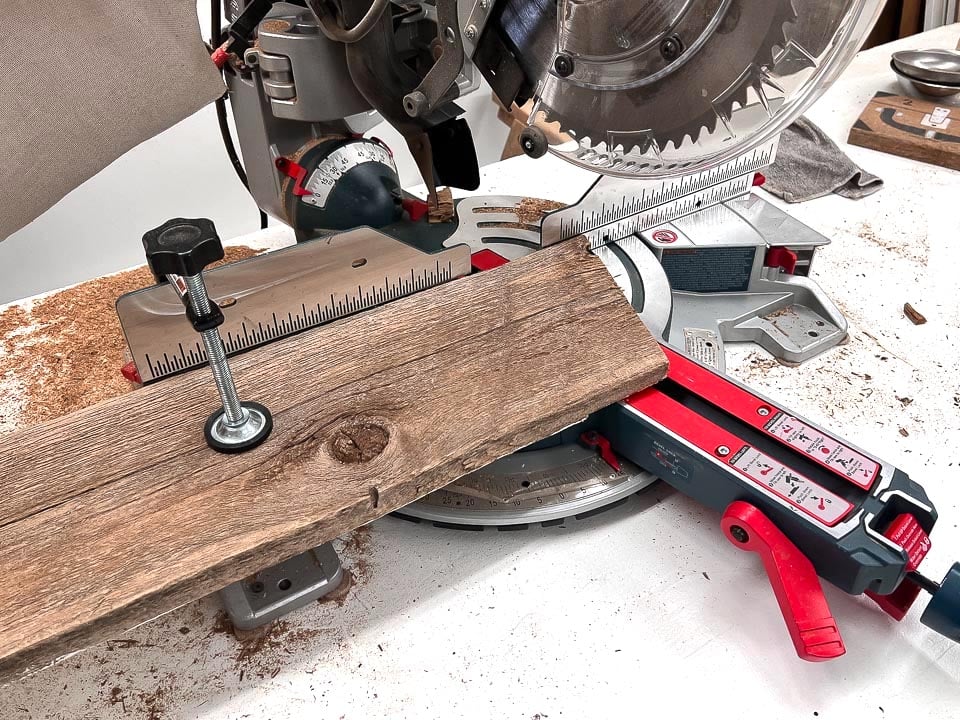
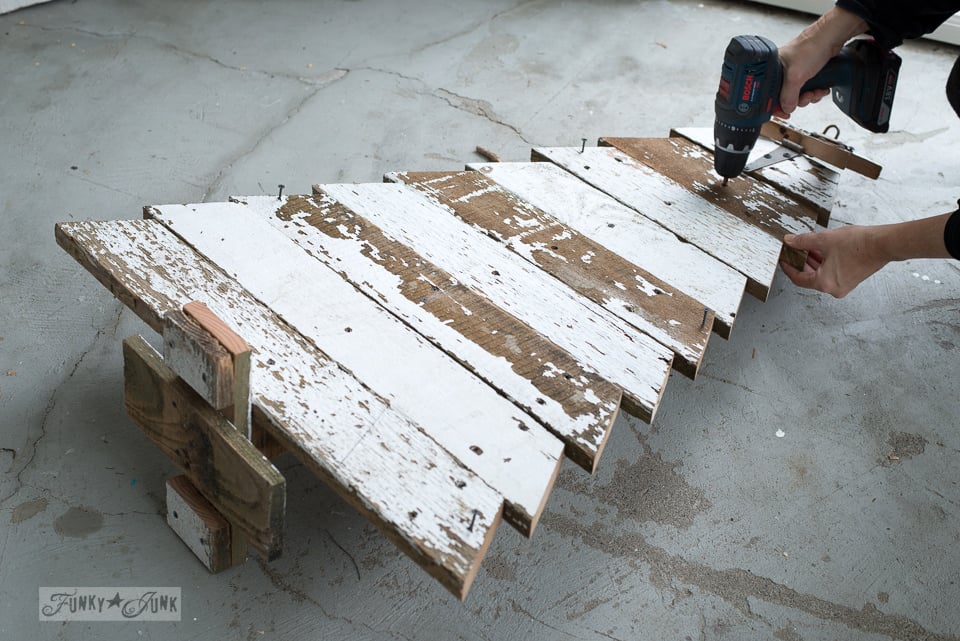
Cutting the boards into wooden tree shapes
7. Cut the tree shapes using a mitre saw.
- Set the mitre saw at a 15 degree angle.
- Cut the board.
- Flip the board over.
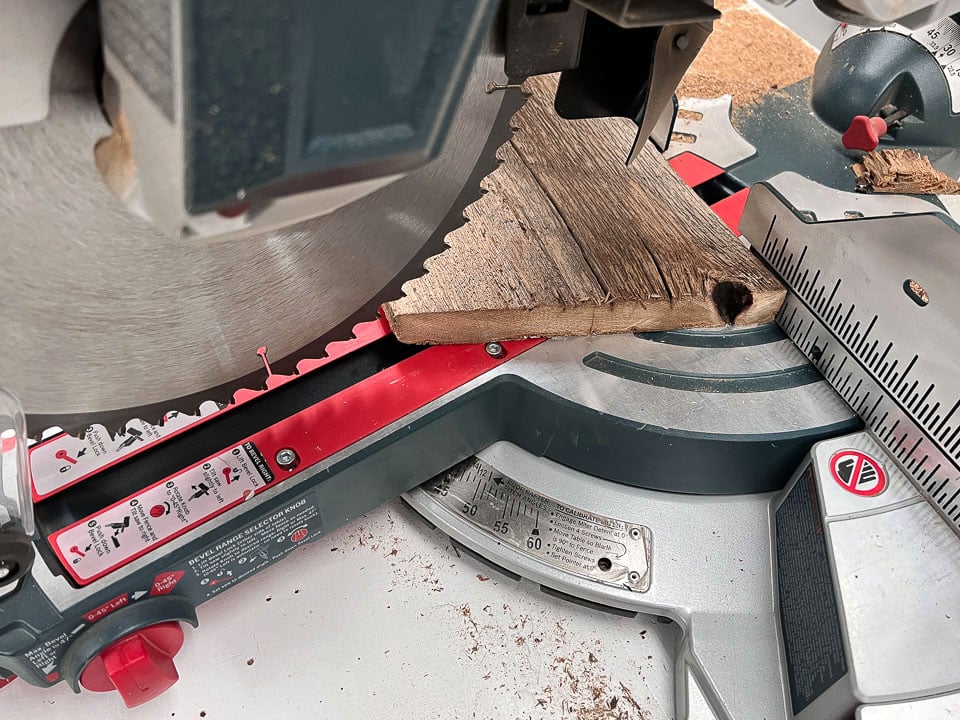
Position the blade against the nearest last cut of the board, then cut again, resulting in a triangle.
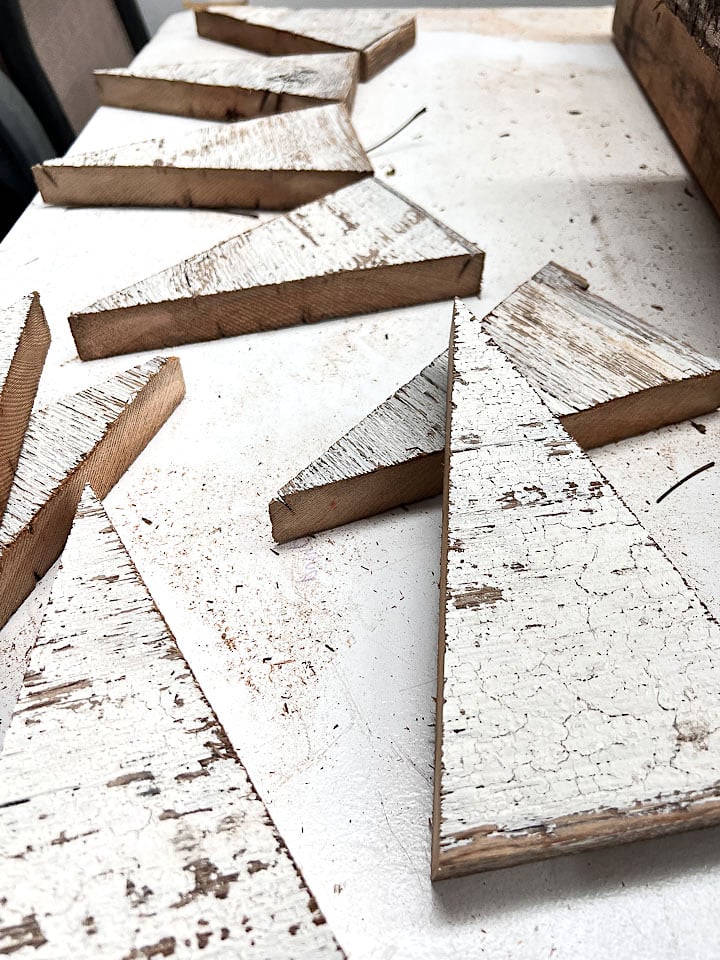
Repeat the cutting pattern until you have all the trees desired.
The finished cut triangles measure: 7.5″high x 4″ wide.
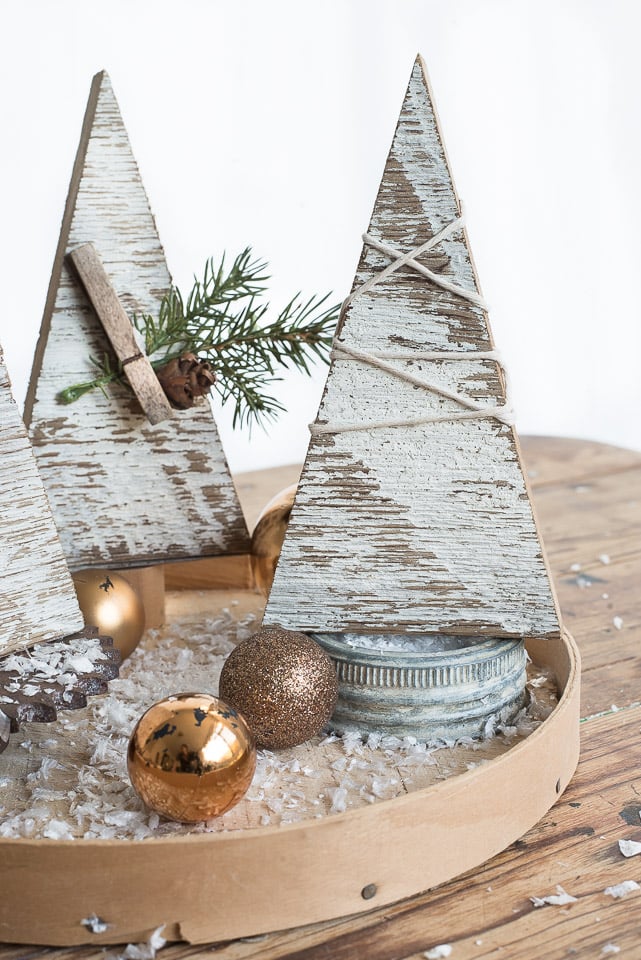
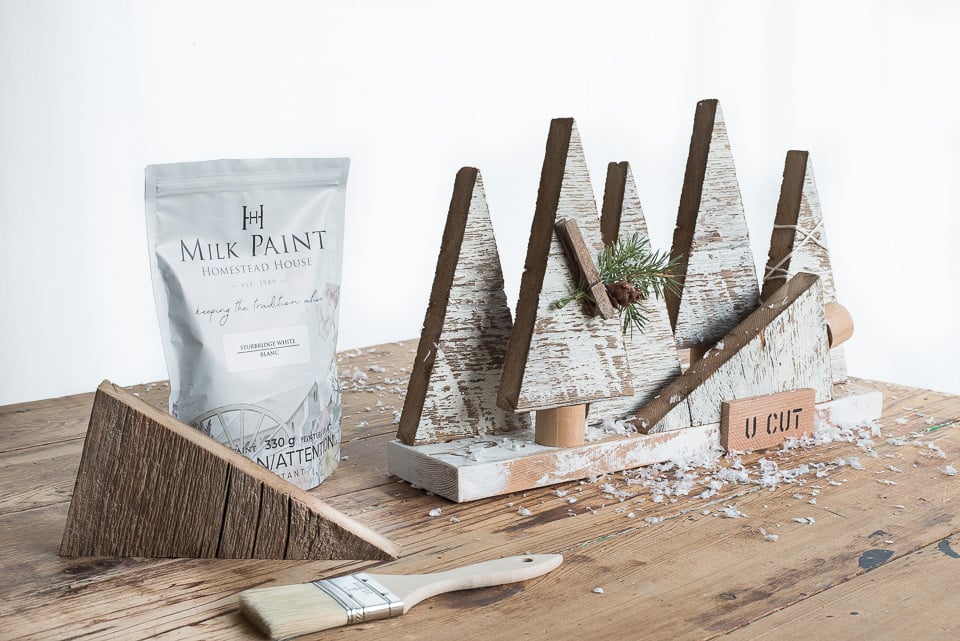
Aren’t they the cutest?! You can decorate with the trees as-is, or here are some other design ideas to make them extra special.
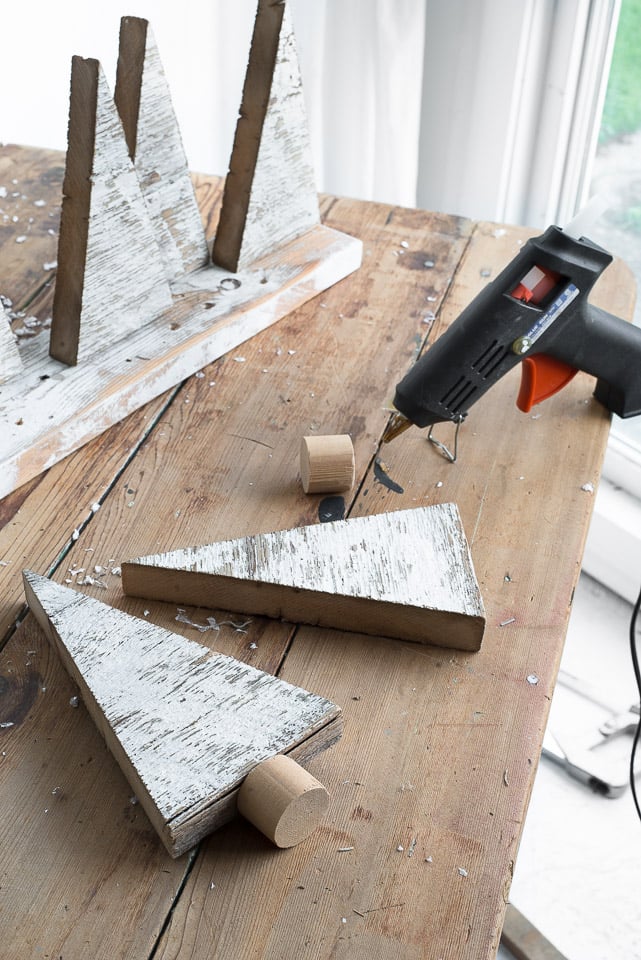
Wood Christmas Trees
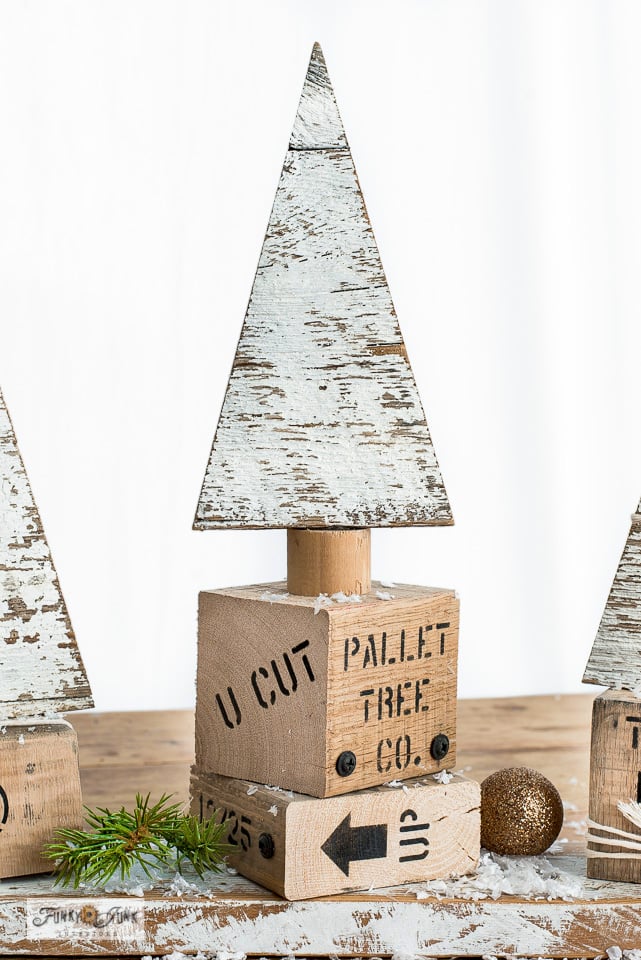
8. Using a mitre saw, cut a wood closet pole into a smaller piece to become the trunk of the tree.
- Try several different lengths to add varying heights to your trees.
- Hot glue the trunks to some trees, while leaving some without trunks to further vary the tree heights.
Decorating the trees
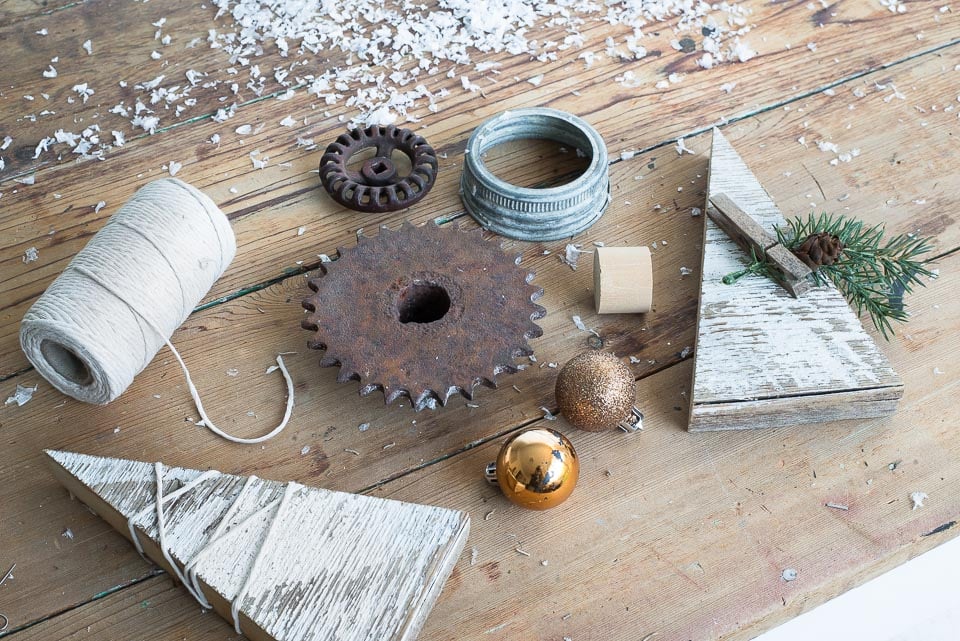
9. To decorate the trees, gather a variety of different supplies to get the look you’re after.
- string
- twine
- small pinecone
- green garland
- faux snow
- small Christmas ornaments
- mini pom poms
- fairy lights
Add string-wrap or twine:
- start string behind the tree
- wrap string around the tree several times, crossing the string over itself the odd time
- end at the back
- tie or glue in place
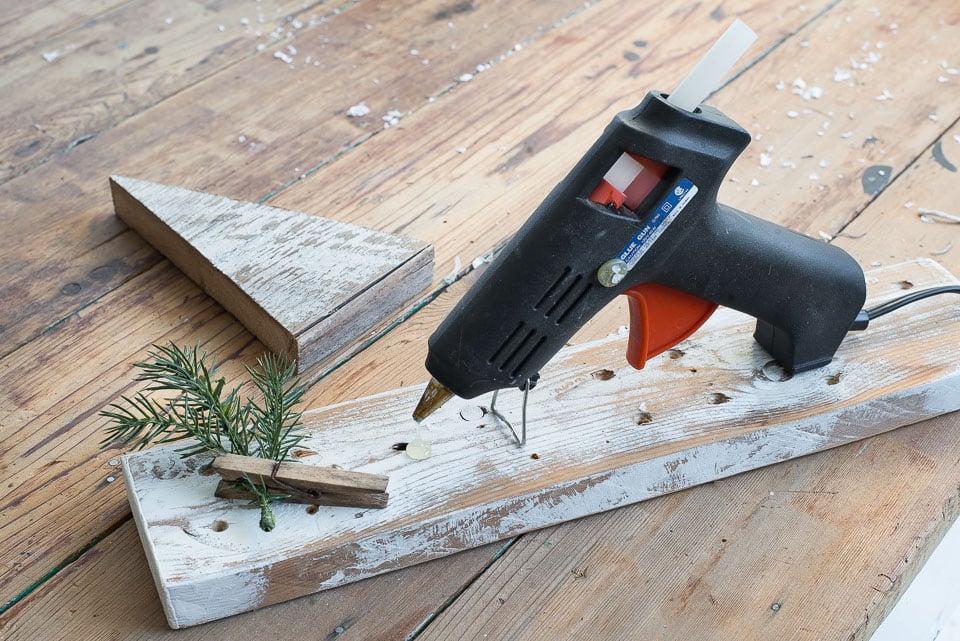
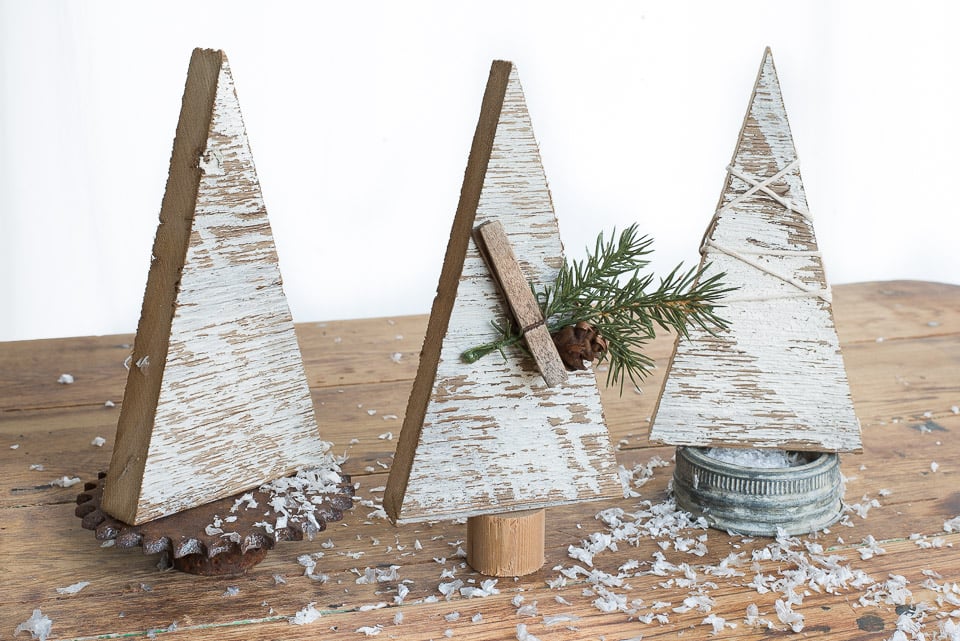
Glue on clothes pins to hold decorations
Using hot glue, stick a clothespin to a tree, then clip decorations inside. This provides an easy way to change the decorations too!
Create tree skirts for your wooden Christmas trees
10. To display the trees as simple shelf sitters, try a variety of tree bases that resemble mini Christmas tree skirts!
Shown above: a rusty gear, closet pole tree trunk, mason jar rim.
Then display them separately or grouped together.
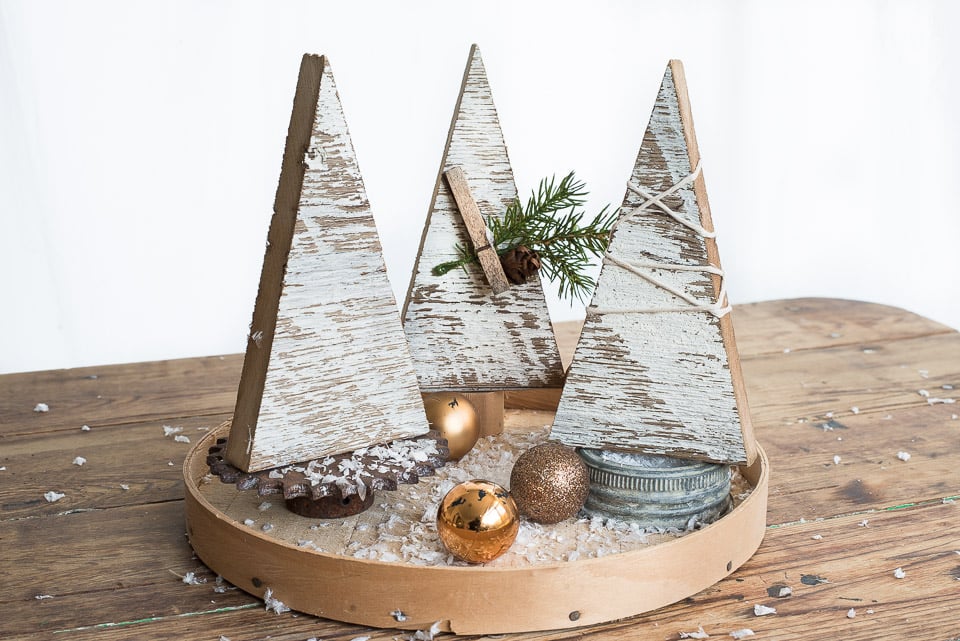
Group together on different platforms
11. For a larger impact, group the trees and place on some kind of platform.
Here a cheese crate lid was used as a base, making this little trio of trees easy to move and carry some faux snow along for the ride!
A serving tray would also work wonderfully.
Display in a mini crate
12. Shop for a dollar store crate to group your trees.
Dollar stores are well known for their affordable wood crafting products. I like to collect the crates since they can hold most anything, and happened to have the perfect size to group a couple of trees.
Since the wood tone is generally very light, two products were used to cover the original finish, giving a wonderful tone-on-tone neutral effect.
Painting dollar store wood for a neutral look
- Mix up a small batch of Silhouette Milk Paint to a 50 % water and 50% powder ratio.
- Paint the crate.
- Wipe back the paint to reveal some wood grain showing through.
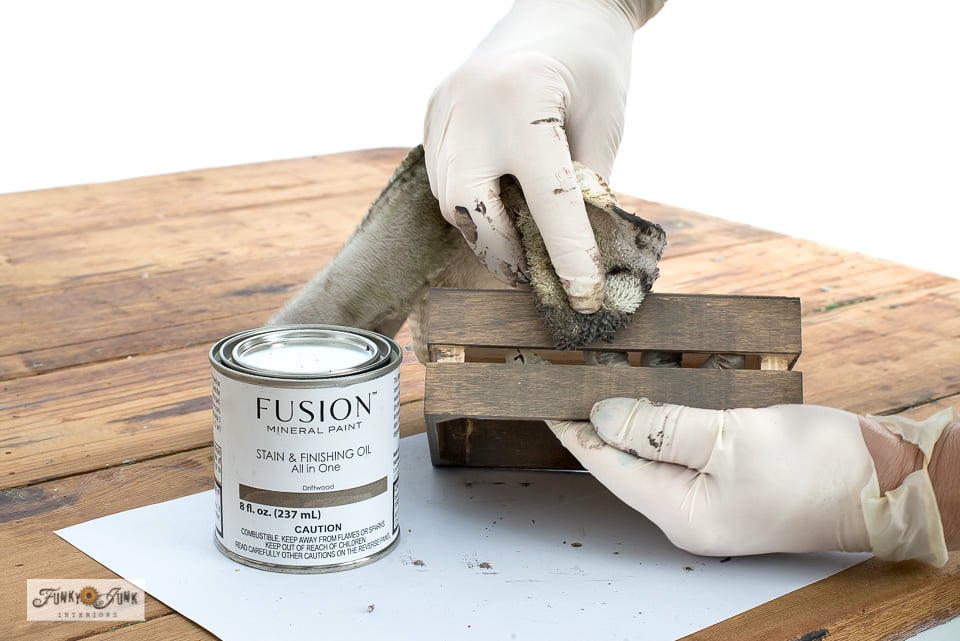
- Apply a coat of Stain and Finishing Oil in Driftwood.
- Wipe back the excess.
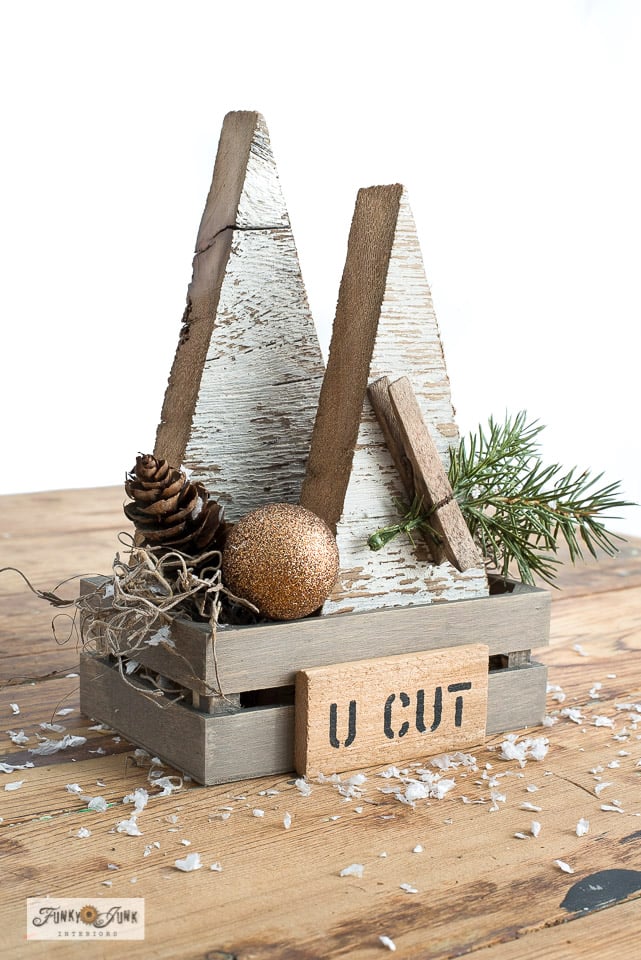
The layers of paint and stain created the exact look desired, which makes the cutest way to bundle up a couple of trees or give them as gifts!
Then an added mini U CUT sign was created to further the tree display story.
More details on how to easily copy the sign are at the bottom of the post.
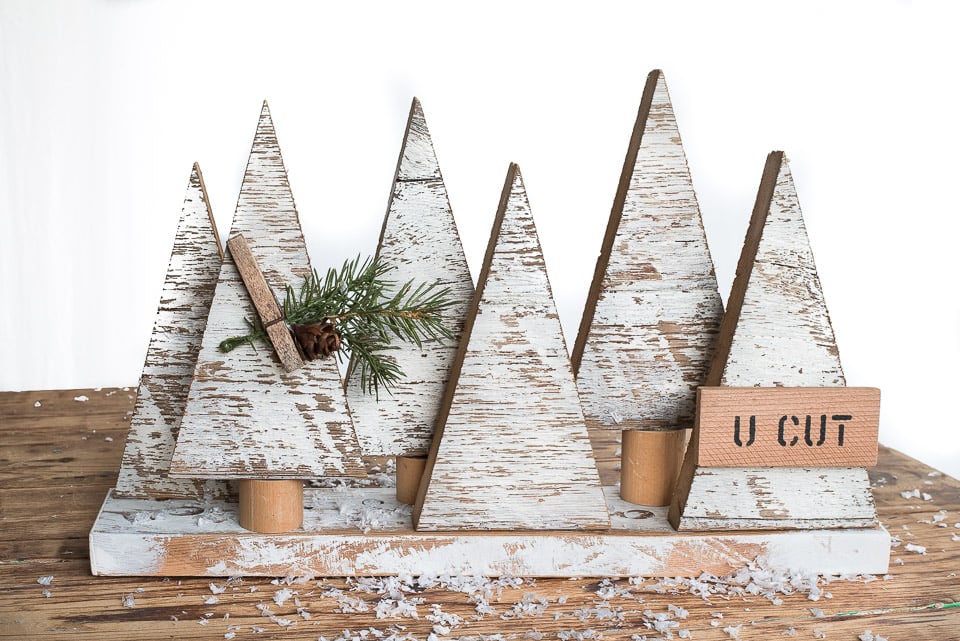
Display wood Christmas trees on a plank
Want even more impact? Grab an extra plank of wood, lightly paint, then distress by sanding, creating the perfect tree platform for an entire mini tree forest… or is this a Christmas tree farm? You get to choose!
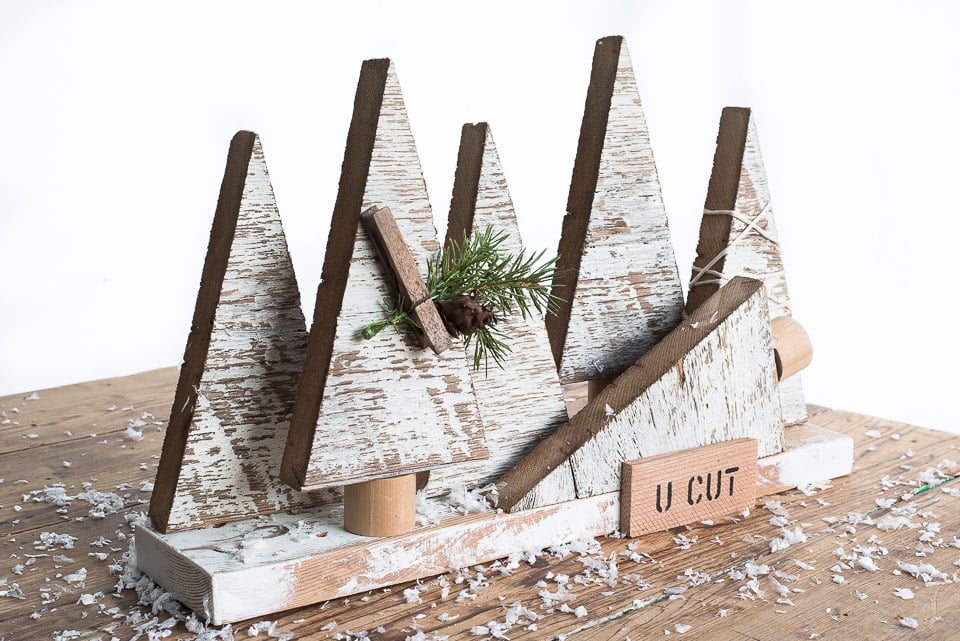
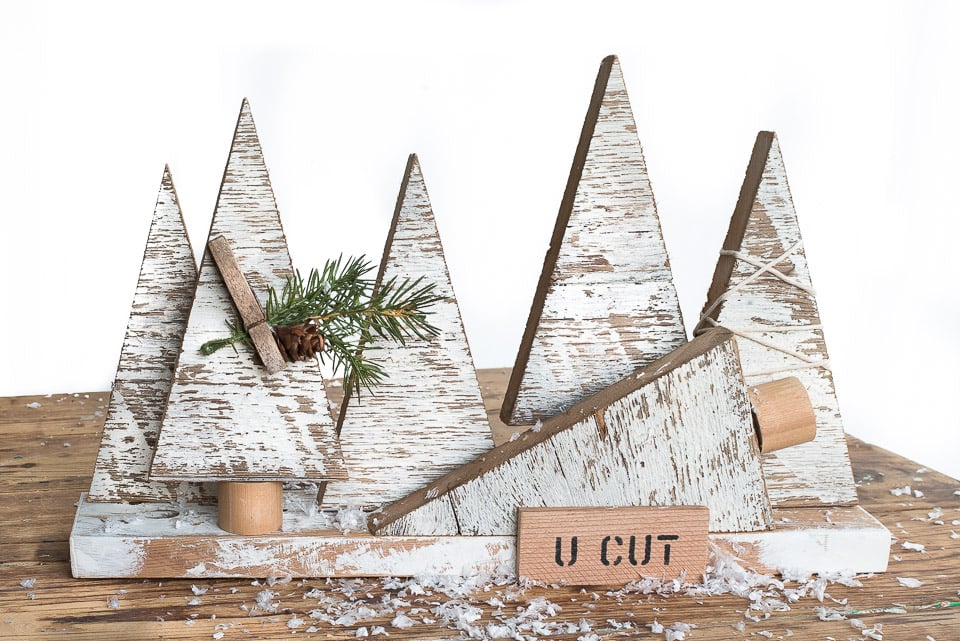
For added quirk, how about tipping one tree over that’s been ‘freshly cut?’
The trees can sit on the plank loose or be glued into place.
As you can see, the benefits of creating your own chippy white paint patina is so valuable for any future project idea!
Plus, this round, you now have the cutest rustic Christmas trees that can take you well into winter decorating too!
However, there’s one more super unique way to display these trees that will chime in with a truly rustic Christmas…
Imagine stacked wood blocks becoming the cutest pallet wood Christmas tree skirts… along with other unique ways to decorate the trees, and make mini signs… Read more about that in Donna's blog post!
Thanks to Donna Williams at Funky Junk Interiors for this blog post. We are so lucky to have her as part of our Fusionista! Donna has a passion for creating unique home decor from repurposed finds. You can follow her on Facebook and Instagram as well as check out her website for inspiration, repurposed finds & stencils. See more of Donna’s ingenious DIY’s here