
Heirlooms and antique furniture can seem pretty intimidating to refinish. There is always that internal struggle to preserve the character of the piece and its sentiment, but on the other hand, it goes with absolutely NOTHING in your home. What if we told you there was a way to do both? Many small changes can be made to modernize your furniture, all you have to do is get a little creative. Here is a before-shot of a classy pine dresser we picked up on Facebook Marketplace. The bones of the piece are lovely, but it’s coated in a very old whitewash that has yellowed.

Below is a list of supplies you will need for a similar project to modernize old furniture:
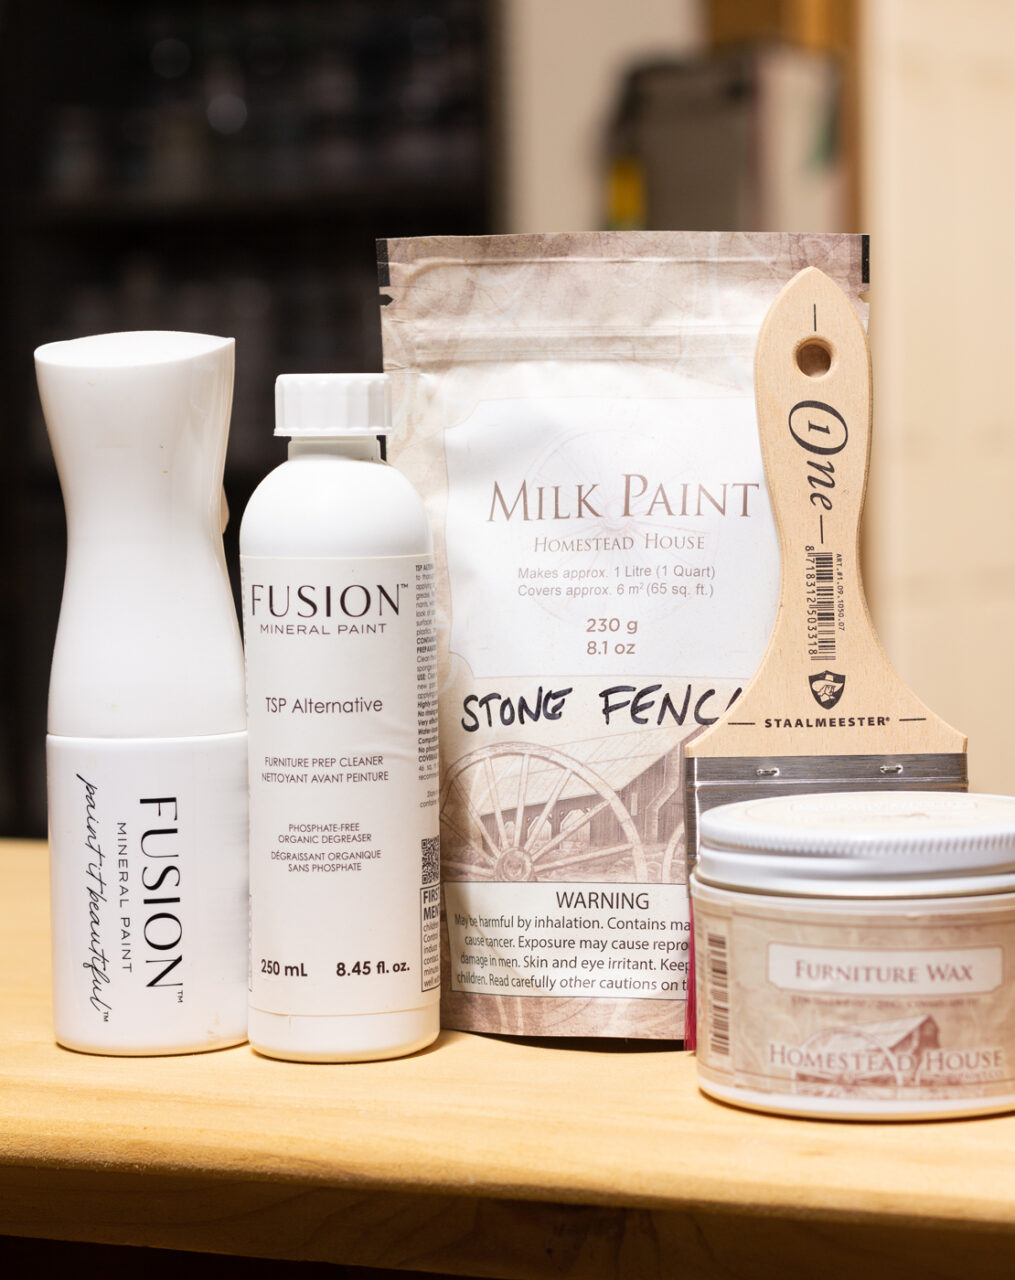
- Fusion TSP Alternative & Wiping Cloths
- Orbital Sander and Sandpaper (80-220 grits)
- Painter’s Tape
- Clear Coat Sealer
- Homestead House “Stone Fence” Milk Paint
- Furniture Wax – Clear
- Fusion Liming Wax
- Staalmeester Flat Ultimate ONE Synthetic Brush
Event though this piece looks to be in pretty good shape, it definitely had loads of grime and dirt all over it. We knew that in order to have a really good finish we had to give it a deep cleaning. First, we vacuumed all the loose dirt and debris. Then we made a 50/50 solution of Fusion TSP Alternative and water and gave the surface a heavy saturation. You can use a sponge to wipe down the surface and loosen and grease. Then we used absorbent wiping cloths to wipe down the surface. We did end up cleaning this piece twice just to make sure it was ready for the next step.
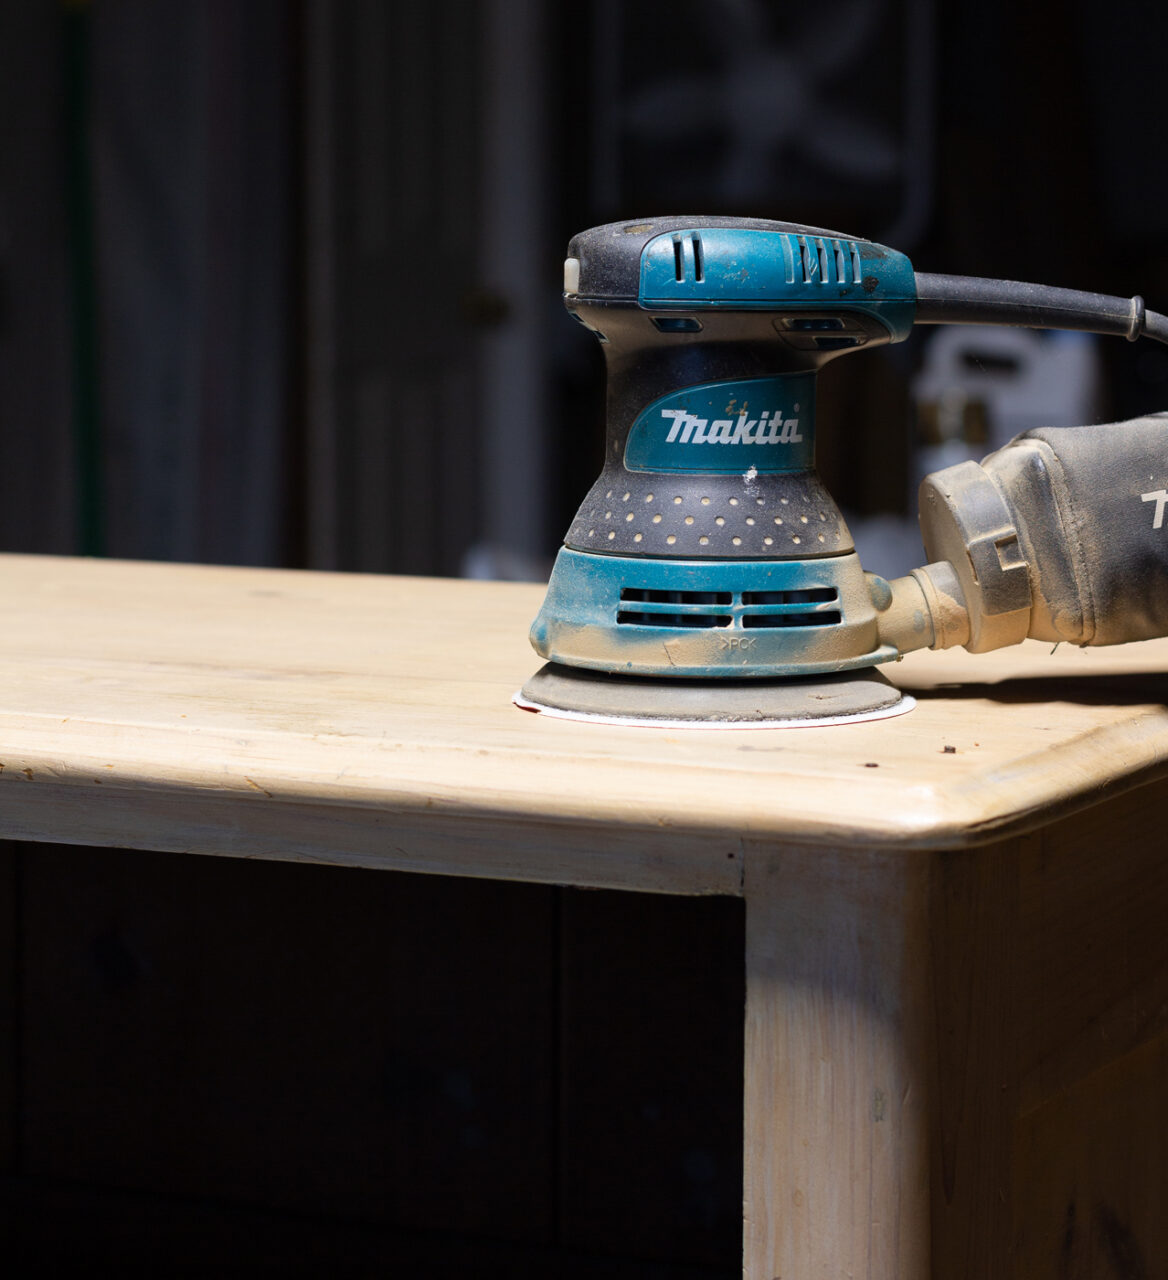
We knew from the beginning that the original yellow whitewash had to go. The only way to truly eliminate a “Stain” is to strip or sand it off. Since it was already flaky in some spots, we opted to sand. We started by using an 80 grit paper to completely remove the finish. 80 grit paper can be a bit rough so you definitely want to work your way up to smoother grits. Pine is a soft wood and we knew that 220 grit paper would be the perfect way to finish the surface. You will want to clean up any sanding dust with a vacuum and a wet cloth.
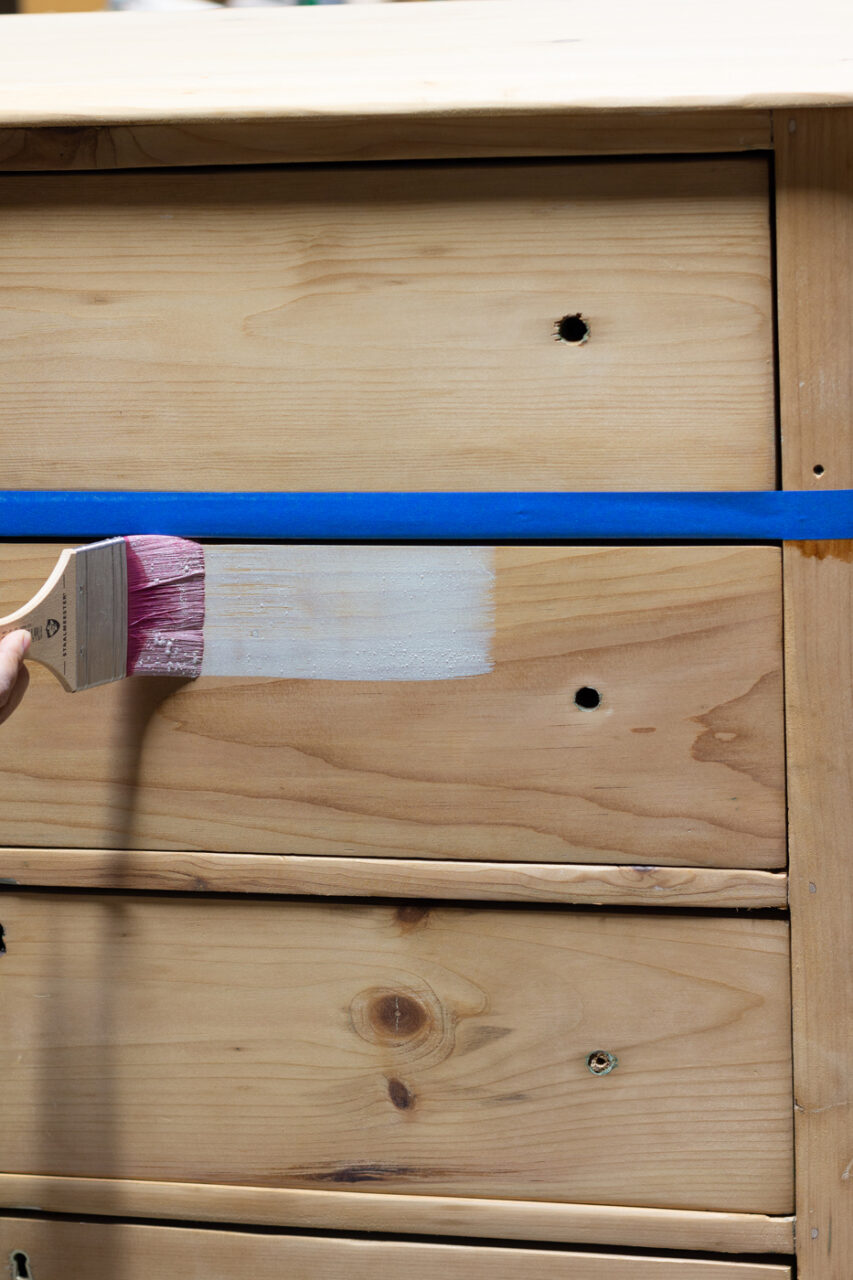
Now you are ready for the creative part. The great thing about modernizing your furniture is how creative you can be for your space. You can choose to make your furniture piece a standout statement or have it blend in to your décor with a classic finish. This piece definitely needed a fun element to it so we decided to do a colour block. A colour block is simply what it sounds like…making a block of colour. We used delicate painter’s tape to draw a simple line around our furniture.
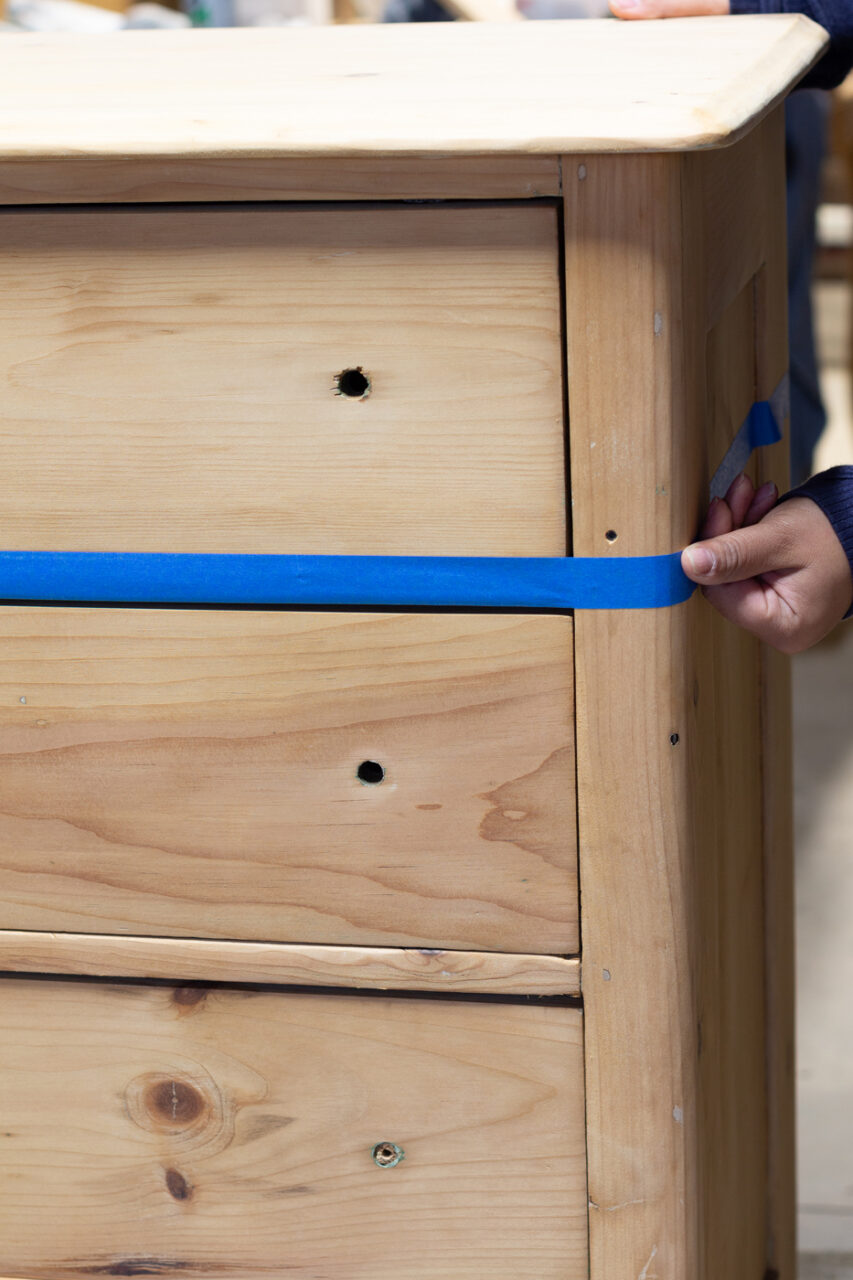
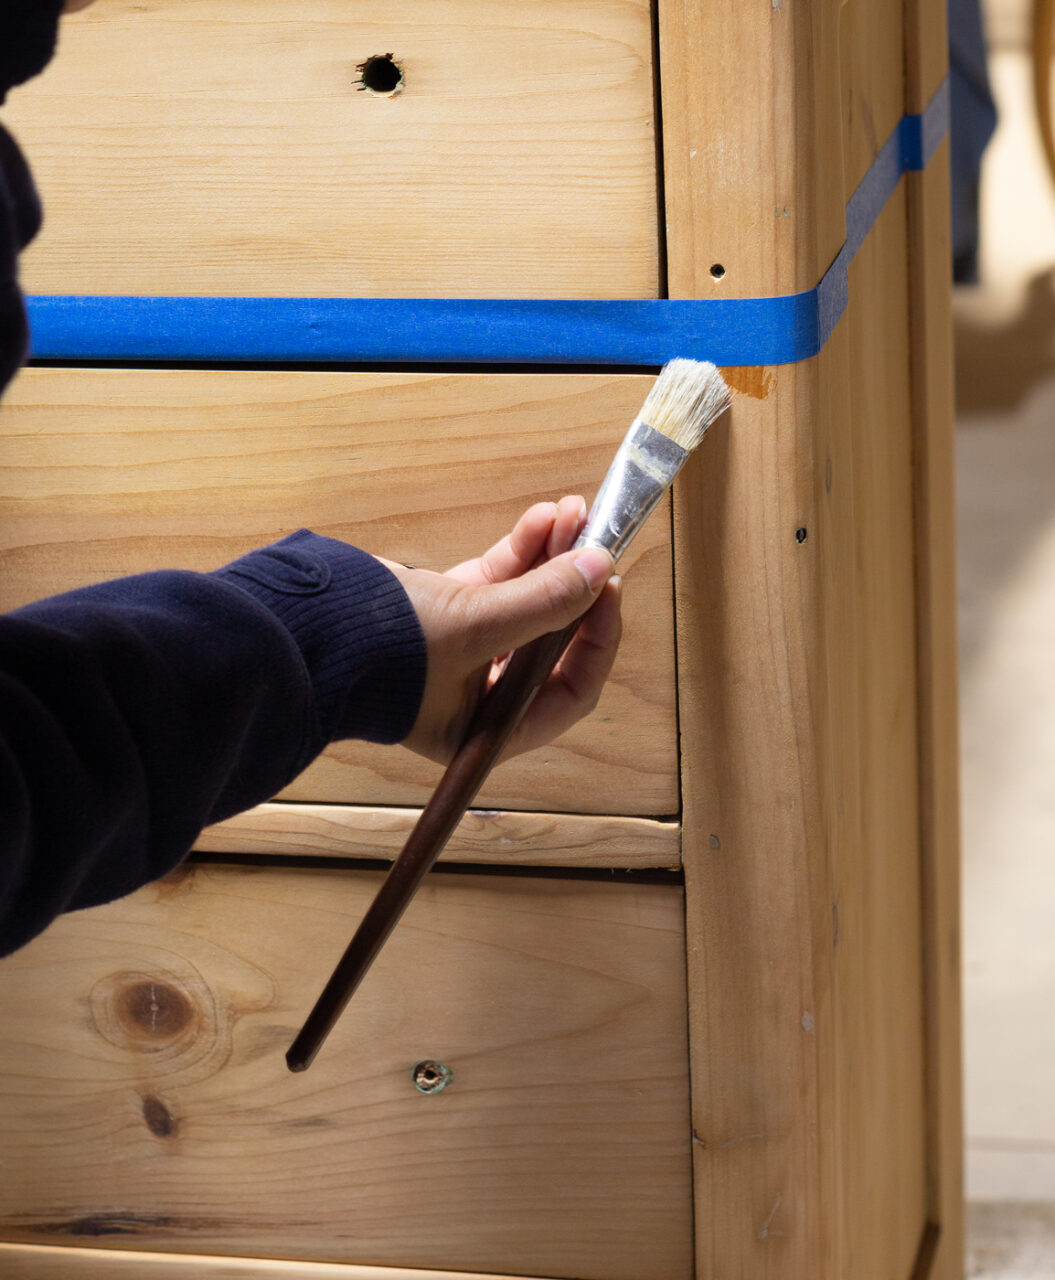
We made every effort to ensure there were no air bubbles in the tape, but sometimes you must take the extra step to prevent your paint from bleeding underneath the tape. So, we took a few drops of clear coat to seal the edge of the tape. This prevents your paint from bleeding through the crevices and bubbles. What you will see when you remove the tape is a clean crisp line because any bleed-through is camouflaged by the clear coat.
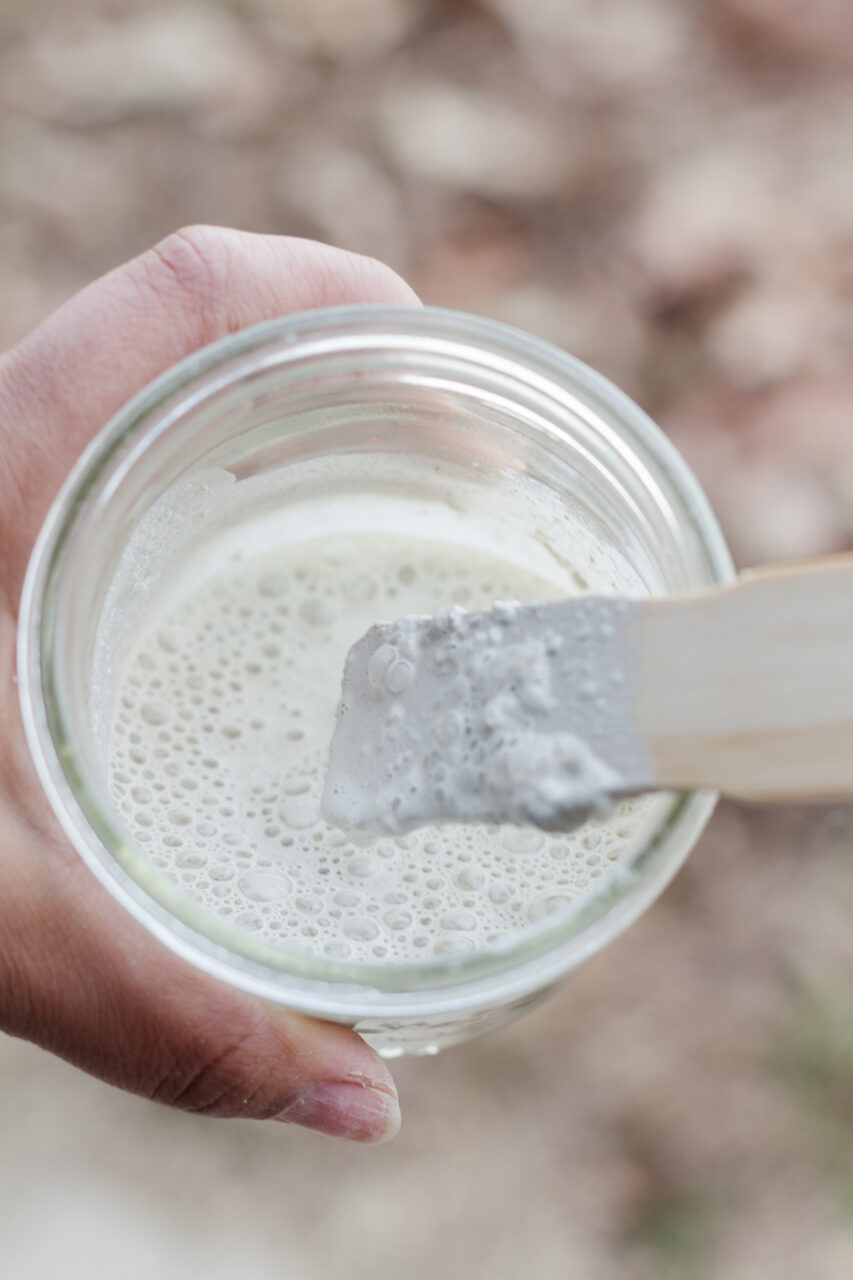
Next, we mixed up a 50/50 ratio of milk paint to room temp water. We used a stir stick to break up the pigments and after a good mixing, we let the paint sit and thicken for 15 minutes. This isn’t necessary, but it gives time for the pigments to break down as well as finish up any last-minute prep.
Our first coat went on smoothly. We did notice that because we painted over a bare surface the wood absorbed nearly all of our first coat. It almost appears we had our whitewash back.
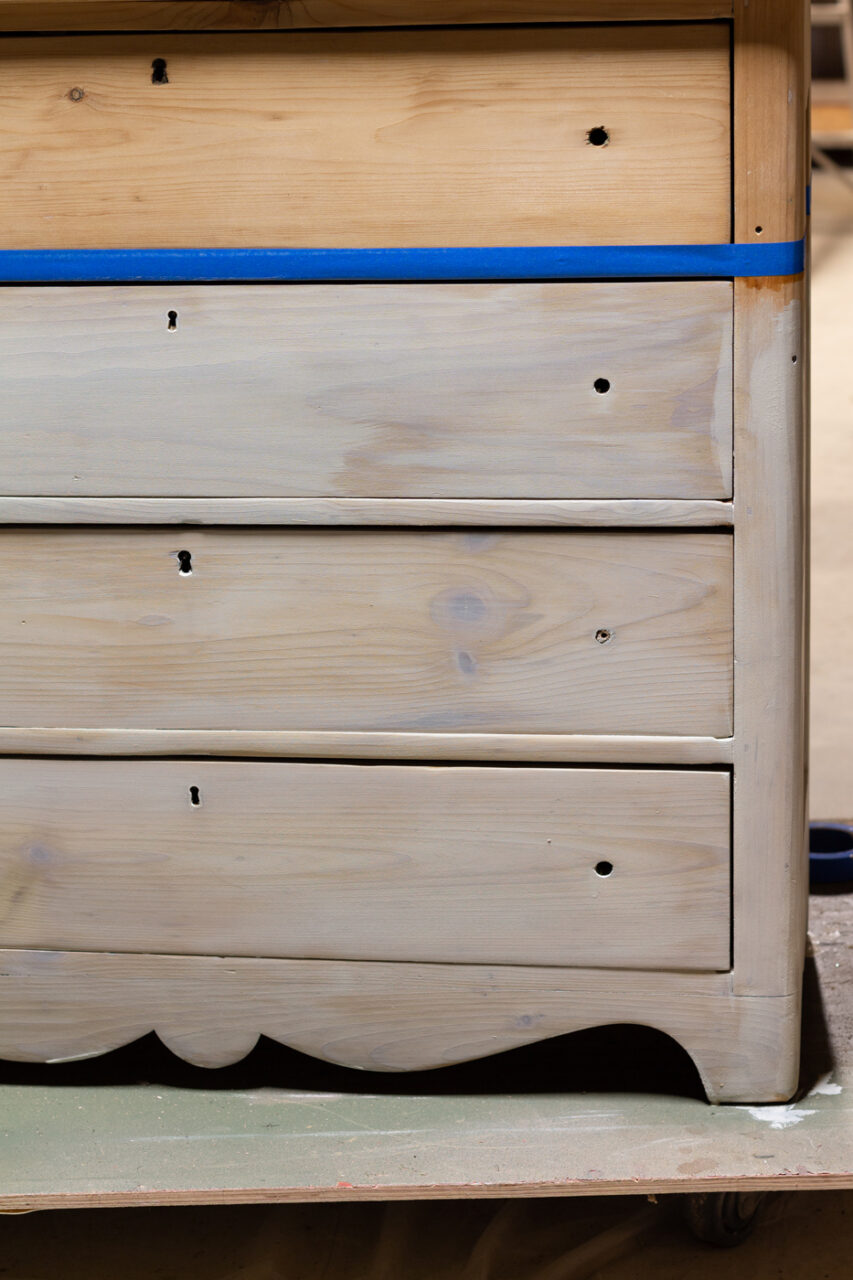
Our second coat gave us a much more opaque coverage.
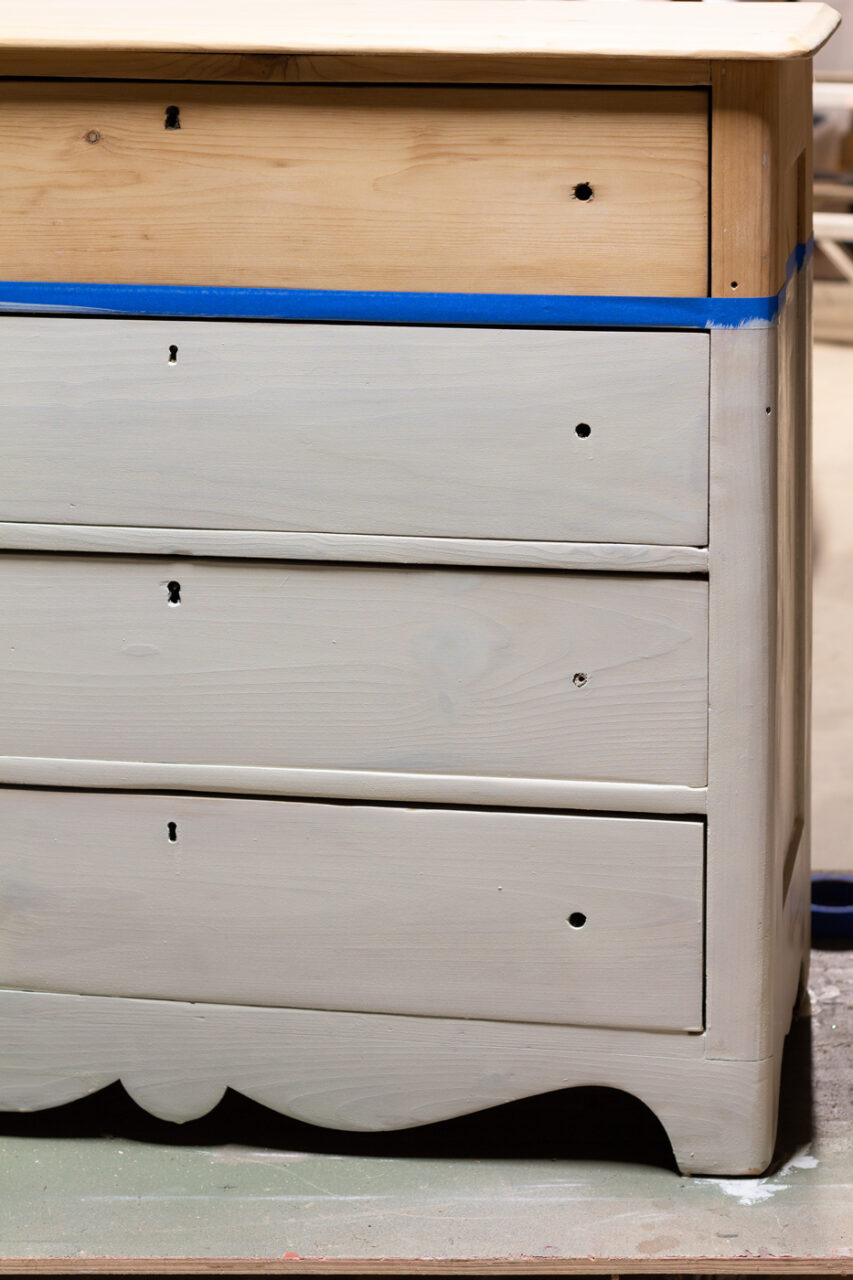
We finally finished with full coverage at three coats.
After your final coat, you want to peel back the tape while your paint is still wet. This will allow you to clean any bleed-through (if it occurs) as well as prevent chipping with the tape removed. It is truly satisfying to peel the tape away and see the crisp line.
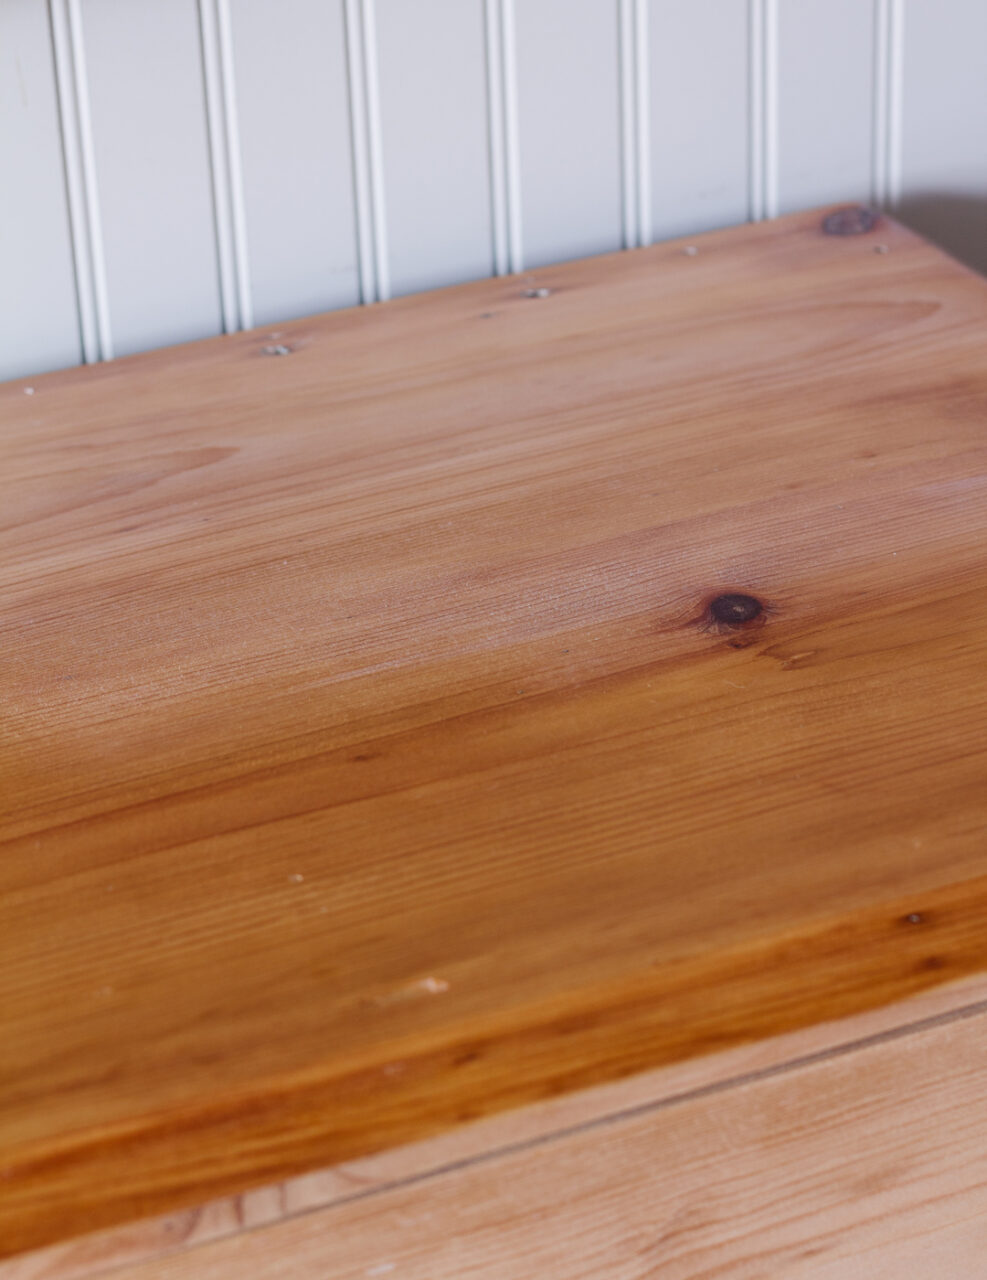
Next, we decided to seal our piece with wax. We didn’t want to risk the natural wood part of the dresser changing colour so we brought in two waxes to provide some protection. First, we set a base of clear wax over the entire piece. Once it dries to a haze, you can buff out with a link free cloth.
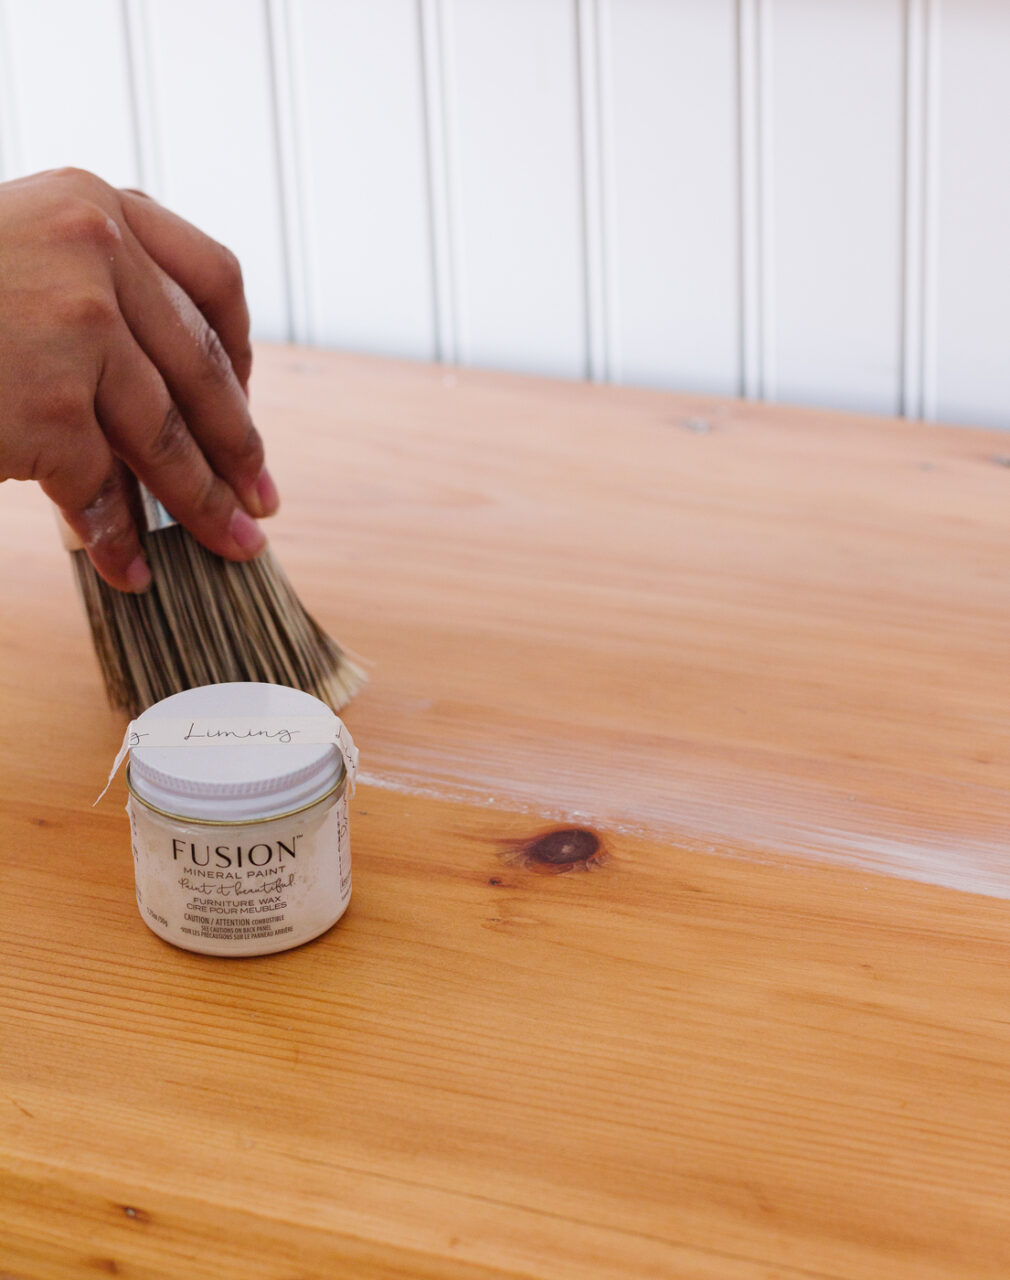
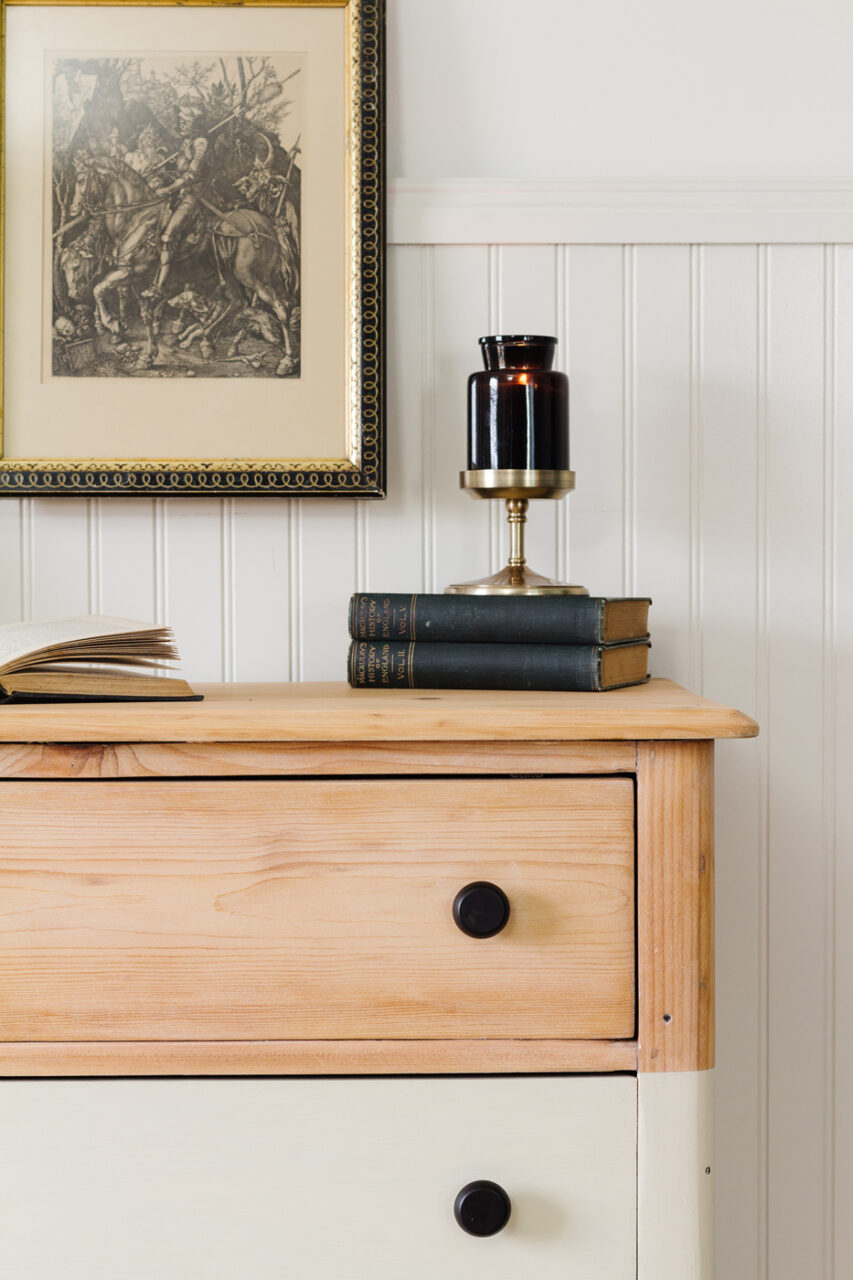
Next we added a layer of Fusion’s Liming Wax over the natural wood portion. We wanted to cancel out some of the orange and yellow tones of the wood and this helped to bring back the raw look we wanted to keep.
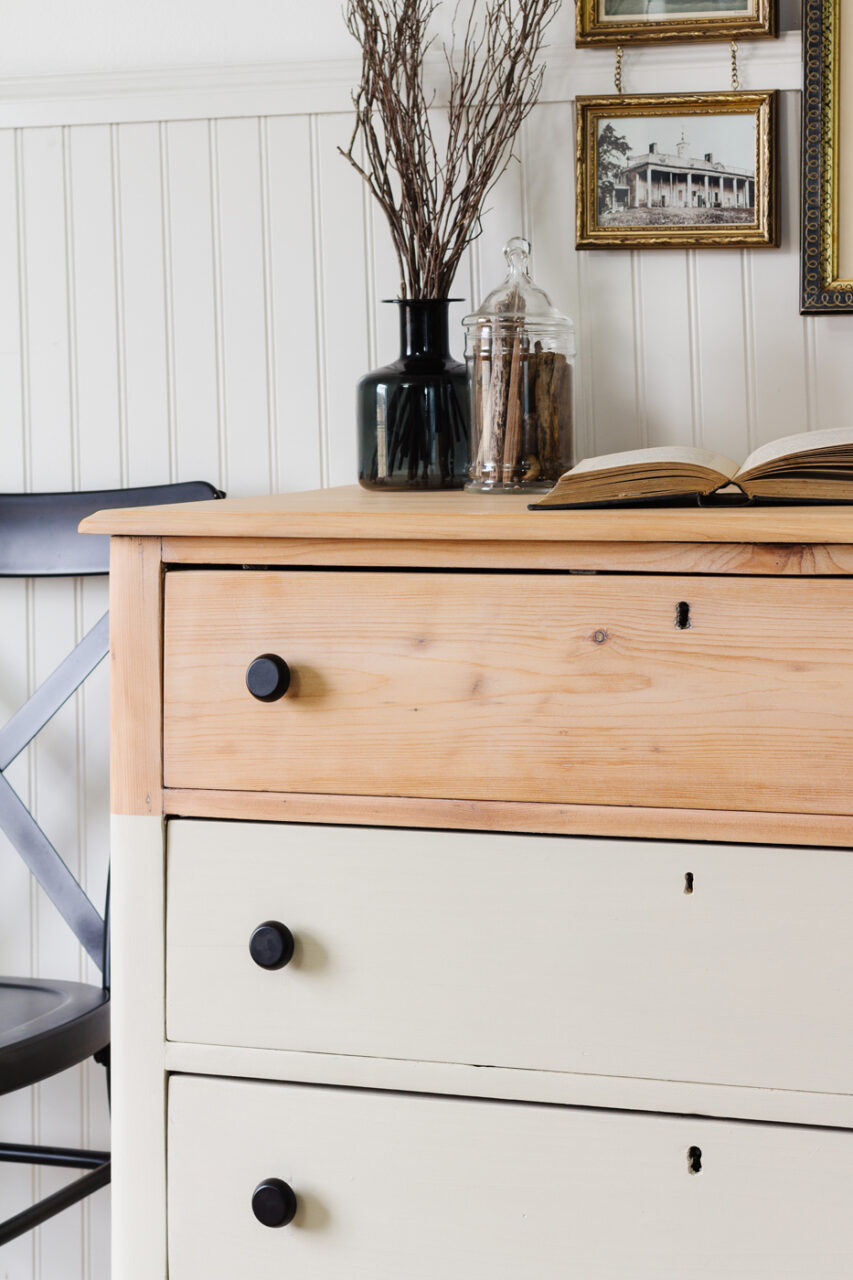
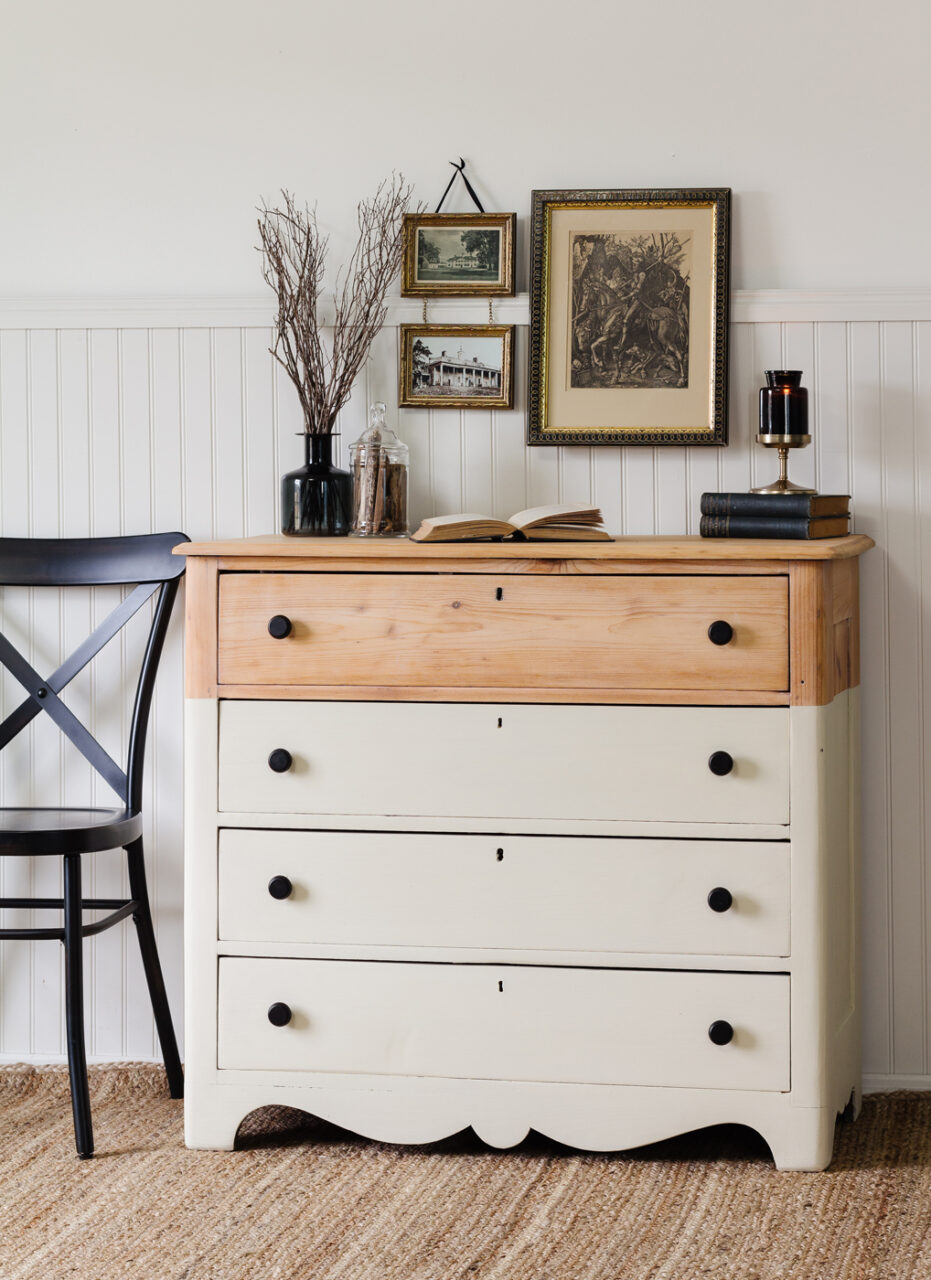
Once you add in some contrasting hardware, you have a totally refinished antique piece that looks like it’s right out of a magazine.
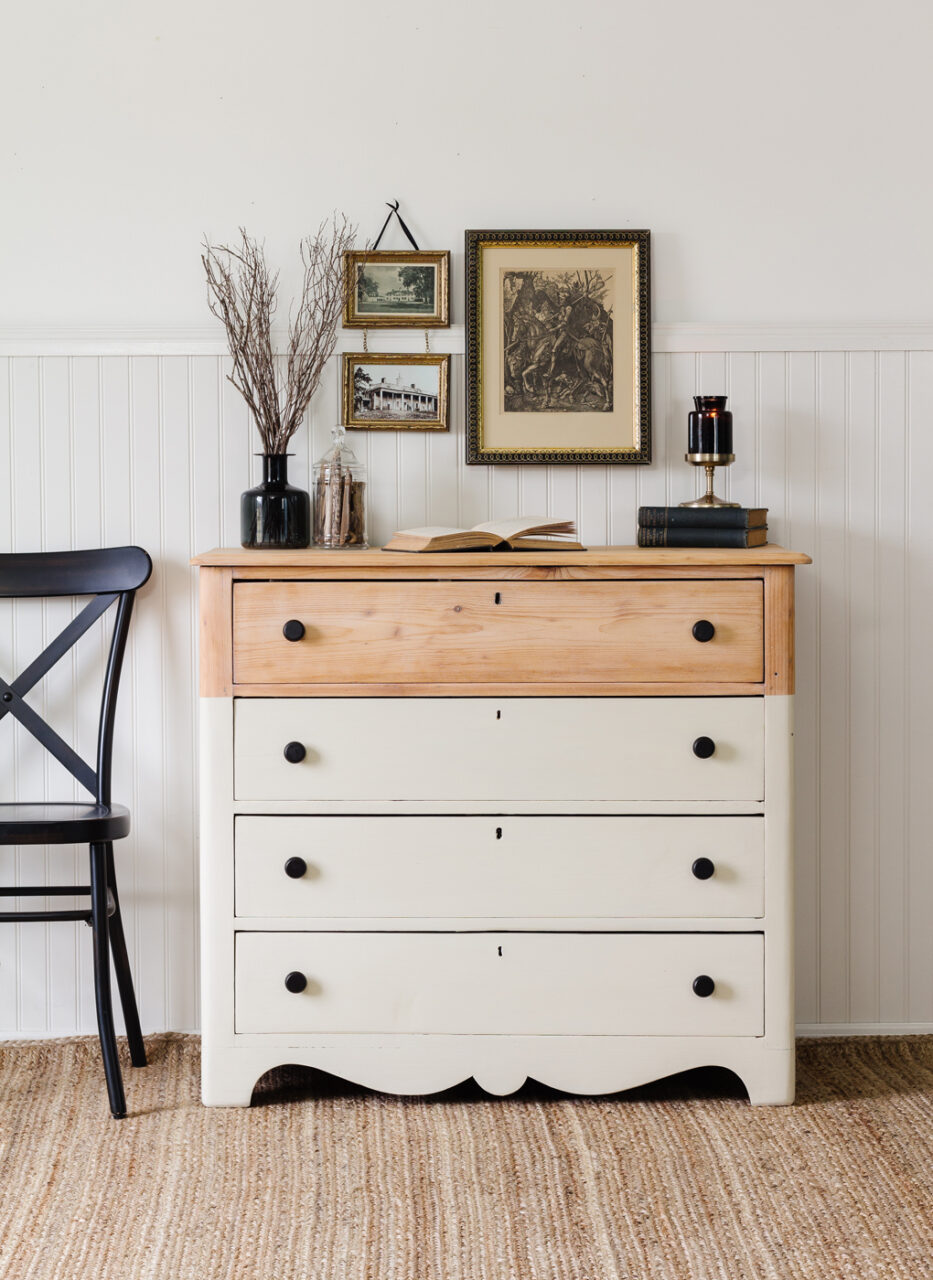
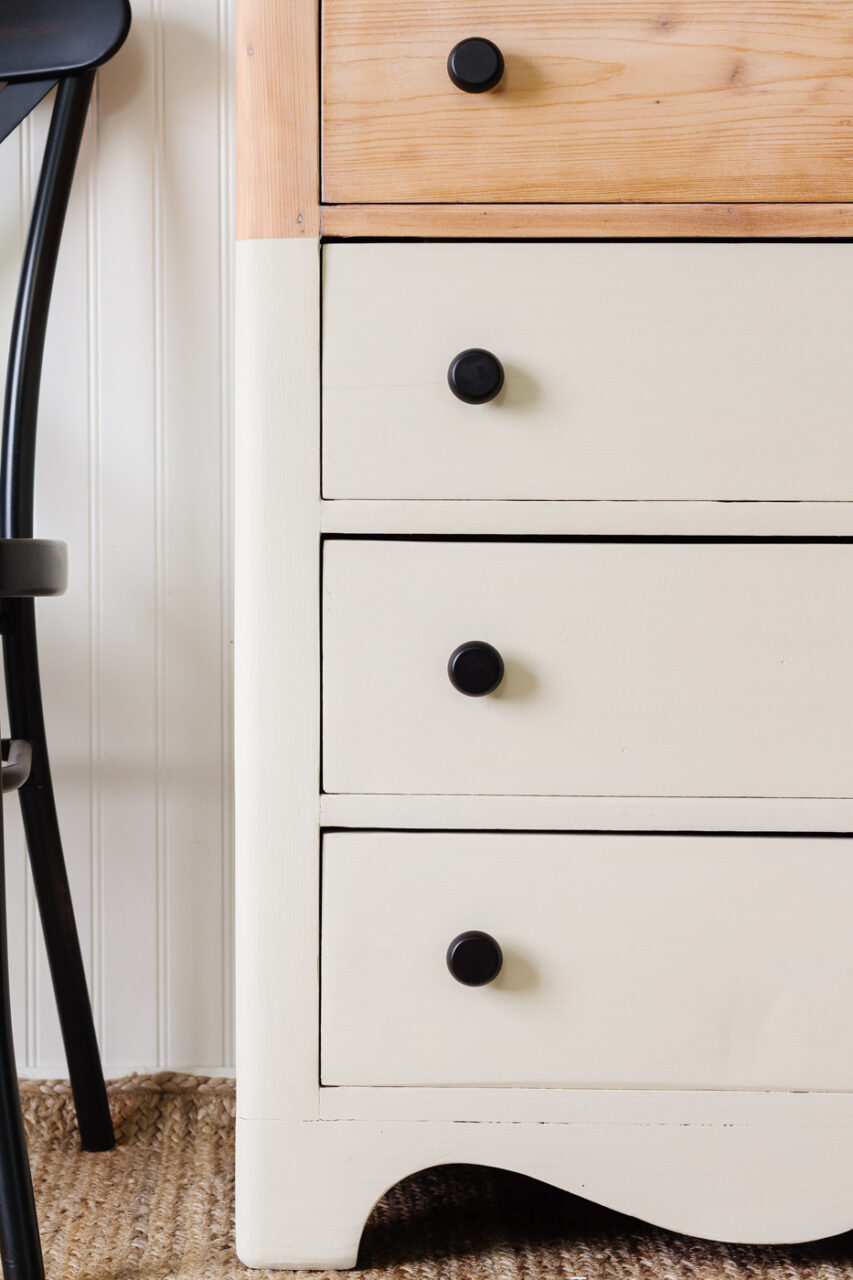
The thing we love the most about this makeover is the different elements this piece brings to the table. Not only does it have a modern graphic to it but it also brings a rustic texture to the wood. The modern black hardware is simple, yet stands out against its lighter background.
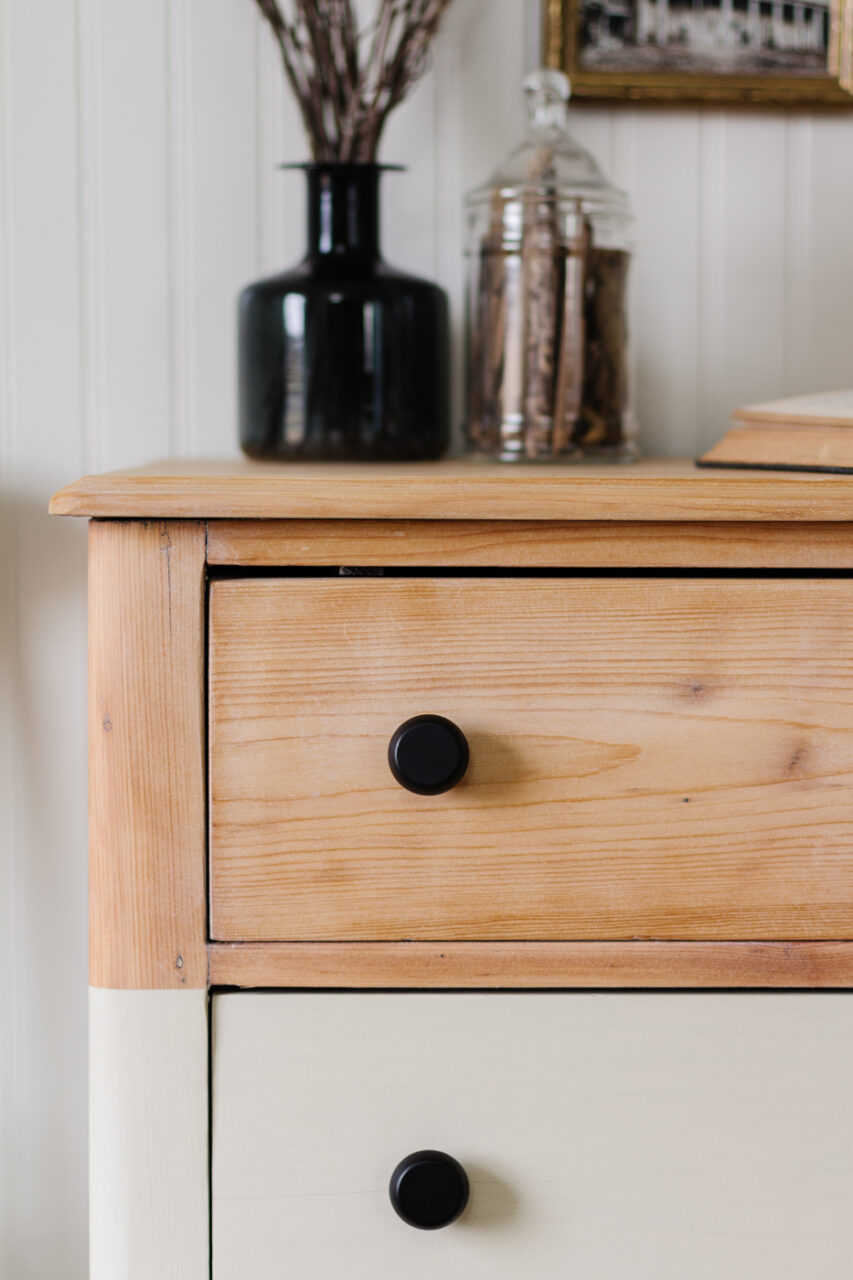
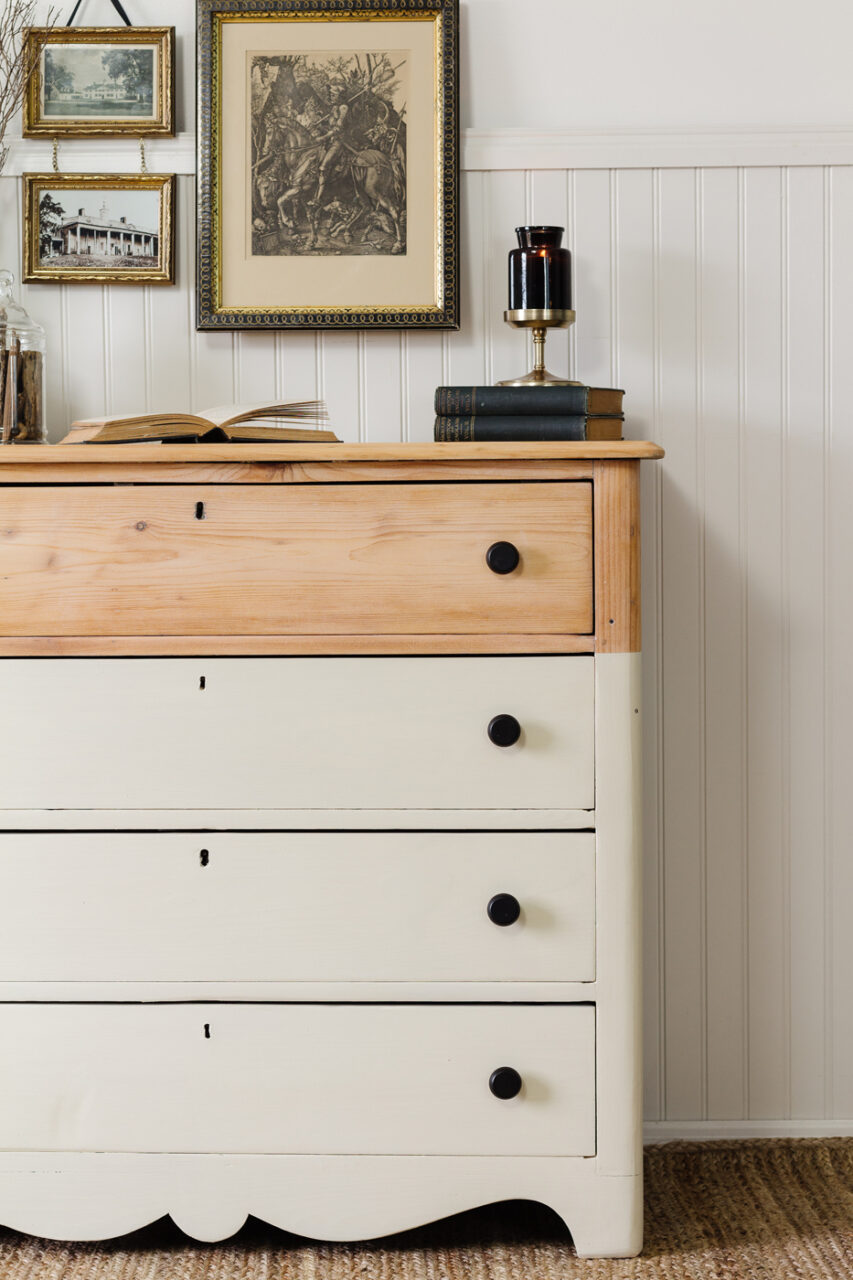
We opted for a smoother finish on this piece, meaning we did not accent with distressing. Rather, we let the wood speak for itself. Even through the opaque paint finish, you can still clearly see the wood grain peeking through.
When it comes to preserving the raw look and providing some protection at the same time, the key is to find a sealer that won't seep and hydrate the wood. Fusion and Homestead House waxes are made with beeswax which offers an optimal layer of water resistance and a natural coating. Once the wax is dried, you’ll hardly believe there was a finish on it.
What a beautiful piece showing you how to modernize old furniture!

We hope this project gave you the motivation to get a little creative with your pieces and try something different. We can’t wait to see the projects you came up with to modernize your furniture.