
Refinishing furniture is a satisfying and creative way to breathe new life into old pieces, giving them a fresh look and a renewed purpose. In this blog post, we'll take you through the step-by-step process of refinishing a hutch using Homestead House Milk Paint in the beautiful "Antique Gold". This stunning paint colour adds warmth and elegance to any piece of furniture and pairs perfectly with a variety of decor styles. So, let's dive in and discover how to revamp your hutch and make it a standout piece in your home.
Gather Your Supplies
Before you begin, make sure you have all the necessary supplies:
- Hutch
- Homestead House Milk Paint in "Antique Gold"
- Staalmeester Paintbrush
- Furniture Wax "Antiquing"
- TSP Alternative
- Sandpaper (various grits)
- Painter's tape
- Drop cloths or old newspapers
- Clean rags
- Paint stirrer
Prep the Hutch
Start by removing any hardware, such as knobs or handles, from the hutch. Place them in a safe spot for later. Then, thoroughly clean the hutch using TSP Alternative to remove any dirt, grease, or dust. Sand the surface to create a slightly rough texture, which will help the paint adhere better. Afterward, wipe down the hutch again to remove any sanding residue.
Apply the Milk Paint to Revamp Your Hutch
Now it's time to start painting. Mix your milk paint with a 1:1 ratio with water and stir until all the pigments have dissolved. Then, use your favourite Staalmeester paintbrush to apply the paint evenly over the entire hutch's surface. You'll need to apply two to three coats for full coverage, allowing the paint to dry between coats.
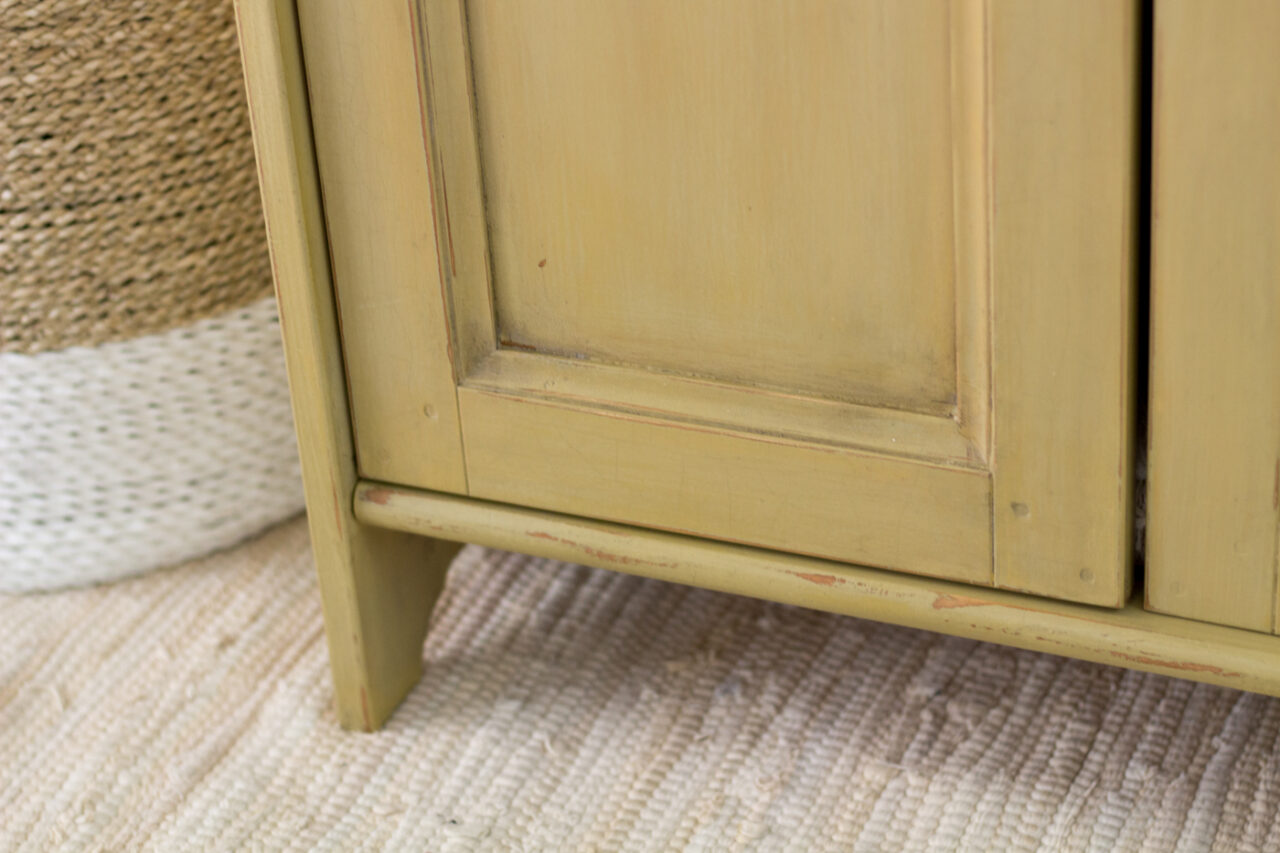
Distress for a Vintage Look
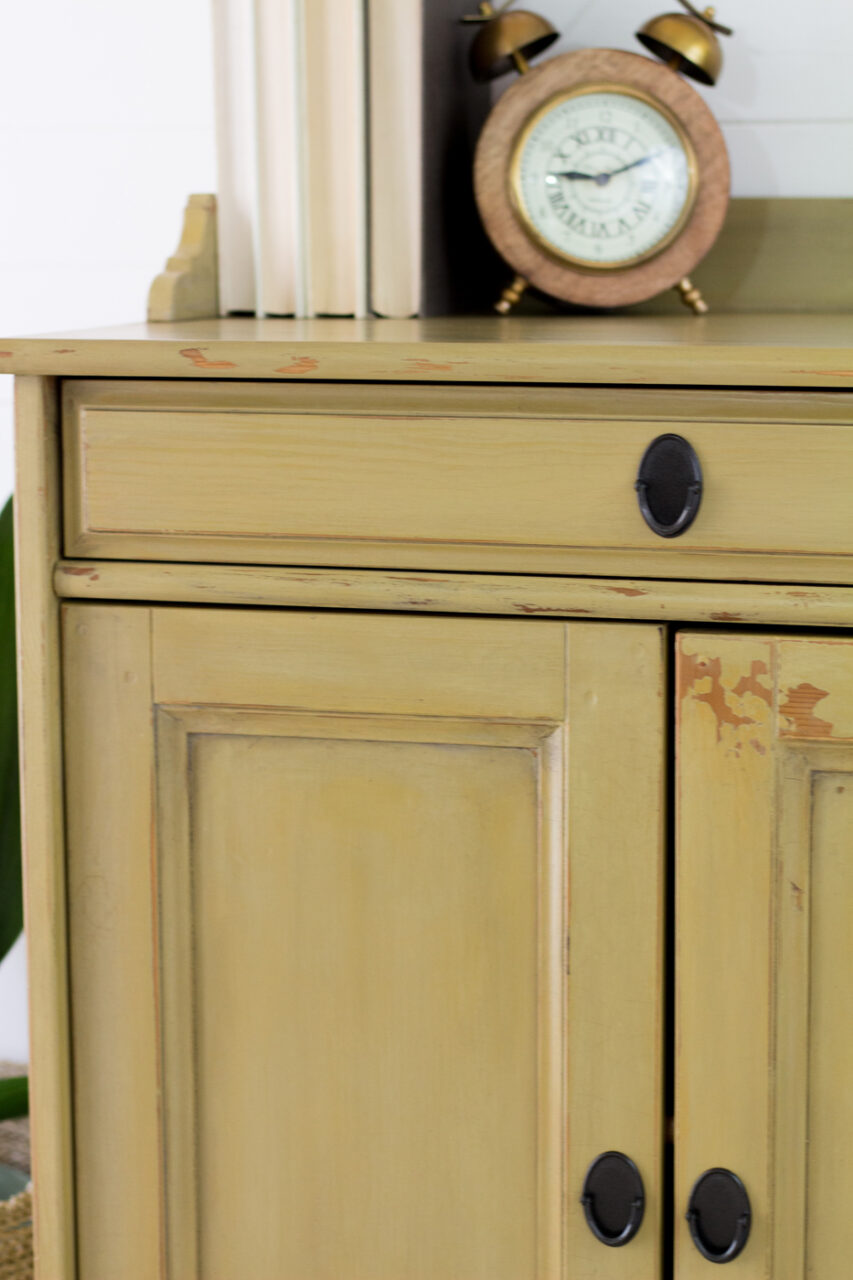
For a distressed, vintage appearance, you can lightly sand certain areas of the hutch after the paint has dried. Focus on edges, corners, and any areas that would naturally wear over time. This will give your hutch a charming, aged look.
Creating an Aged Look
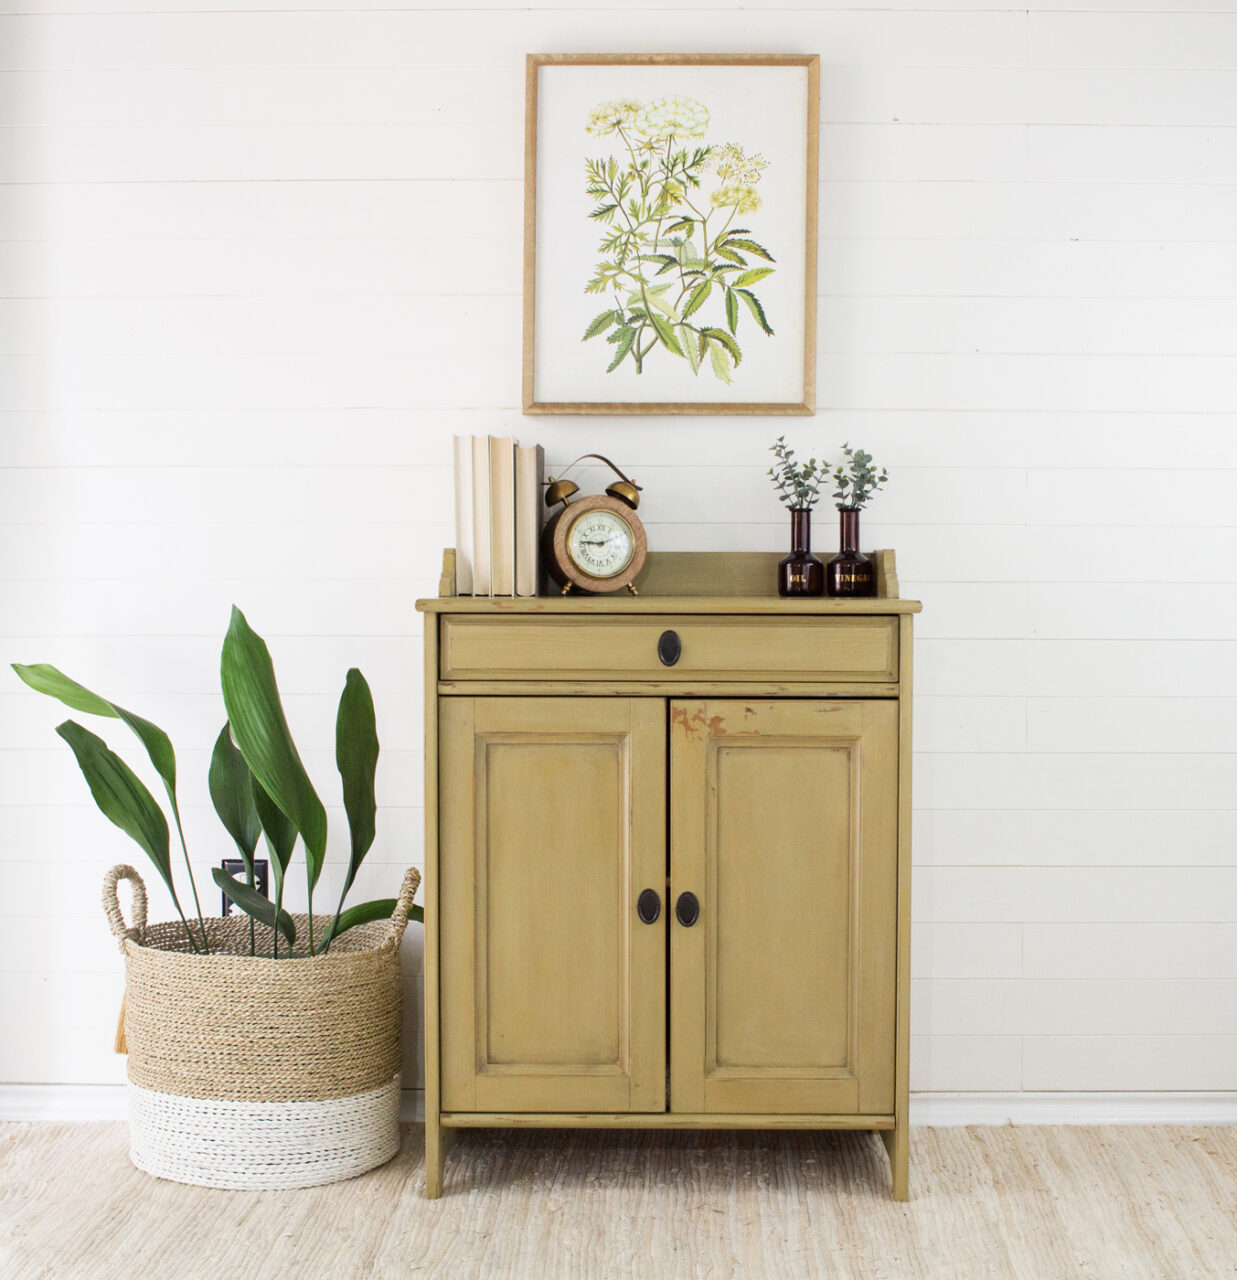
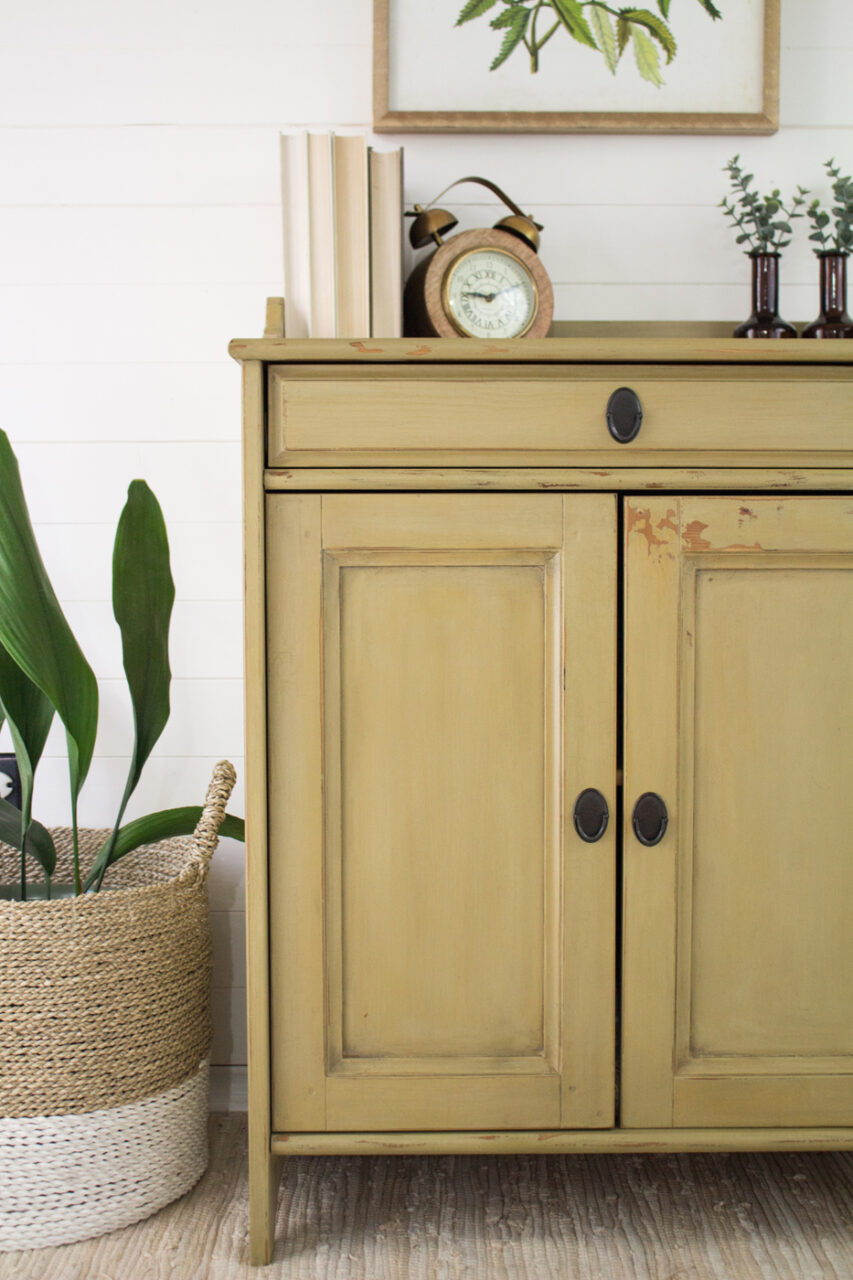
To achieve an authentic aged look for your refinished hutch, we used Furniture Wax, "Antiquing". This special wax is designed to give your furniture a beautiful antique patina. After applying your Homestead House Milk Paint in "Antique Gold" and distressing, use a clean cloth or wax brush to apply a thin layer of the "Ageing" wax to the hutch's surface. Pay extra attention to the corners, edges, and areas that naturally accumulate wear over time. The wax will subtly darken and deepen the paint colour while creating an aged, time-worn appearance. Once applied, gently buff the waxed surface to a soft sheen with another clean cloth. The result is a hutch that not only looks beautifully aged but also feels wonderfully smooth to the touch, adding to the overall vintage charm of your piece.
Accessorize To Completely Revamp Your Hutch
Once the paint is completely dry, reattach the knobs or handles that you removed earlier. Make sure they are securely fastened. Now that your hutch is beautifully refinished in Homestead House Milk Paint's "Antique Gold," it's time to add the finishing touches and make it a stunning focal point in your home.
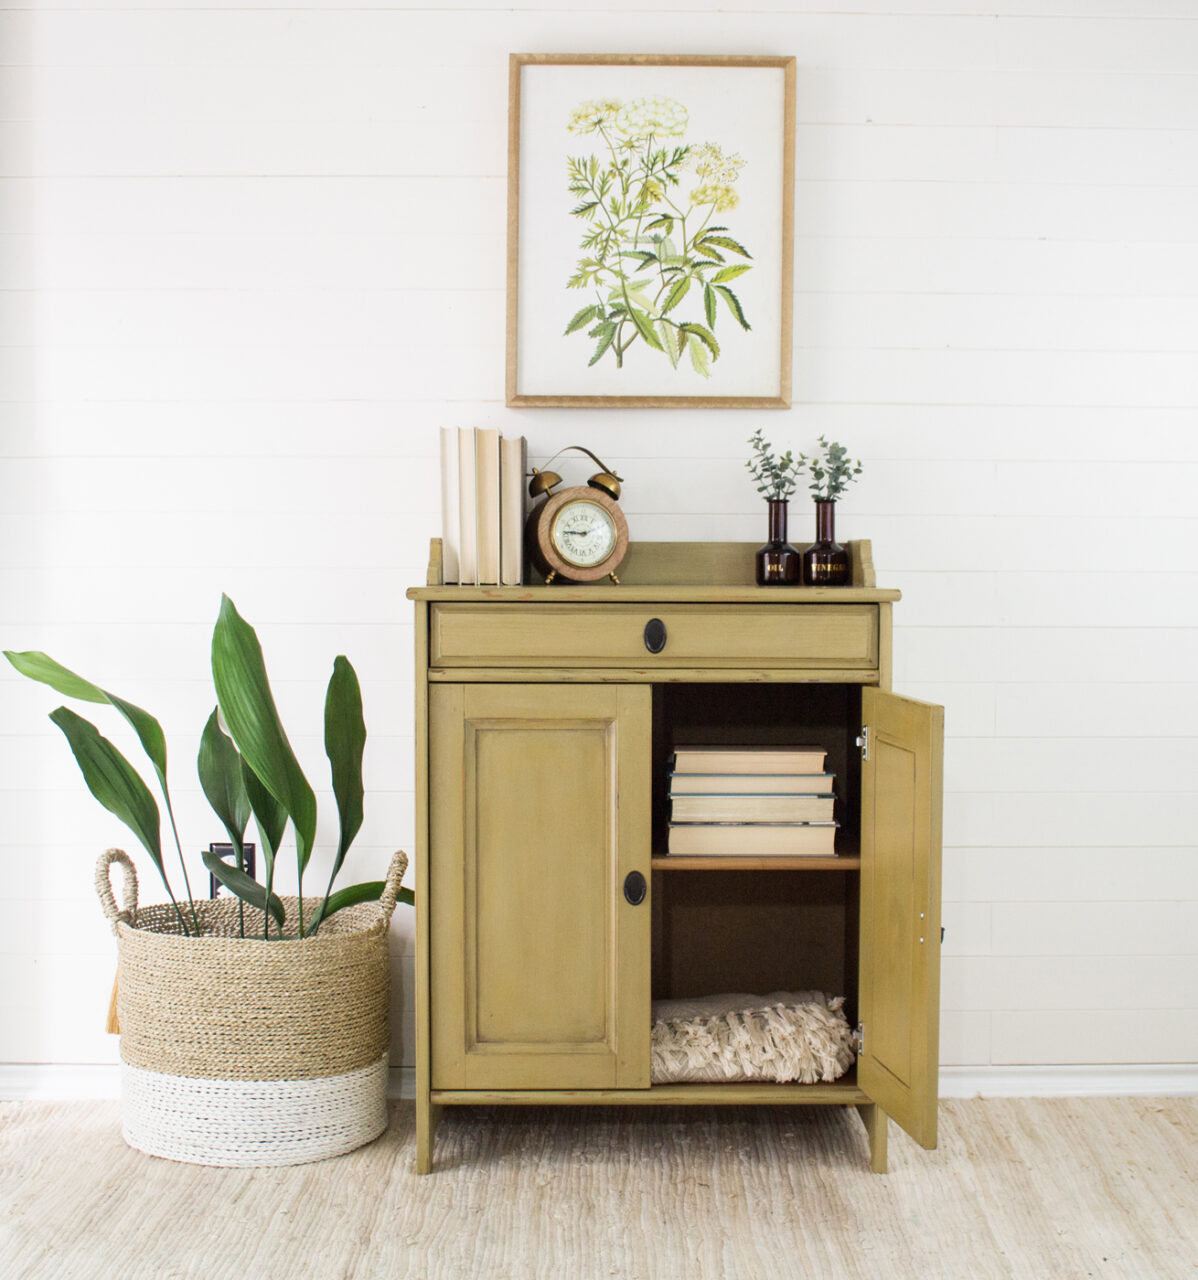
- Large Plant in a Wicker Basket: Place a tall, leafy indoor plant in a wicker basket and position it beside the hutch. This natural element adds vibrancy and freshness to your display.
- Books: Stack a few vintage books with attractive covers on another shelf. Books not only add visual interest but also provide an opportunity to introduce colour and texture.
- Vintage Clock: Place a vintage-style clock on the hutch to evoke a sense of nostalgia and practicality.
- Plant Painting: Hang a painting or print of plants or botanicals on the wall behind the hutch to tie in with the greenery and create a cohesive look.
- Faux Plants* Fill in any gaps or corners with high-quality faux plants or succulents. They bring in the beauty of nature without the need for constant maintenance.
By following these steps and accessorizing your refinished hutch with these carefully chosen items, you can create a stunning and functional piece of furniture that adds character and style to your home. Enjoy the transformation and the beauty of your newly revamped hutch!