
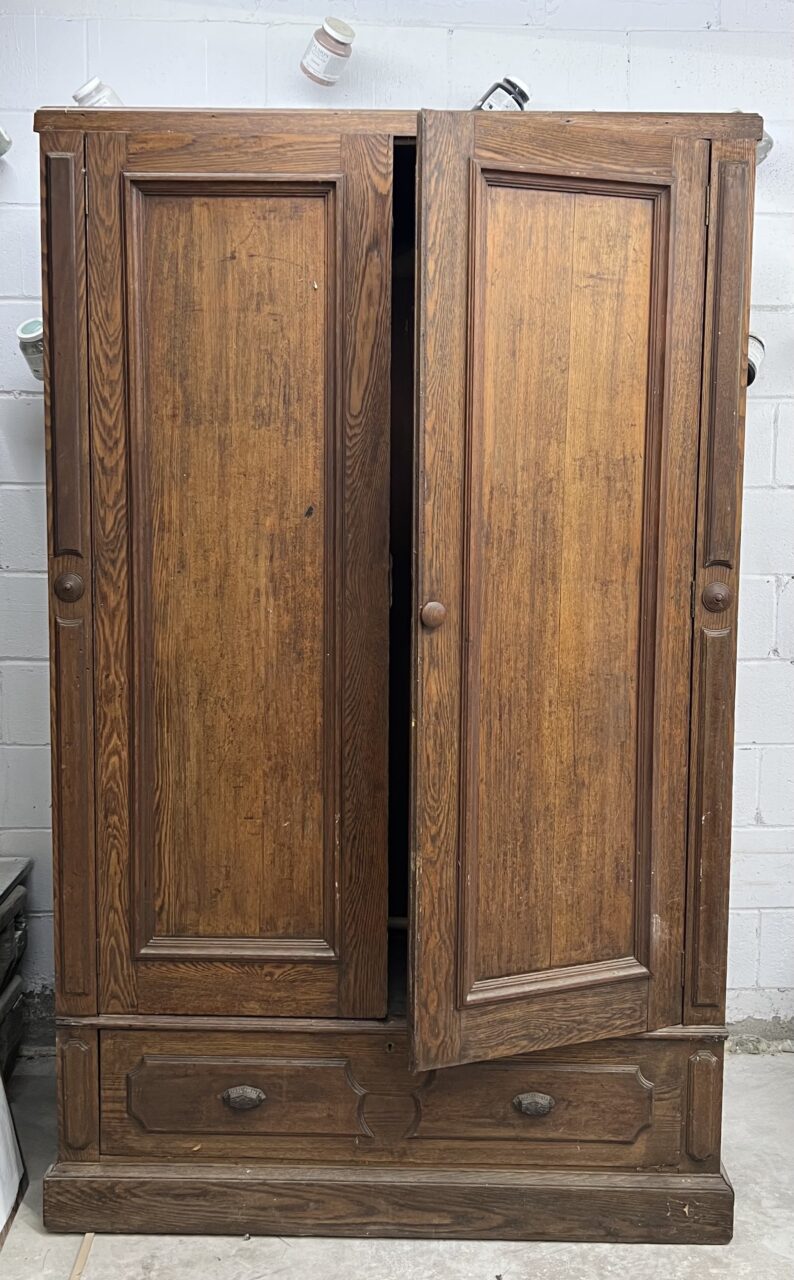
Reviving a Vintage Armoire. Milk paint is a popular choice for furniture restoration projects, especially when you want a vintage, distressed look. In this article, we will go over the process of reviving an old armoire using milk paint in the colour Stone Fence & London Fog.
Preparing the Surface
The first step is to clean the surface thoroughly. This particular armoire was sitting in a garage for a few years and was previously in a smoker's home. So, it required a double cleaning with TSP Alternative and a scrubby, followed by a rinse to remove all the grime. Our TSP Alternative is a non-toxic, bio-degradable non-rinse formula. Just add a couple of capfuls to a container of water and you have a powerful degreaser.

Testing the Milk Paint
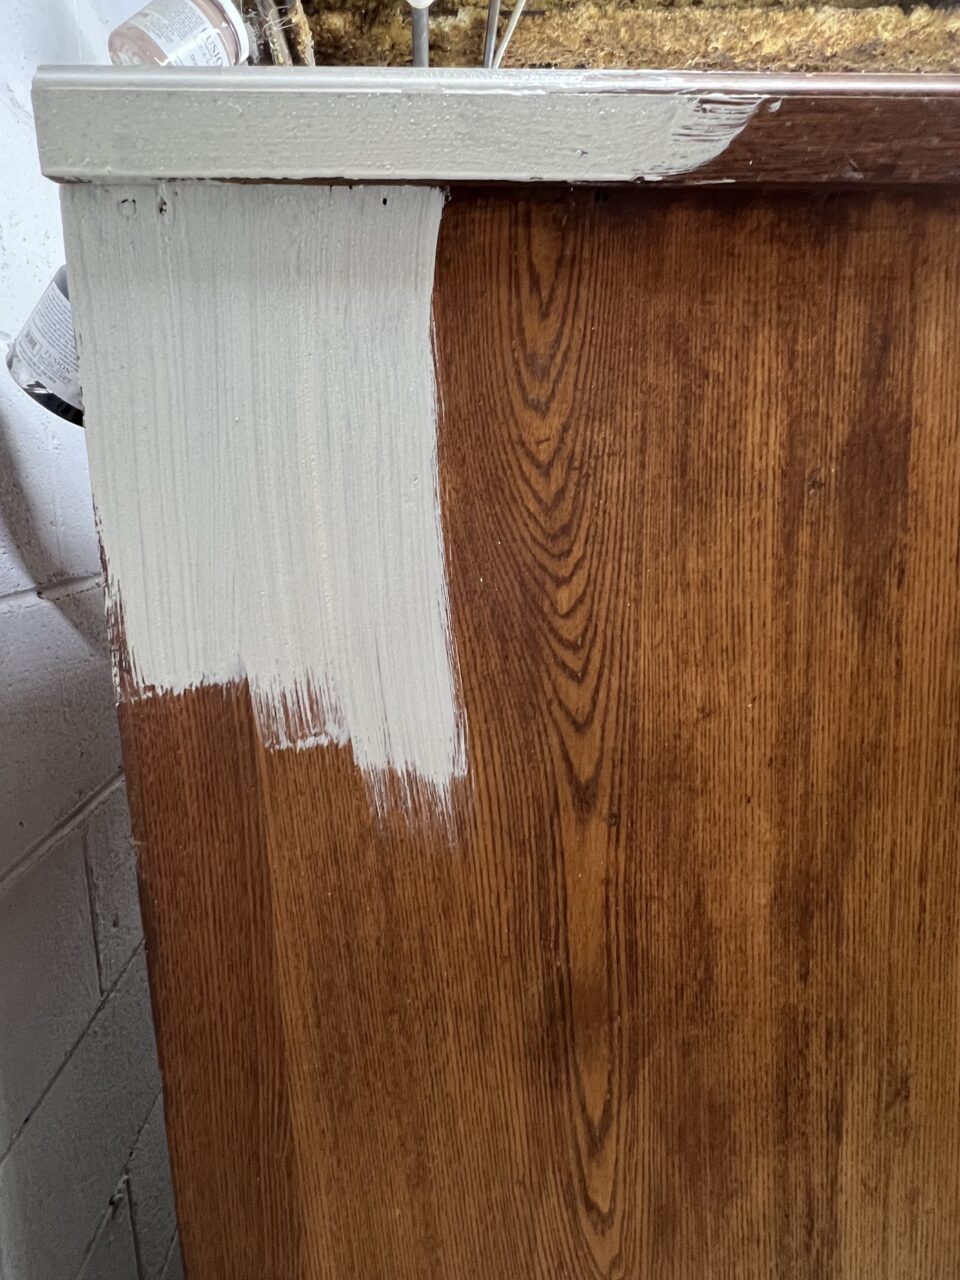
Once the wood surface was dry, a test of the Milk Paint was done in two areas to ensure that it adhered well. The test patches were done at the very bottom and top of the armoire. The Milk Paint adhered beautifully.

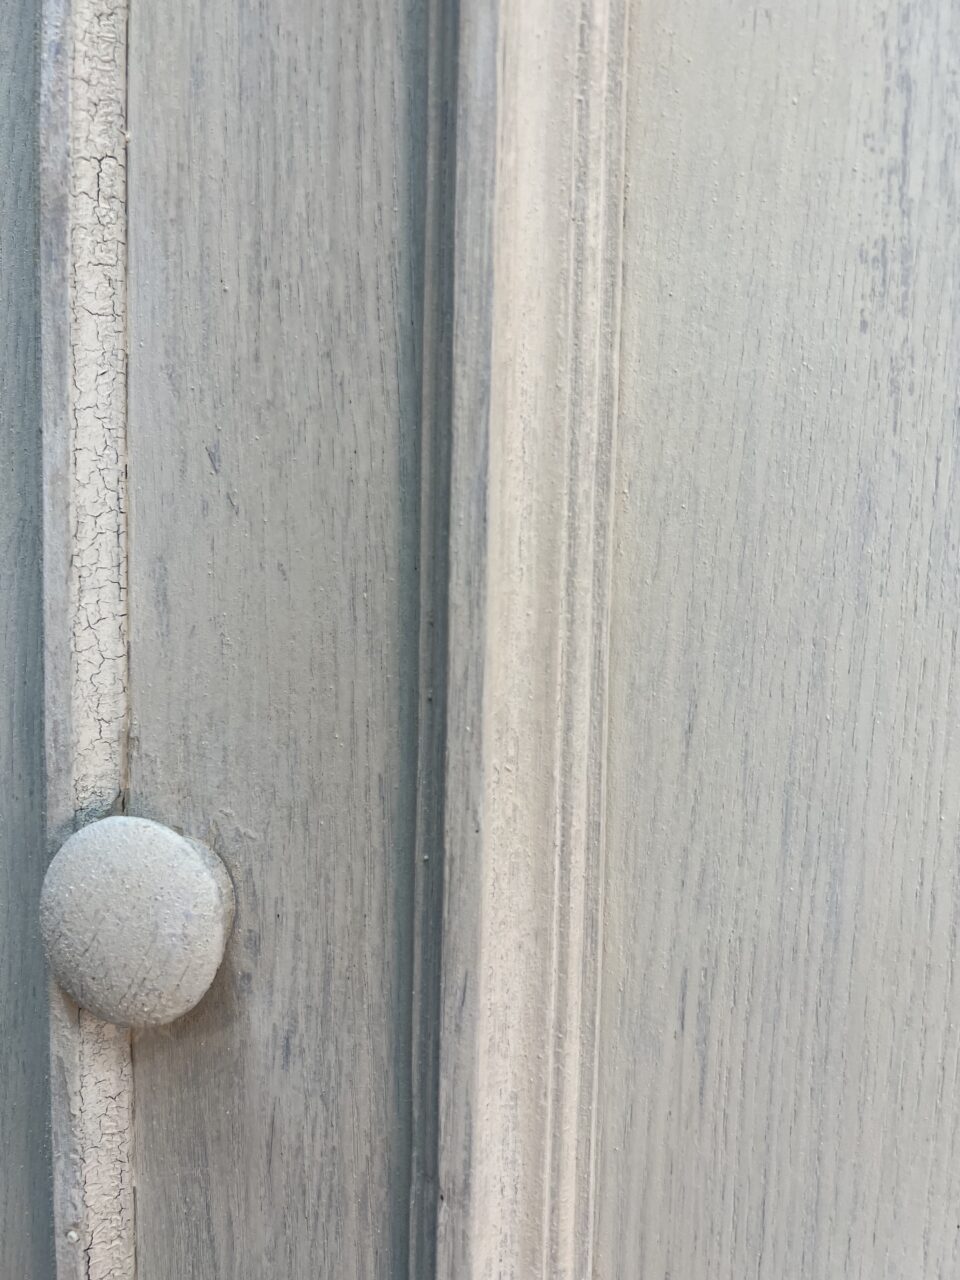
So, to distress the piece without using too much elbow grease, a resist was applied using Fusion's Beeswax Distressing Block. This was done around the handle and any edges or areas of the furniture that would have naturally worn. This adds to the vintage-aged look we were going for.
Application of Milk Paint
The Milk Paint was mixed using a whisk, You can use a stir stick or even a fork! Every time the brush was reloaded, it was put to the bottom of the container to agitate slightly and inhibit the heavy ingredients of the milk paint from settling. When using Milk Paint, the heavier ingredients can settle at the bottom of your container. Agitating it when you reload your brush ensures you get an even colour over your entire project.
Tips for Applying Milk Paint
On a completely raw piece of wood, you will go through more paint because the wood is like a sponge. However, in this case, much of the original finish was still left on the armoire, which inhibited the wood from absorbing the paint. In this example, milk paint did adhere to the finish as proven in the sample test spots. If the sample areas did not adhere, clear Ultra Grip ( Bonding Agent ) would have been applied over the whole unit first before milk paint.
Find out more about how to use Ultra Grip / Bonding Agent with Milk Paint.
Milk Paint Effects
If you wanted to have cracks, use a hairdryer at the time of application to force it to dry faster than it should. Larger cracks can be obtained by mixing the milk paint slightly thicker and then blasting it with a hairdryer.
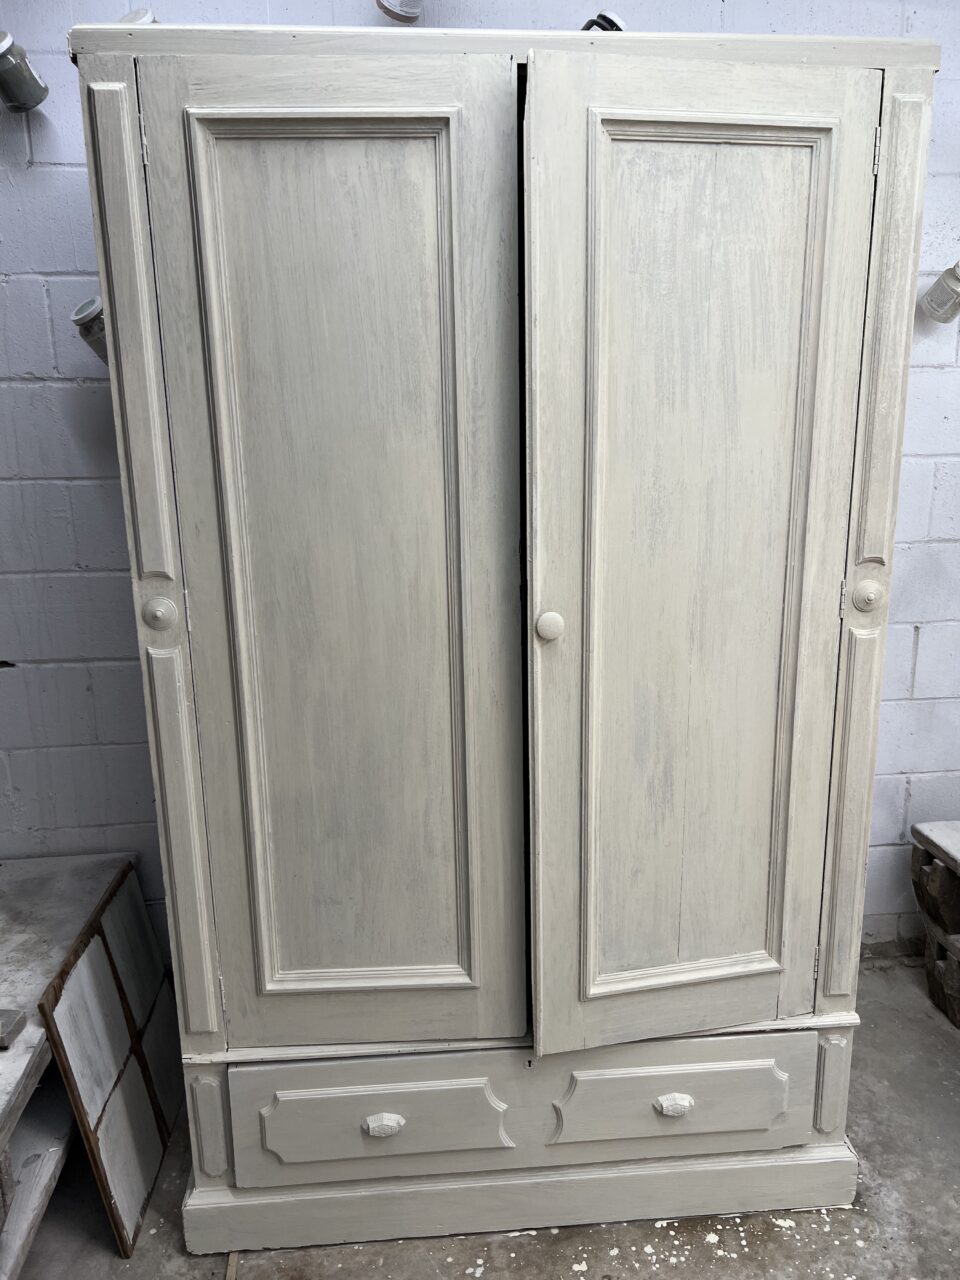
For this vintage armoire, Stone Fence was applied using a 2-inch bristle. We then applied a wash of London Fog which was applied using a Staalmeester wall brush. A vertical application of new paint when it is a bit thinner can be challenging as you will constantly get drips. But, the long open time of milk paint makes it easy to work the drips into the finish.
Hemp Oil Wood Finish
Using Hemp Oil wood finish as the final topcoat over your milk-painted piece can be a great option for those looking for a hard-wearing, durable, and water-resistant finish. Hemp oil is a natural drying oil specially processed for wood finishing. When applied over milk paint, it binds with the paint to create a protective layer that is both durable and long-lasting. Hemp oil also adds a natural sheen to the finish, enhancing the beauty of the painted piece. It is a versatile option that can be used on a variety of surfaces, including furniture, cabinetry, and flooring. Overall, hemp oil is a topcoat option that we highly recommend for those seeking a natural and long-lasting finish for their milk-painted piece.
Reviving a Vintage Armoire with Milk Paint
We love how this piece turned out! It now looks fresh with a bit of vintage charm. Milk paint is a versatile paint that can transform old furniture into beautiful, vintage pieces. With some preparation and application tips, you can create a distressed, unique finish on any piece of furniture.

Happy milk painting!