
Rustic furniture possesses a timeless charm that many homeowners find appealing. But what if you want to infuse new life into that beloved rustic dresser that's seen better days? One solution that can bring a fresh and vibrant look to your furniture is Homestead House Milk Paint in Liberty Blue. In this blog post, we'll take you through the process of transforming a rustic dresser to give it an updated look.
Why Homestead House Milk Paint?
Homestead House Milk Paint is a popular choice for furniture restoration because it's eco-friendly, easy to use, and provides an authentic vintage look. Made from all-natural ingredients, this paint creates a beautiful, time-worn finish that's perfect for rustic furniture like a dresser.
Materials You'll Need for Transforming a Rustic Dresser
Before you get started, make sure you have the following materials on hand:
- Rustic dresser in need of a makeover
- Homestead House Milk Paint in Liberty Blue
- TSP Alternative
- Your Favourite Staalmeester Brush
- Sandpaper (various grits)
- Clean cloth
- Drop cloth or newspaper to protect your workspace
- Furniture Wax
Step 1: Prepare Your Dresser
Start by removing any hardware, such as knobs or handles, from your dresser. Lay down a drop cloth or newspaper to protect your workspace from any paint splatter. Clean the dresser thoroughly using TSP Alternative to remove any dust, dirt, or grease that may prevent the paint from adhering properly.
Step 2: Mixing the Paint
Homestead House Milk Paint comes in powder form and needs to be mixed with water. Simply mix the powder with a 1:1 ratio with water and stir until all the pigments are dissolved.
Step 3: Applying the Paint
Using your favourite Staalmeester paintbrush, apply the first coat of Liberty Blue Milk Paint to your dresser. Don't worry if it looks a bit thin; milk paint dries quickly! Let your paint dry for approximately 20 minutes, and then apply 1-2 more coats until you've reached your desired coverage.
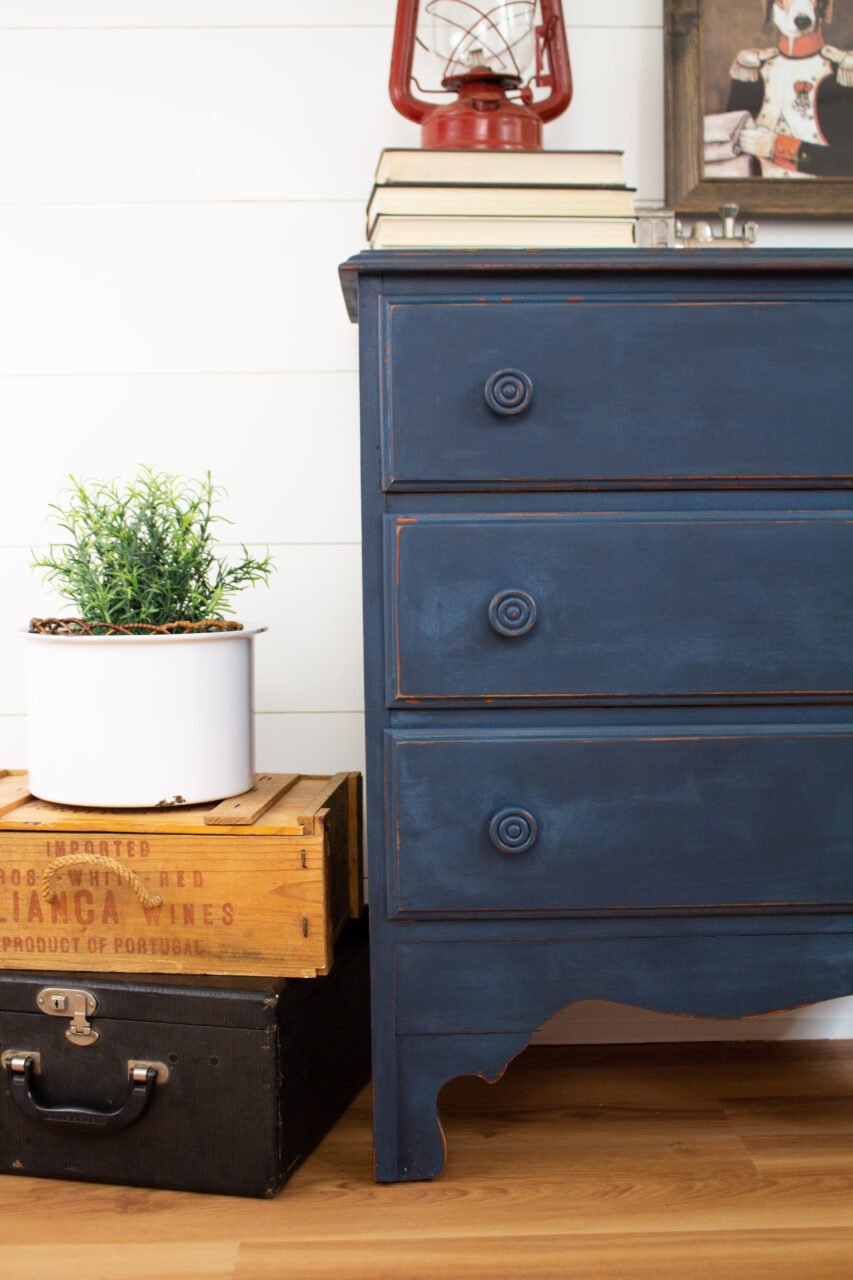
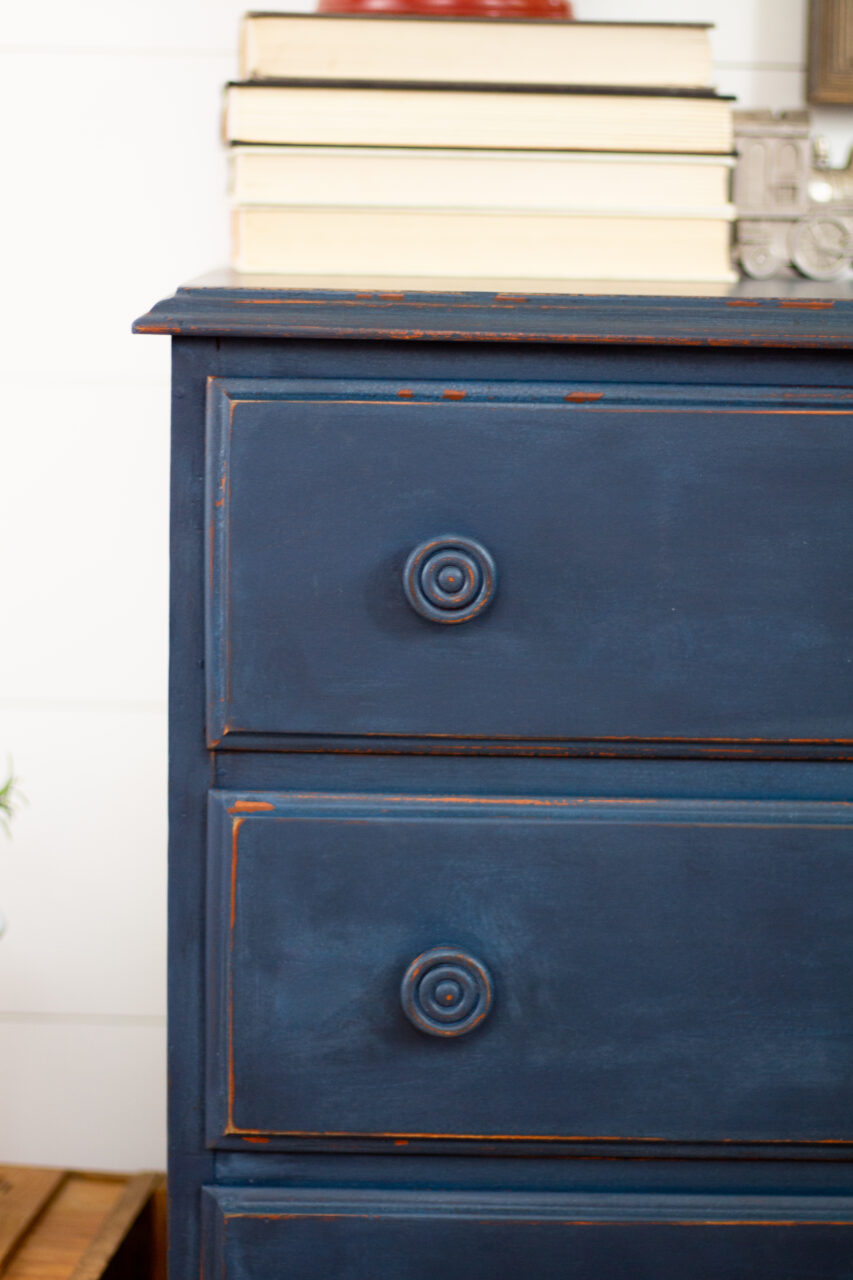
Step 4: Sanding for Distressing
Once your final coat is dry, use sandpaper to distress the dresser in areas where wear and tear would naturally occur. Focus on edges, corners, and any areas that would naturally get scuffed over time. This step helps to achieve that rustic, weathered look that's so appealing.
Step 5: Top Coat
We always suggest applying a topcoat such as Furniture Wax to Milk Paint projects. This helps bring out the true depths of the colour and protects your piece for years to come!
Step 6: Reattach Hardware & Stage Your Piece

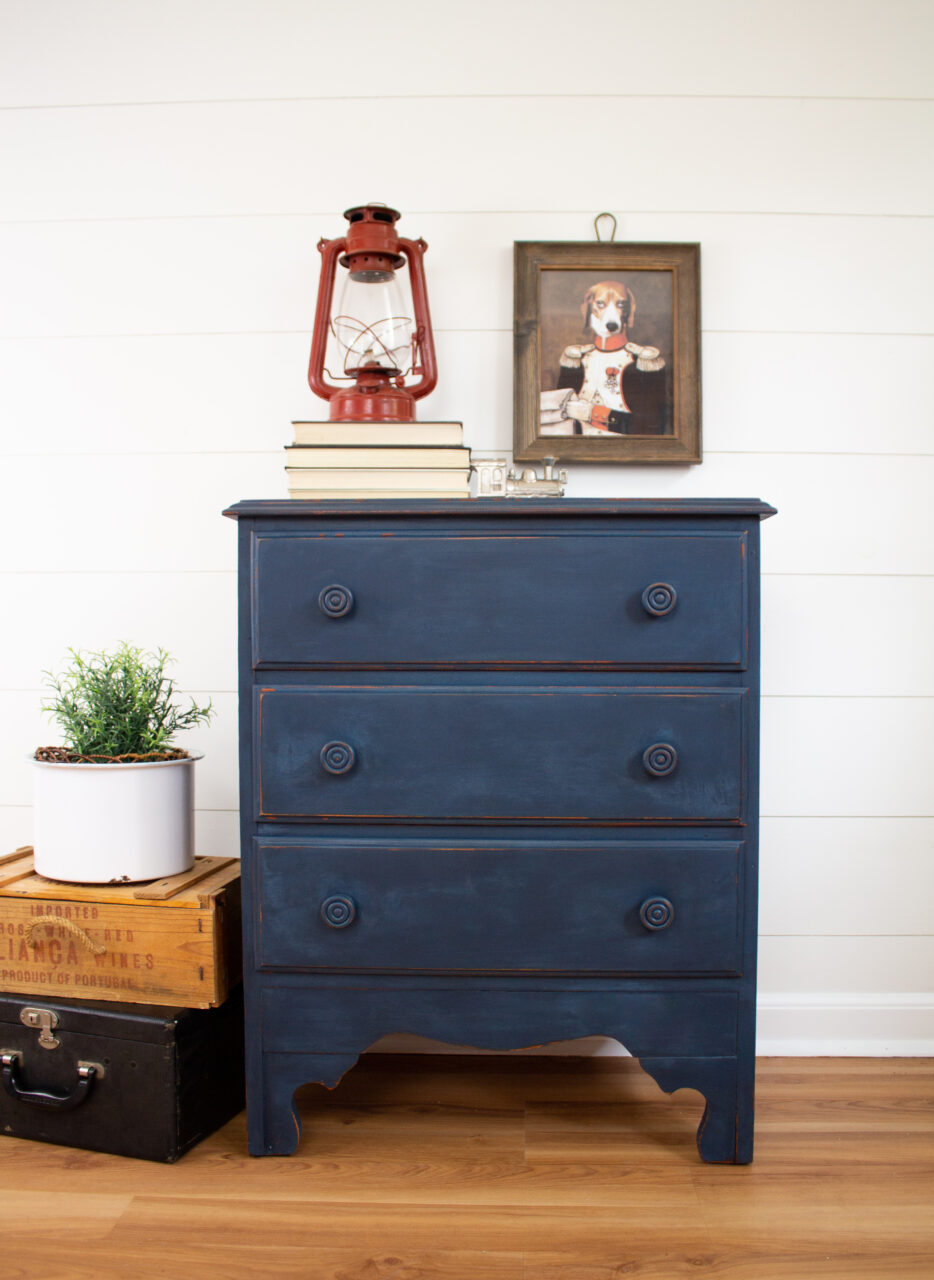
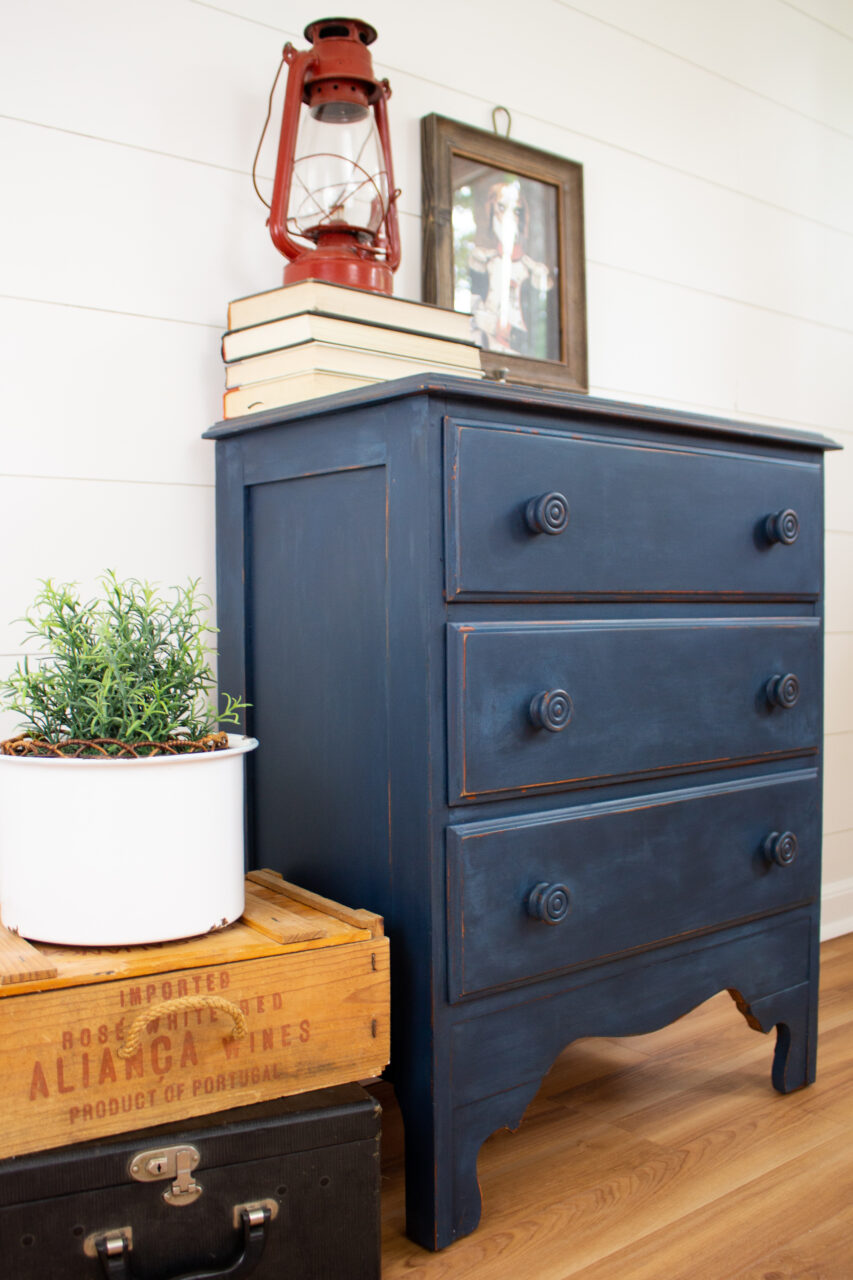
Incorporating decor into your freshly painted Liberty Blue dresser is the final touch that will elevate its rustic charm. By adding a red oil lamp, a stack of books, a comical painting, and a lush plant, you can infuse personality and character into your space.

The red oil lamp brings a warm, vintage ambiance, while the stack of books adds an intellectual touch. The comical painting provides a sense of whimsy and personality, and the vibrant, green plant breathes life into the setting. Together, these elements create a harmonious blend of rustic elegance and individuality, making your Liberty Blue dresser a true centrepiece in your home.