
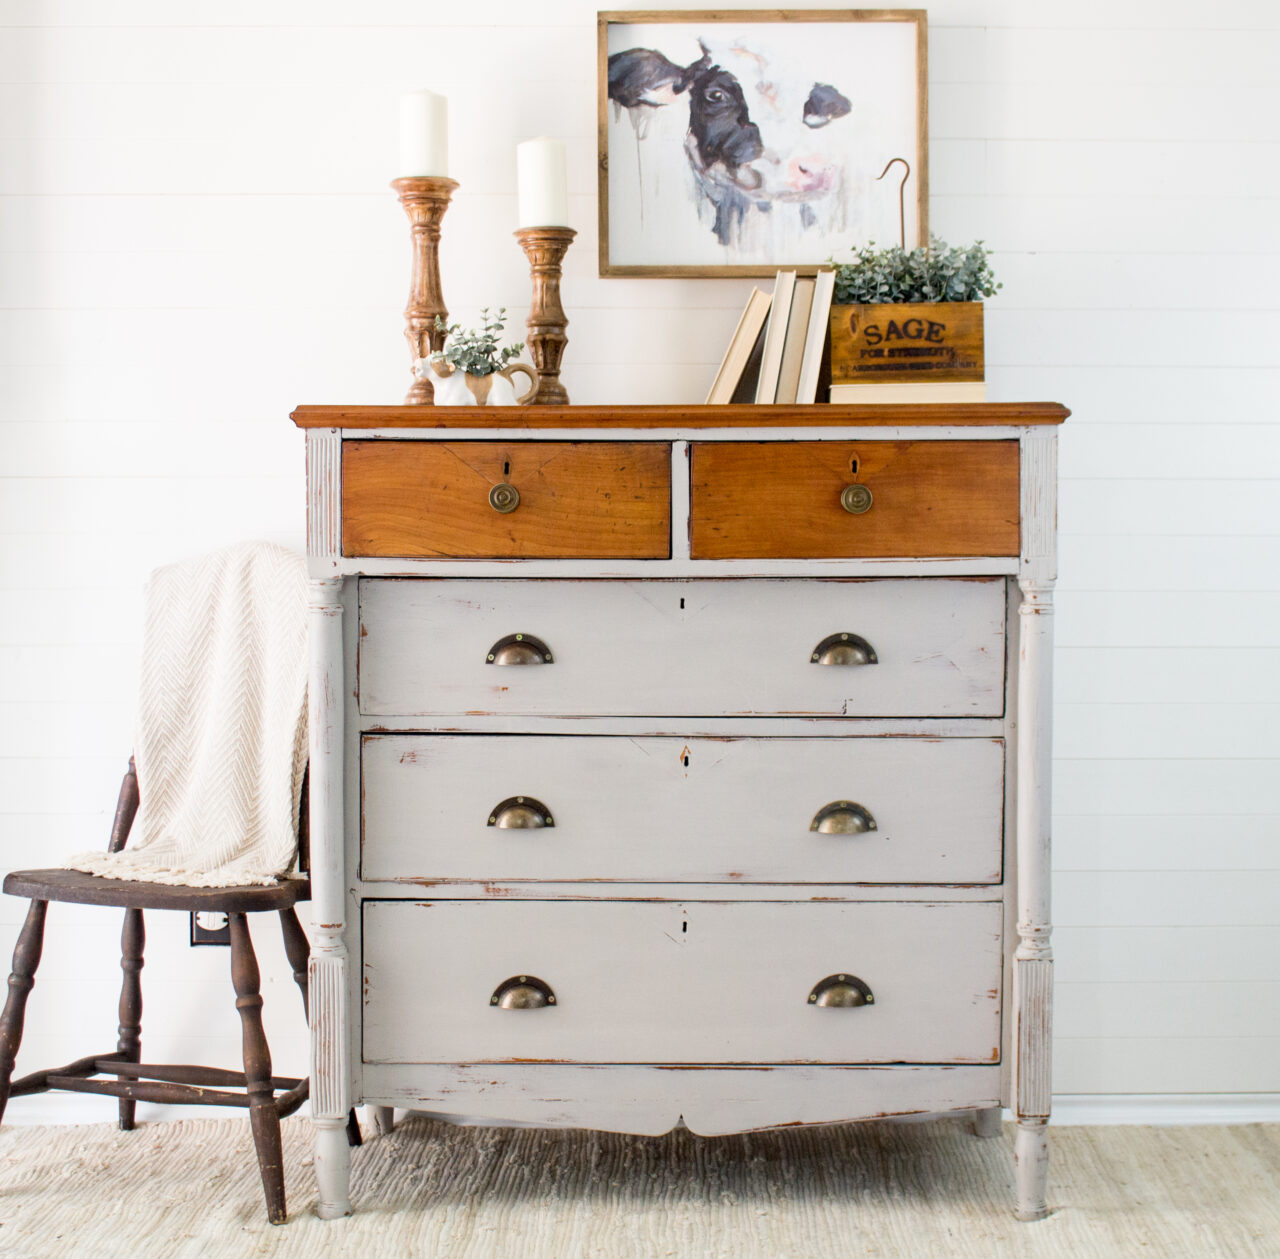
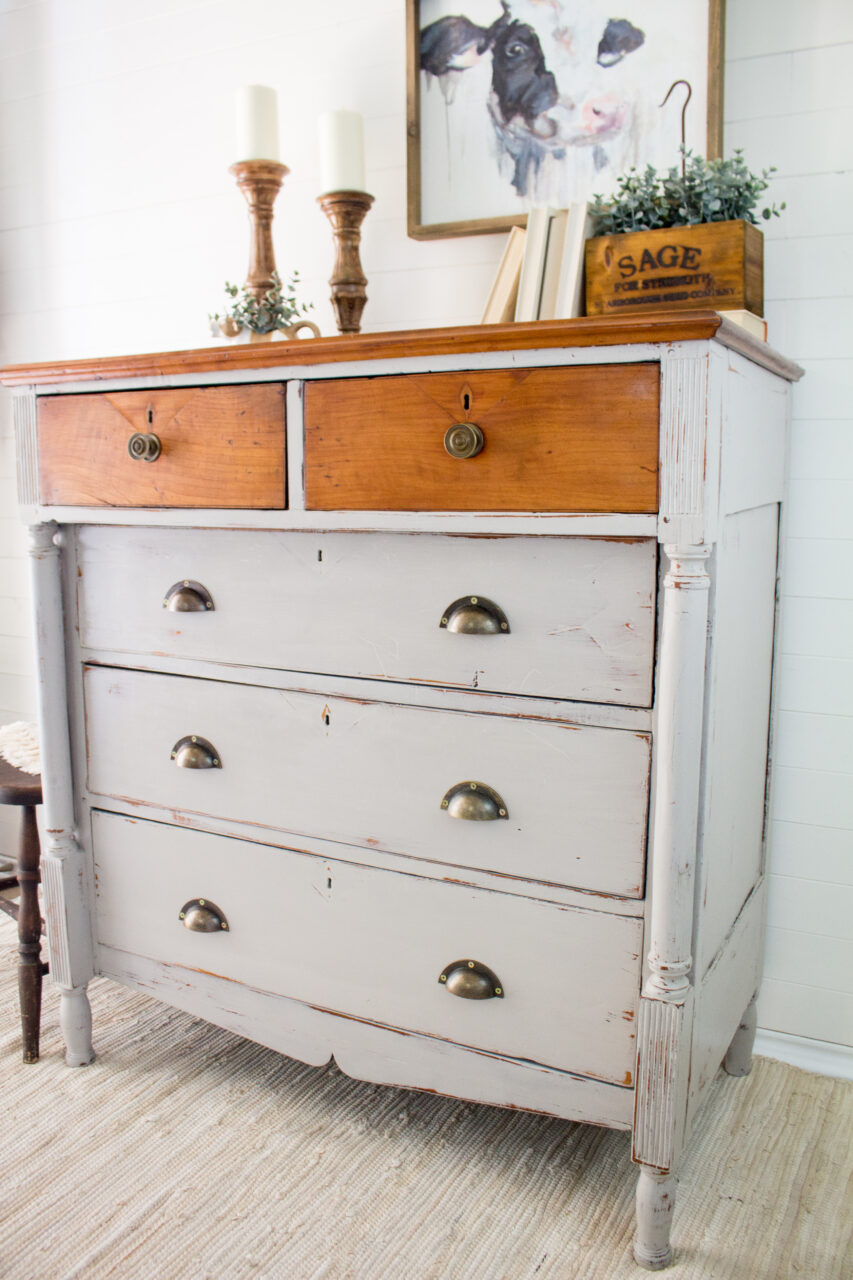
Refinishing furniture is a rewarding DIY project that not only breathes new life into old pieces but also allows you to put your creativity to work. In this blog post, we'll take you through the exciting journey of transforming a tired dresser into a stunning statement piece using Homestead House Milk Paint in the elegant shade "Cathedral Taupe." The final result? A beautifully restored dresser with a natural wood finish on the top and the top two drawers, enriched and protected with the rich touch of hemp oil. Let's get started on this creative adventure!
Gathering Your Supplies
Before diving into the project, make sure you have all the necessary supplies on hand:
- Dresser in need of refinishing
- Homestead House Milk Paint in "Cathedral Taupe"
- Staalmeester Paint Brush
- TSP Alternative
- Sandpaper (various grits)
- Tack cloth
- Hemp oil
- Painter's tape
- Drop cloths
- Screwdriver (if hardware removal is required)
Step 1: Preparation for A Stunning Statement Piece
Begin by removing any hardware such as drawer pulls and knobs. Lay down drop cloths to protect your work area. Sand the entire dresser's surface, starting with a coarse grit sandpaper and gradually progressing to finer grits. This step will help the milk paint adhere better and ensure a smooth finish. After sanding, wipe the dresser clean with TSP Alternative to remove any dust particles.
Step 2: Mixing and Applying Milk Paint
Homestead House Milk Paint is known for its natural, authentic appearance. To use it, mix the milk paint powder with a 1:1 ratio of water. Once mixed, start applying the milk paint to the dresser using your favourite Staalmeester paintbrush. Don't be afraid to apply it unevenly or with texture; this paint thrives on its charming imperfections. Allow the first coat to dry completely, and then apply a second coat. If you desire a more opaque finish, apply a third coat, ensuring each layer dries thoroughly (approximately 30 minutes).
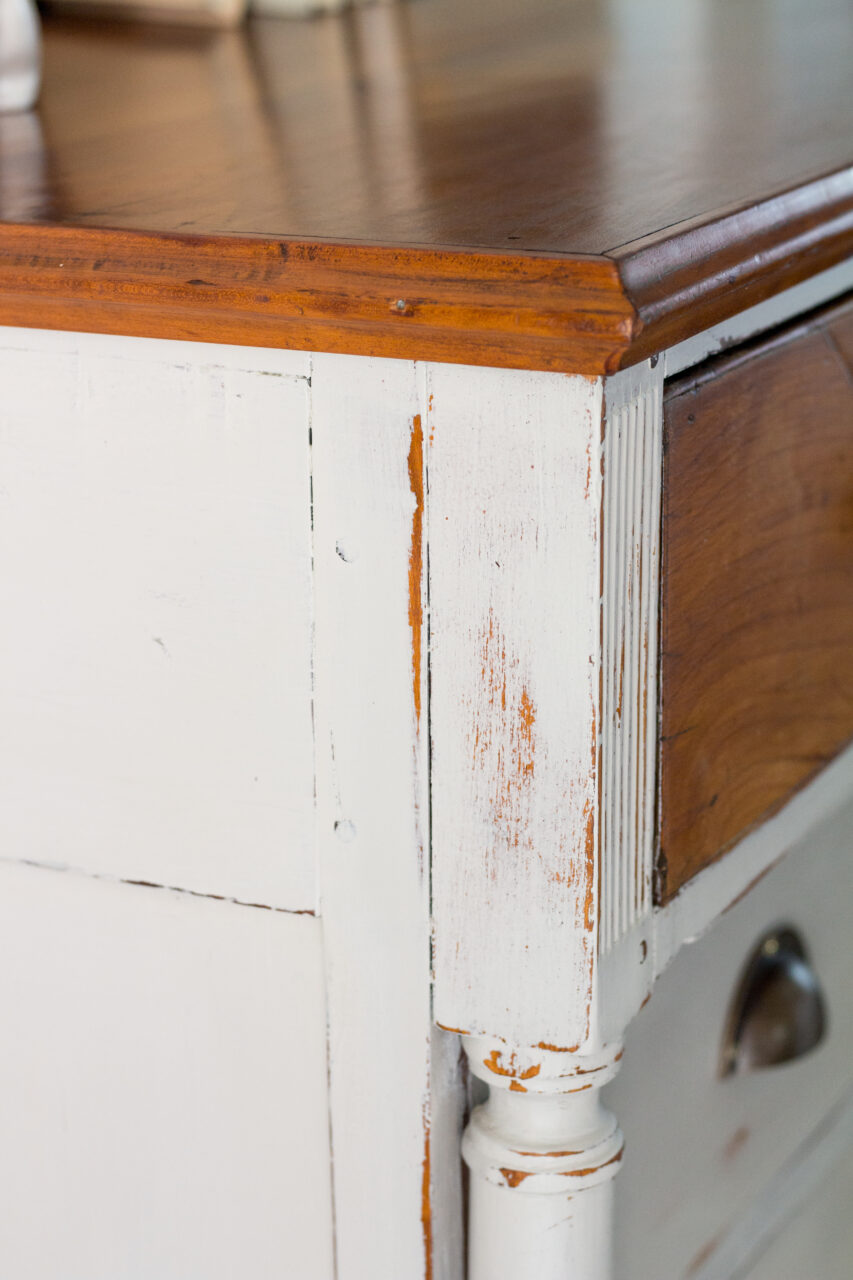
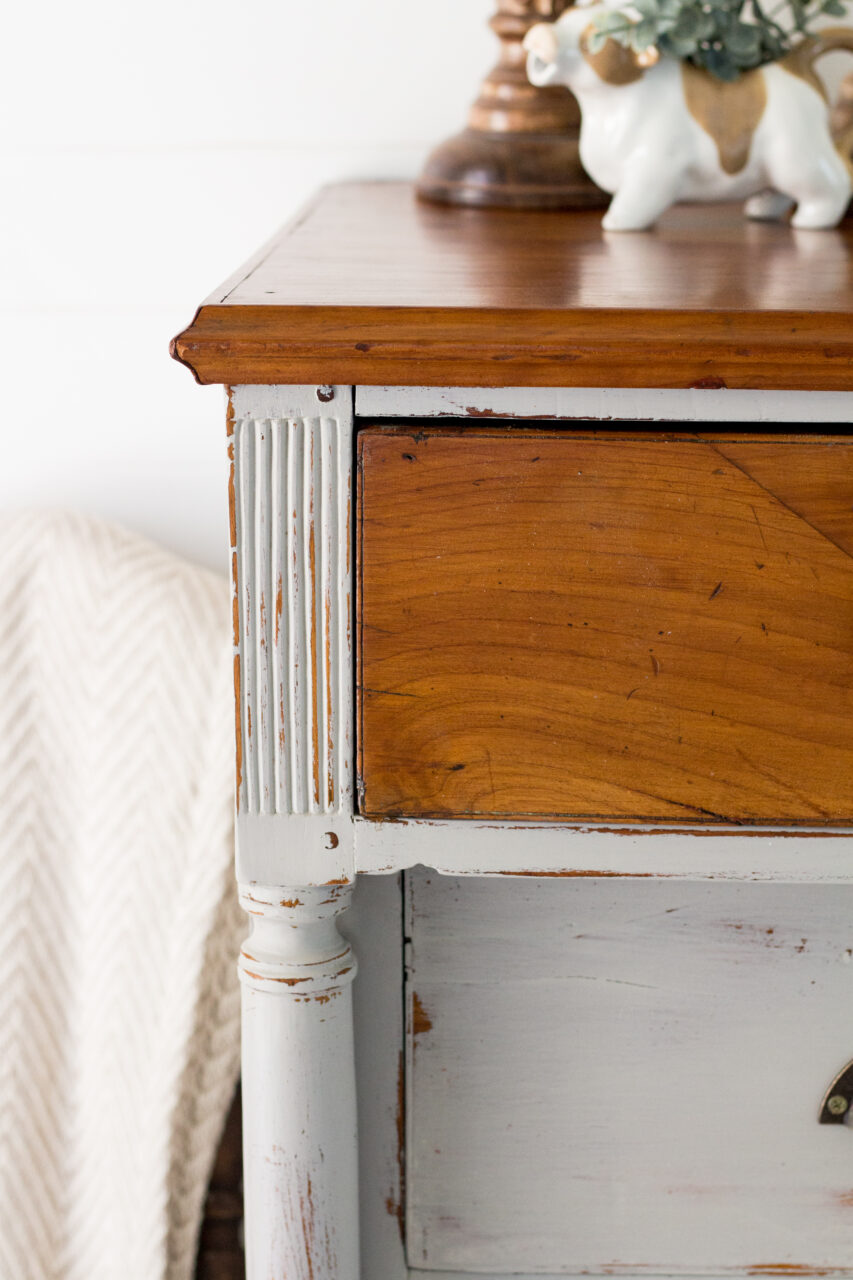
Step 3: Distressing
To achieve a vintage, distressed look, gently sand the edges and corners of the dresser after the paint has dried. This step adds character and reveals some of the wood underneath, giving your piece that sought-after shabby chic appearance.

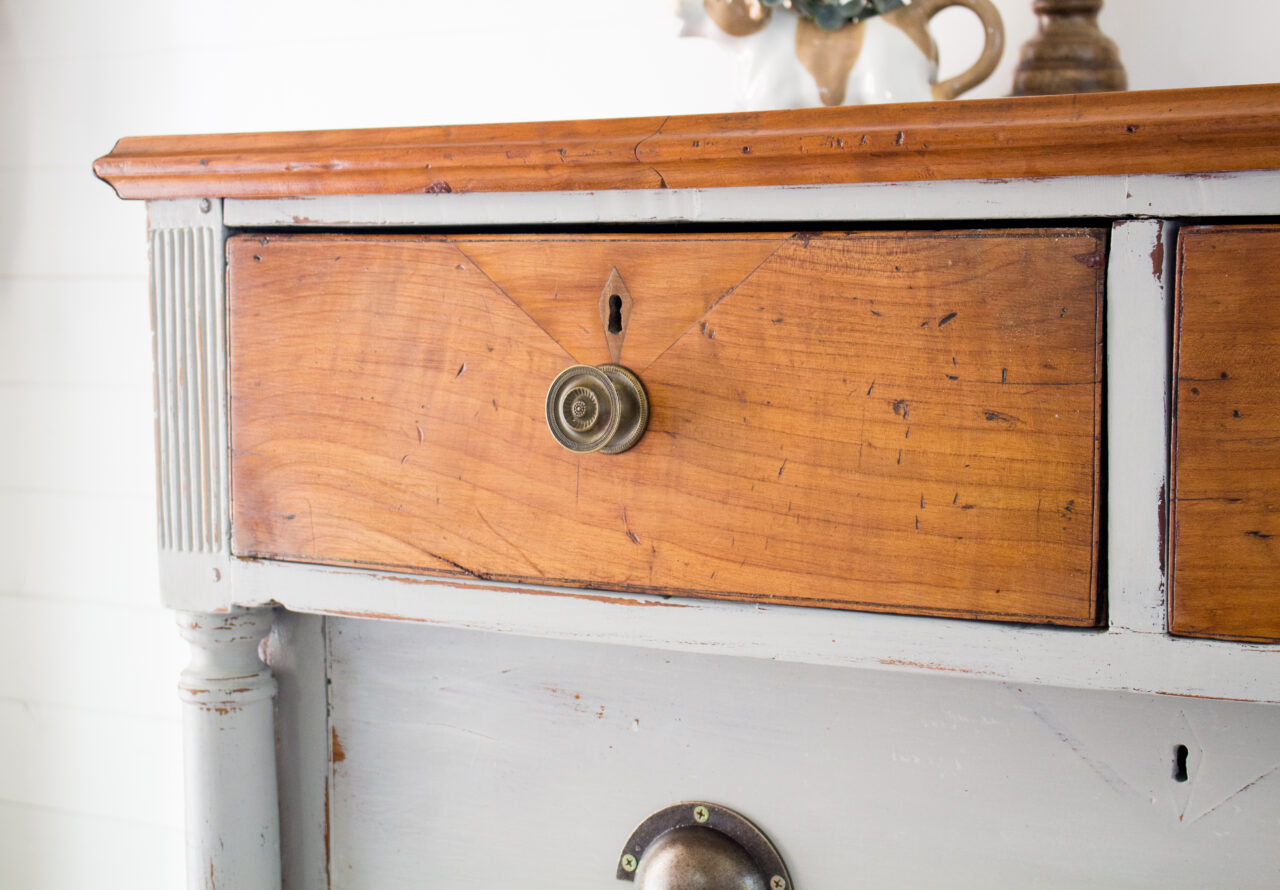
Step 4: Applying Hemp Oil
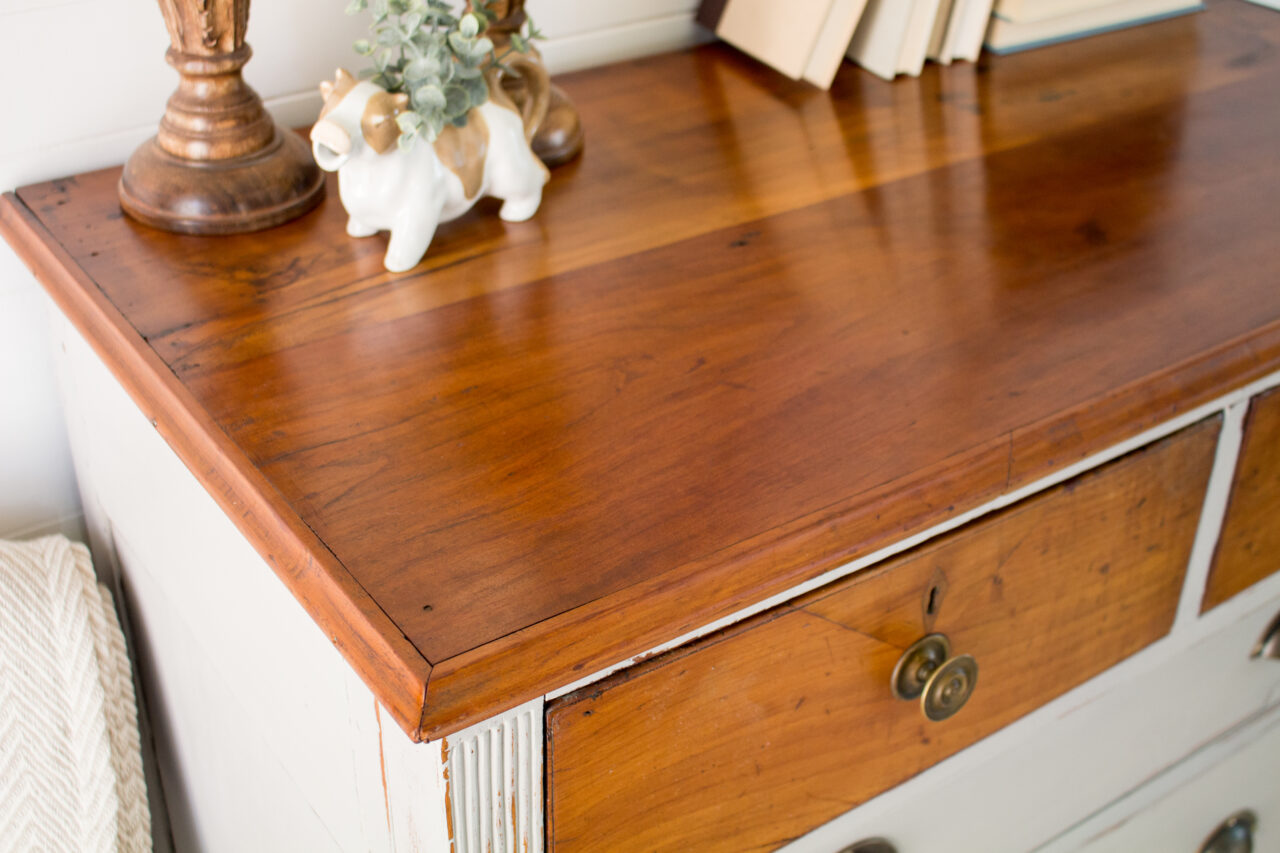
For a warm, natural wood finish on the top and top two drawers, we chose Hemp Oil. This eco-friendly and non-toxic finish enhances the wood's grain while providing protection. Simply apply a generous coat of hemp oil to these areas, allowing it to soak in for a few minutes. Then, wipe off any excess oil with a clean cloth. Repeat this process until you achieve the desired depth of colour and protection.
Step 5: Reassembling and Final Touches for A Stunning Statement Piece
After allowing all painted and oiled surfaces to dry thoroughly, reattach the hardware to the dresser. Take a step back and admire your handiwork – you've successfully transformed an old, worn-out dresser into a stunning focal point for any room.
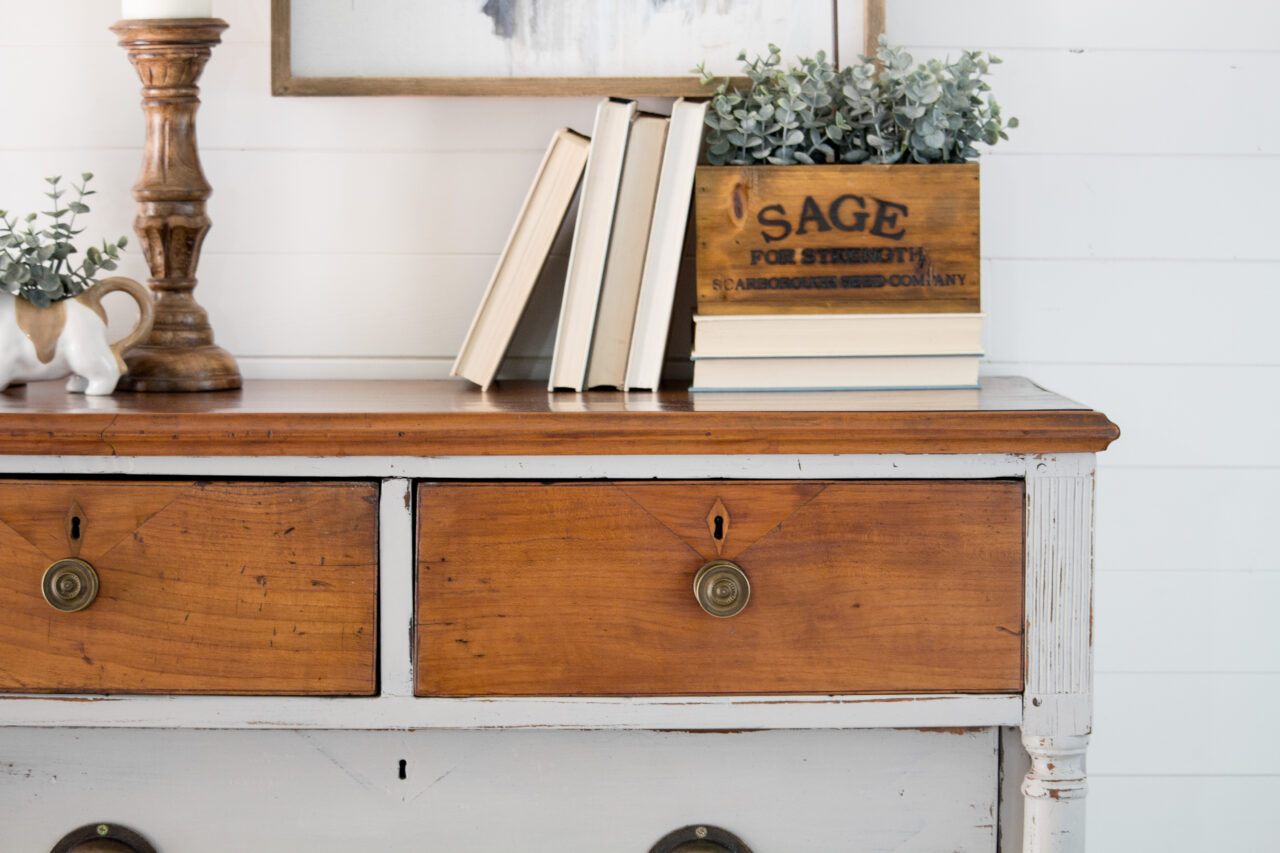
To complete the transformation of your refinished dresser, don't forget the delightful finishing touches. Adorn the top surface with a carefully curated collection of decor items. Place large, unscented candles in elegant holders to create a warm and inviting ambiance. Stack a few well-chosen books with beautiful covers to add height and visual interest. To bring a touch of nature indoors, consider placing a faux sage herb box on one corner of the dresser. This combination of elements, from the flickering candlelight to the photograph and the organic feel of the faux sage herb box, will not only complement your refinished dresser but also elevate the entire room's aesthetic, creating a space that's both stylish and deeply personal.